Showing posts with label stained glass. Show all posts

Wednesday, 30 March 2022

Stained Glass panel planning

 Last week I was stuck at home with the dreaded COVID.... and I got SO BORED!


I had caught up on all my blogs, and note taking from Uni, I had drawn a few Sacred Geometric designs and done quite a bit of crochet.   What to do next?


I thought I might design a stained glass panel to make - in the theme of my kaleidoscope ideas.


I didn't have paper large enough to do the whole thing, so I drew half and hopefully I can just use the same half again to be able to create the pattern... that's if I have my measurements correct!


I used a protractor and ruler to make sure each piece was the same.


Then I decided to colour it in.... things are always better in colour, aren't they?


I added a key to show what effects I wanted to include and where.  I want to add some sandblasting, painting and maybe some stain.... with a mandala type piece in the centre.

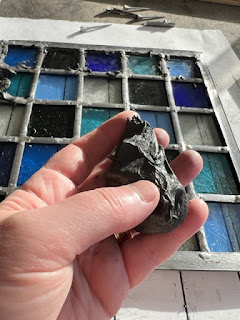
So, now all I need to do is find some glass and make the thing!

Watch this space....

Monday, 14 February 2022

Stained Glass Panel

My first attempt as proper leaded stained glass – I have done numerous amounts of copper foiled stained glass, and I have edged some of those pieces in lead to make them sturdier, but I have never made a fully leaded piece – until now.


First I drew a ‘cartoon’ (a design on paper) and cut 25 squares of glass exactly the right size as the cartoon.


It’s really important to get the squares exactly right so that the lead runs straight along the lines.

The next step was to cut the lead to match.  The vertical strips ran in one piece, while the horizontal strips were cut to be slightly smaller than the glass squares.


Once all the pieces of lead were cut, I then ‘blocked’ it by hammering some nails in behind piece of wood to keep everything in place.


The next step was to cement it.  I made a putty out of lead cement and whiting and pushed it inbetween the glass and the lead with my thumb.

I then coated the whole lot in a layer of whiting and brushed it all off.


The final job was to give it a polish with black polish, and it was done!


Friday, 4 February 2022

Sandblasting little squares

A lesson in using the sandblaster today.

First of all I cut 12 small squares of glass, then piecing them back together I stuck some sticky backed vinyl all over them. 

I then drew a basic flower image that I had found on the internet.

Next, I cut the lines out of the flowers with a sharp craft knife. The parts I cut away were the parts that I wanted blasted by sand.

The sticky backed vinyl wasn’t quite sticky enough, so I started again with strips of masking tape which was a bit stronger.


Once I had given them a good blast in the sandblaster, I removed them from the tape, cleaned them off and started to wrap each square in copper foil.

I then fluxed the copper foil and soldered it all back together again.

Not the neatest work I have done, but I think it looks ok, and shows off the sandblasting nicely.


Tuesday, 13 July 2010

Stained Glass at School.

I was asked to go into my daughter Shona's 6th Form Art Class at school to let the students learn how to make some Stained Glass panels.


It was quite bizarre going back to the school that I left 26 years ago !


There was 6 students, the teacher and an assistant wanting to play :)


I bought some lovely packs of mixed glass, and the colours were bright and vivid, perfect for what we wanted to do.

The students drew a plan, and cut themselves some glass to match the patterns.


Then they used the grinder to take of the sharp edges, taking care to use safety goggles, hats and aprons,


...in fact I think they enjoyed the "dressing up" part a little more than they should have :)


Next they stuck copper tape to all the edges,

then it was time to face the soldering iron.


They all did incredibly well, even the teacher, and some lovely pieces were produced.


I had a great time, it made a lovely change.

Thursday, 11 March 2010

Shona & Stained Glass

Shona, my daughter, has decided to do a Stained Glass piece for her A-Level Applied Art.


Her big plans are eventually to do a big 3D Violin, but having never had even the most basic lesson, we thought a session in the shed might be in order.


So tonight we did just that. I have to say, it does make me ever so slightly envious how Shona can pick things up so easily, and always make something nice, I, on the other hand, often turn out a 'dog's dinner' for the first couple of attempts!


So here we are, a step-by-step photo blog into Shona's first attempts at stained glass.


First of all she took a rectangle of glass and just simply cut it into 4 pieces.


Then, using an inland grinder, she ground (grinded?) the edges to make them less sharp. At this point you are flicked with tiny chippings of glass which embed themselves in your clothing and hair.


Next it is time to add a sticky copper foil around all the edges of the glass, this gives the solder something to stick to.


When all the pieces are complete, you lay them back together in your chosen pattern and 'tack' them together with little bits of masking tape.


Next is the fun bit - melting the solder and filling in the gaps between the copper, smoothing it over to make it look nice.


Then you turn it over, do the other side, and finally the edges, taking care not to let the solder drip onto your hands (coz that really hurts !!!)


Then she added a cute wire curl, because she could :)


Tada ! The finished piece. Ready to stick into her work book as a sample.


Now....... to order a huge pile of brown glass for this Violin idea !!!

Saturday, 2 January 2010

Stained Glass Wall Hanging


Following on from my Stained Glass course with Mo Wallis way back in November, I came home and ordered all the equipment and gadgets that I needed to have a go myself.


Until this week it has sat in a box unpacked, but I decided I should really have a go while I can still recall what to do.


A wall hanging, I decided.


I love waves and circles as opposed to straight lines and right angles, so I drew a random pattern on a piece of paper, blobs and rounds, and curves.


To add texture to the piece I decided to fuse some glass to make nuggets, this would make the finished hanging a little more 3D I thought. Then I cut glass, grinded (ground?) the edges and got showered in millions of glass splinters. On trying to pull one out of my hair I managed to cut a chunk of hair out !! A bandana is needed next time I think, or perhaps a baseball cap.


I still need to work hard practising my soldering skills, it's all a little too rough for my liking, but hopefully it will improve with time.


This piece is just slightly smaller than A4, and I think I will gift it to my Godparents, who I am visiting tonight after too many years of not being in touch.

Monday, 16 November 2009

Stained Glass Course with Mo Wallis

Just had an exciting weekend.


Once a year, myself and my good mate Carol, go off on a Jolly, I mean an educational trip to learn something new about glass :)


This year we decided on Stained Glass, both of us make beads, and fuse, so now it was time to learn another glassy skill.


We found a fabulous stained glass worker called Mo Wallis (check out her website http://www.mowallis-artglass.co.uk/) and booked a two day course with her.


I have to say, it was worth every penny. We did copper foiling stained glass.


So, first I drew a design - I thought it was childish, but Mo said I was a "naive artist" :)


Then came the tricky but of cutting the glass, I am used to cutting glass in straight lines for pendants etc... so this was a little different.


After grinding down all the edges of each piece, it was time to copper foil them, this is a self-adhesive foil which was stuck firmly to each and every piece.

After tacking it together with masking tape, it was time to solder the gaps.

Wow, this was tricky, it took a while to master, and it still looks a little rough in place. You have to do both sides, my reverse side was a bit better than the front, so I have turned it round to display :)


Finally, it was edged in lead, then given a coat of black patina to make the bright shiny solder look more antique.

Taaa Daaaa, the finished piece. I have to say, I was quite chuffed with myself.