Showing posts with label Magazine Features. Show all posts

Wednesday, 19 June 2013

Flower Watch Tutorial

Featured in Beads & Beyond magazine, November 2008.  I have taught this piece at many a workshop and it has always been very popular.


You will need:
  • 1 x Watch Face 
  • 16 cm Wide Link Chain 
  • 60 Acrylic Flower Caps 
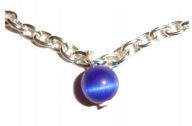
  • 60 x 6mm Glass Beads 
  • 60 Head Pins 
  • 1 Toggle Clasp 
  • Few seed beads
What you do:
  • Measure your watch face and cut your chain to make your bracelet up to a total length of 8” (larger or smaller if required) 
  • Cut your chain in half and add a clasp part to each piece. 
  • Onto a headpin thread a small seed bead followed by a 6mm bead and a flower cap to sit on top of the bead. 
  • Bend the pin (do not cut any wire off at this stage) and loop onto one of the links on your chain. 
  • Form the wire around into a loop enclosing the link, and wrap the wire round the head of the flower cup twice. 
  • Nip off the wire close to the cup and make sure it is tucked in neat so no sharp bits protrude. 
  • Add TWO flower pins to EACH link, fill up both lengths of chain as shown in the pic. 

  • Open the link on the watch face and add the flower chain. 

  • Repeat for the other side. 
  • You may like to add a couple of flower pins to the actual watch link too to add more fullness.

© Sue Simmons / The Bead Shed / 2007


Friday, 14 June 2013

Blueberry Cluster Necklace

I wrote this for "Making Jewellery" magazine, and you know what?  It takes AGES to make, but it is oh so tactile and wonderful when it is finished that it is worth every minute of coiling and curling.

I did mine in a very rich royal blue colourway, but all colours would work, imagine a pearl one though, that would be beautiful.

You will need:
  • 16-18” Of Cable Chain with Clasp (5x3mm Links)
  • 2 x 16” String of 8mm Cat’s Eye Beads (approx 100)
  • 2 x 16” String of 6mm Cat’s Eye Beads (approx 130)
  • 1 x 16” String of 4mm Cat’s Eye Beads (approx 100)
  • Approx 250 Headpins.
What you do:
  • Beaded Pins - Take a Head pin and thread on a bead, bend the wire over and trim off with wire cutters leaving enough to form a loop.
  • Slightly bend back the wire as it exits the bead – using a pair of round nose pliers, this will form the first half of your loop.
  • Make some beaded pins with 8mm beads, and find the centre of the chain and hook the beaded pin through the link, then using round nose pliers closed the loop on the beaded pin tightly. (If you leave a gap, your beaded pin may drop off at a later date)
  • Add an 8mm Beaded Pin to each link, filling about a quarter of the chain, making sure you work up each side from the centre.
  • Add another lot of 8mm Beaded Pins to the same links, meaning you will now have two beads on each link.
  • Working up one side only, add another “quarter” of beaded pins, this time 1 x 8mm and 1 x 6mm bead.
  • The final “half Quarter” should be done with 1 x 6mm & 2 x 4mm beads. 
  • Repeat from step 6 up the opposite side and wear with pride ! 


© Sue Simmons / The Bead Shed / 2009

Wednesday, 12 June 2013

Figaro Earrings


These earrings have a little bit of work in them, but they hang and sway so nicely and are so eye-catching.
Published in Beads & Beyond magazine, March 2009.

You will need:
  • 2 x Earring Wires 
  • 2 x 16” Figaro Chains 
  • 2 x 50mm Eyepins 
  • 2 x 4mm Jump Rings 
  • 12 x Sz 12 AB Clear Seed Beads

What you do:
1. Cut the chain as follows: 
••• Starting at a large link, count 5 large links down then cut the chain at the last small link before the 6th large link. 
••• 2 pieces in the same manner but with 4 large links in the piece. 
••• 2 pieces but with 3 large links 
••• 2 pieces but with 2 large links 
2. Onto an eye pin thread a 2 link piece with the large link at the top, then a Seed Bead, followed by the 3 link piece, seed bead, 4 link piece, seed bead, 5 link piece, seed bead, 4 link piece, seed bead, 3 link piece, seed bead and finally the 2 link piece. 
3. Turn the end of the eye pin into a loop the same size as the eye on the eyepin and trim off the excess. 
4. Cut some more chain, this time 3 large links long with a large link at each end – 2 pieces of this. 
5. Open the eye on the eyepin and slide on a piece of this chain before closing again, do the same at the 
opposite side. 
6. Cut a final piece of chain 2 large links long, ending on the last small link before the next large link. 
7. Open the jump ring and slide on one piece of chain connected to the eyepin loop, then the last piece you 
have just cut, then the other piece on the eye pin and finally an earwire before closing. 

8. Make a second one to match !

© Sue Simmons / The Bead Shed / 2007

I do apologise about the poor quality photos in this tutorial, I will endeavour to re-make them at some point with much better pics.


Friday, 31 May 2013

Zesty Wire Necklace

One of my magazine submissions this one, such fun colours, bright and zesty, perfect for summer.


You will need:
  • Selection of Lampwork Beads ***
  • 0.8mm Silver Wire (4m coil)
  • 24-30 Closed Twisted 8mm Jump Rings
  • 10g Matching Seed Beads - sz 11
*** I got the Lampwork beads in the photo from Tan Grey, you can find her HERE.

What you do:
  • Take a 10cm piece of wire and bending it roughly into a third, loop a closed 8mm jump ring onto it. Bring the wire back around and wrap it twice round the stem.
  • Thread a Lampwork bead onto the long length of wire, and form the shorter length into a curl and lay it flat on one side of the Lampwork bead. 
  • Thread on a jump ring and bend the wire back over the back of the bead (opposite to the side with the curl).
  • Wrap the wire twice around the stem as in Step 1, and form into a curl to sit on the same side as the first curl.
  • Take a 50cm length of wire and using a knitting needle or mandrel approx 3mm in diameter, wind the wire tightly around it to form a coil.

  • Cut the wound wire into pieces approx 20mm long, and file off any sharp edges. (You can also tuck the edges down so they touch the wire on the coil below).
  • Take a 6cm piece of wire, bend a third and loop it onto a jump ring attached to your previously made Lampwork link.Wind the wire twice around the stem neatly. Cut off the excess with wire cutters.
  • Add 9 seed beads, and then slide on of your coils over these beads.
  • Add another jump ring to the end in the same manner as at the start of the link. This is your basic design, continue until the necklace is nice and long enough to slip over your head.
  • You could also make a matching bracelet  :)


© Sue Simmons / The Bead Shed
2008

Wednesday, 27 February 2013

Magazine submissions

I've been sorting a few photographs out on my PC and came across a folder with some of my magazine submissions in.

I don't think I have blogged about all of these before, and I cannot remember much detail about them now, so I will just share the photos with a few words.

Stardust Earrings


Cube Bracelet, I got front cover of Bead for this one.


Zesty Necklace, with beads made by Tan Grey.


Four Seasons choker.  Had lots of fun with this piece, loads of embellishment.


Slave Bracelet, not a very politically correct title and for that I apologise.


Chocolate & Marshmallow Discs. 


Flower Cabochon Pendant, one of those decorative pebbles you can buy in homeware stores, beaded around.


A twisty sapphire blue beaded necklace with a Murano heart focal.


Figaro Chain earrings, dangly and interesting, but without being heavy.


Lillybells bracelet.  A mixture of beadwork and stringing.  Each glass bead is nestled in it's own little beaded cup.


One of my favourites.   A lucite flower bracelet with a watch face.  Very full, bustling with colour.


Loop Earrings.  I loved making these, they remind me of a Spanish dancer doll I had when I was young.


Gemstone Twist - you said tumblestones were uncomfortable?  Not when they are sewn into a spiral with seed beads.


Blueberry Cluster, a very heavy piece with various sizes of glass cats-eye beads.  Incredibly tactile.


And I will leave you with this one, my Daisy Chain.  This piece can be made as long or as short as you like, and it is threaded together like you would a real daisy chain.


If you would like any of these patterns, I am sure I will still have them somewhere, just ask and I will email then over  :)