Showing posts with label gift idea. Show all posts

Friday, 23 October 2015

Crochet Cotton Facecloth - free tutorial


This is a lovely textured pattern which is designed in mind to grab your soap or shower gel.  Then you can just chuck it in the washing machine with your towels.
The pattern is written in UK Crochet terms. 

Stitches explained:

Chain Stitch - Yarn around hook (from the back) and pull the new yarn through the loop on your hook.  This is ONE chain.  Repeat as needed.
Double Crochet - Put hook through work, draw yarn back through (2 loops on hook) yarn around hook (from the back) draw yarn through the 2 loops on the hook.
Treble Crochet - Yarn around hook (from the back) put hook through work and draw yarn back through (3 loops on hook) yarn around hook, draw through 2 loops on hook, yarn around hook, draw through 2 loops on hook.

(I have written the tutorial up using a blue yarn, for photographic purposes.  The natural cottons which work well for this project are usually white or cream.)

You will need:

  100% Thick Craft Cotton
  6mm Crochet Hook
Sewing Up Needle

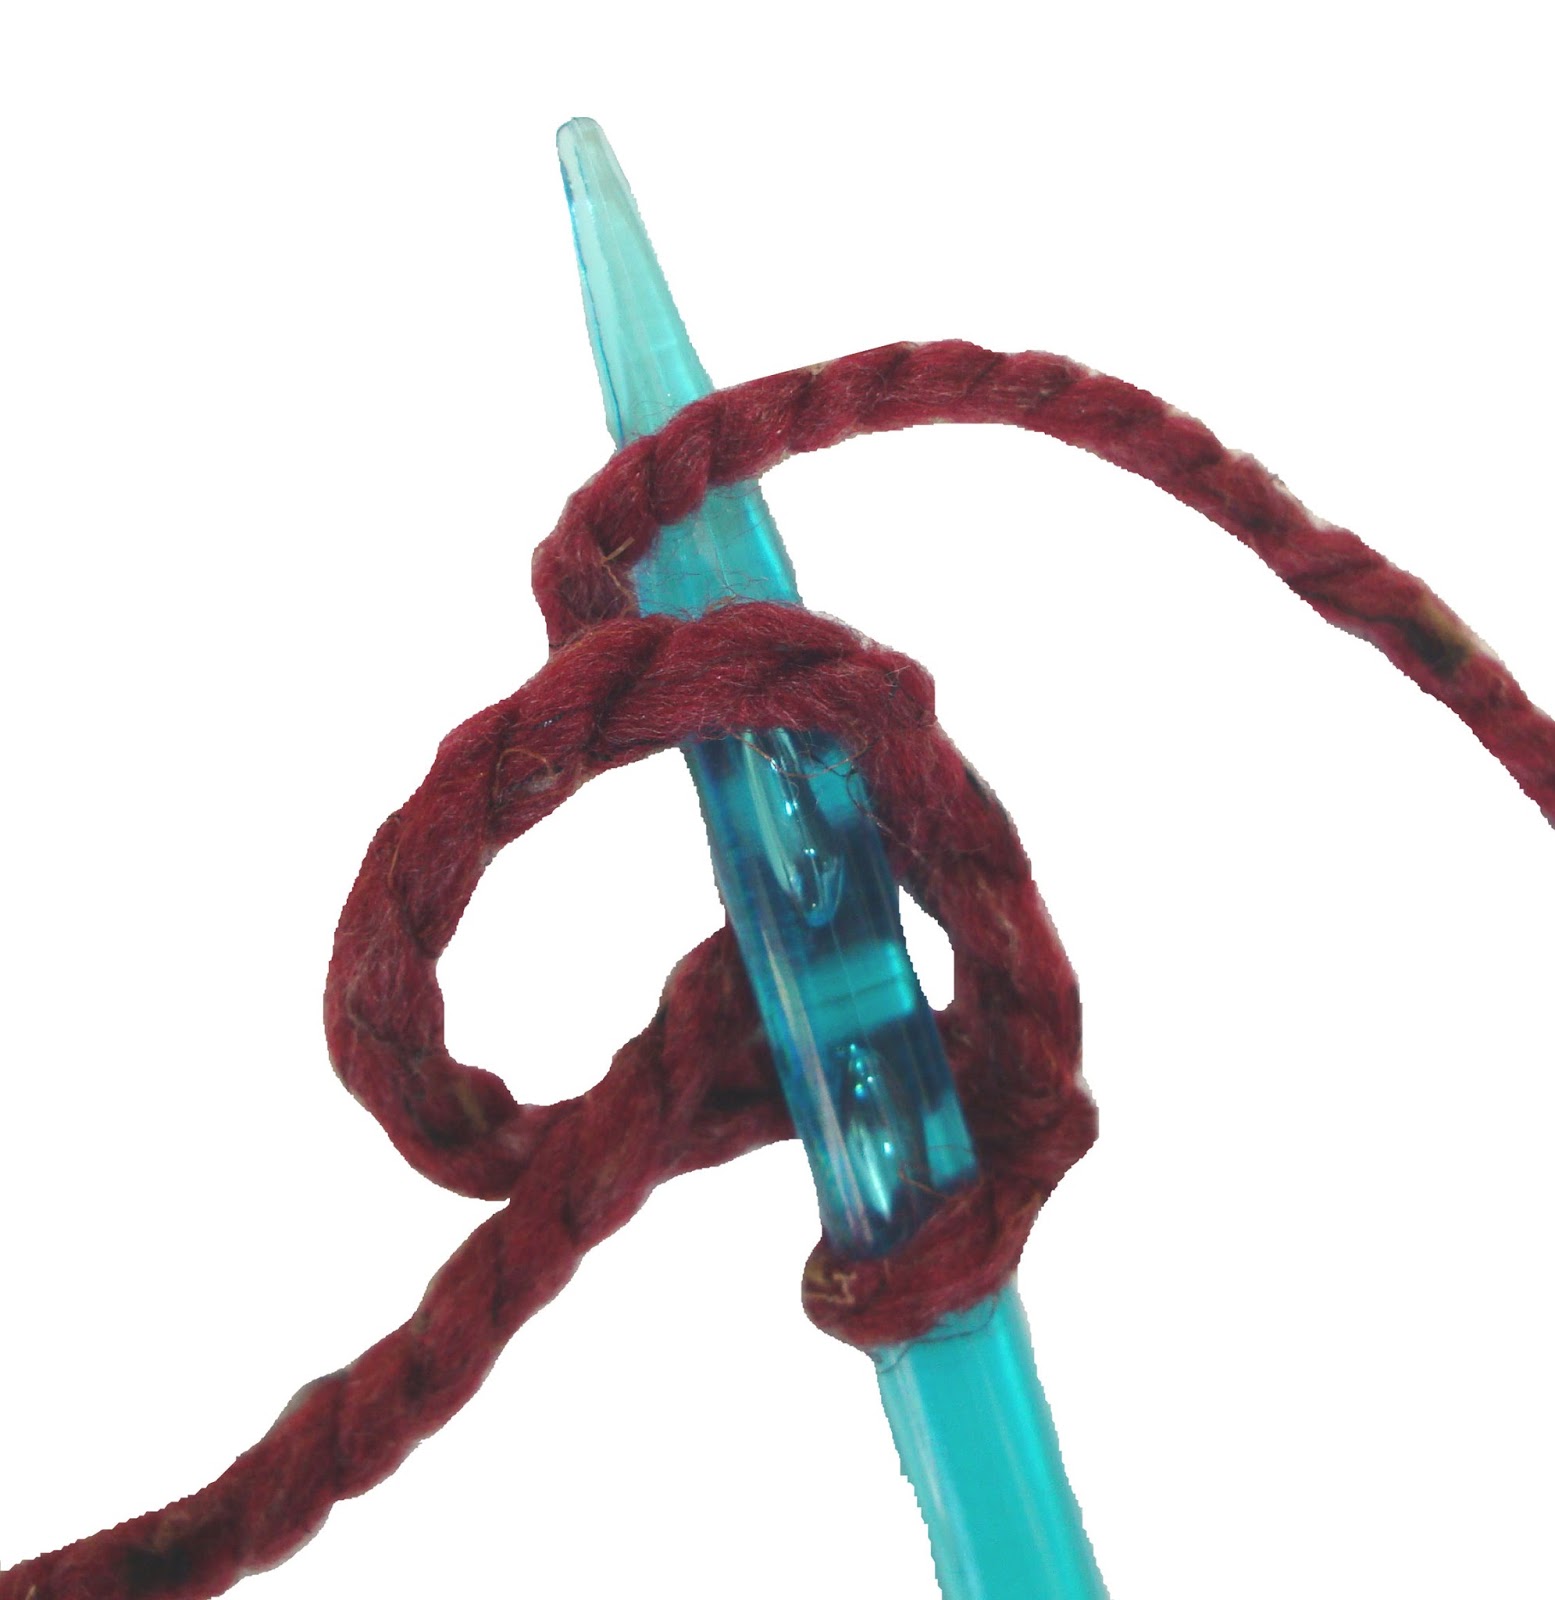
1. Start with a slip knot then make a foundation chain of 28.  Make them quite loose otherwise you will find you have one edge tighter than the others when you have finished.


2. Working back along your foundation chain, make a DC (Double Crochet) into the 4th chain from the hook.
3. Into the next chain work a TR.  (Treble Crochet)


4. Work across the chain row with alternate DC's and TR's, ending on a DC.

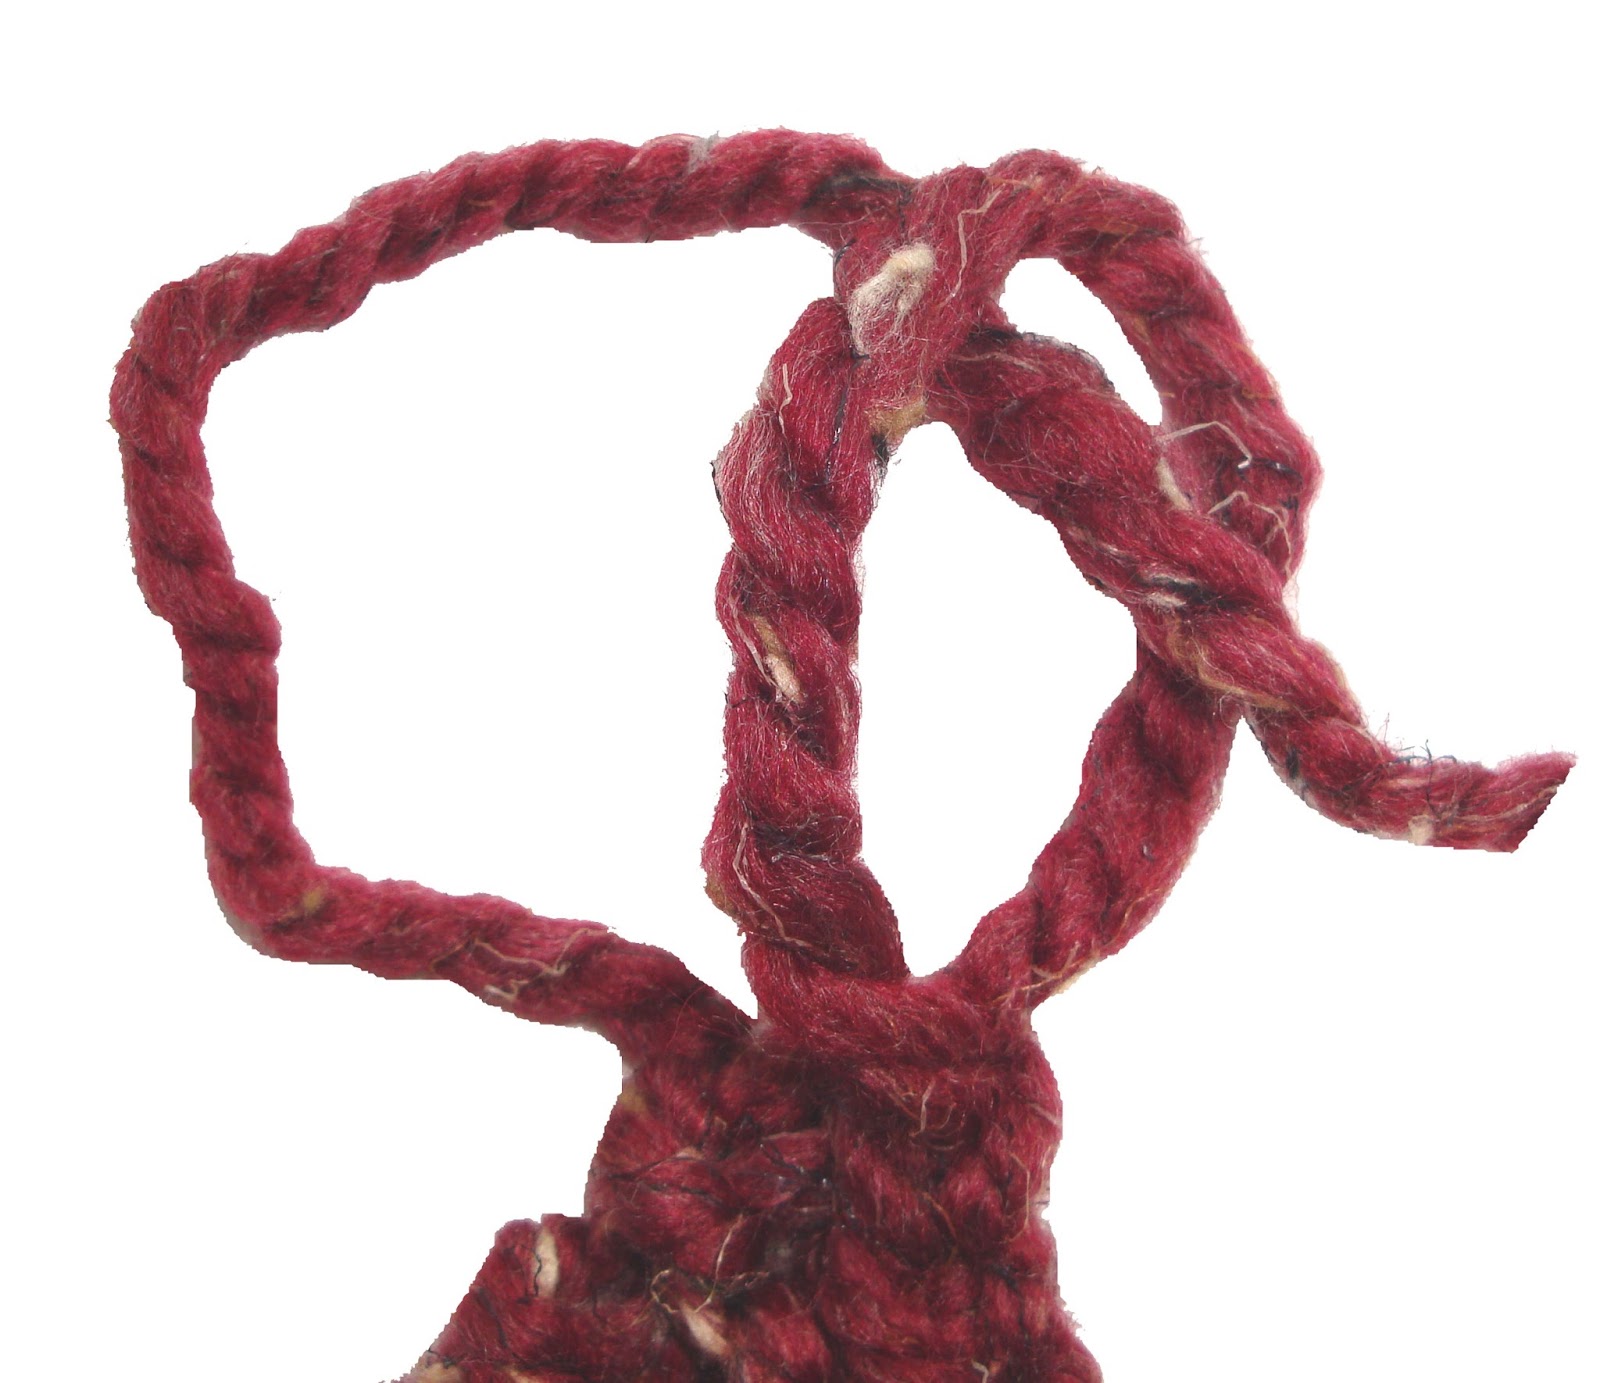
5. *** For the next row CH 3 then turn your work so you can work back down the row.

The first stitch is not at the base of the chain (regard that as your first TR) but the stitch next to it as shown in the photo by the metal hook.
Work a DC into this space.
6.  Into the next stitch work a TR then go along the row alternating between DC and TR, ending with a DC.
The end stitch is not always noticeable as it is into the turning chain, but if you miss it you will find that your work starts to creep in.  Always make sure you end on a DC stitch.
Continue from *** until your work is square.
7. Turn your work as if you were going to add another row.
The next row is CH 2 and work a DC into the same space.  Then CH 1 and work 1 more DC into that very same space. This forms a corner.  DC all the way across until the last stitch.
8. Into the last stitch work 1 DC, 1CH, 1 DC - all into the same stitch.
Now work down the side without turning.  There is no real space to place stitches on this row, so just work as evenly as you can down to the last stitch.
9. Into the last stitch work 1 DC, 1 CH, 1 DC then work  across the original foundation chain, working one DC into each stitch, until the last stitch.
Work down the next side as in step 8.
11. The next round is very easy. Do not turn. CH 3 then DC into the same stitch.  After that DC all the way round, but in each corner stitch do 1 DC, 1 CH, 1 DC.  SS to join, then do one single chain, cut of your yarn and pull it up through the loop.  Weave the thread in so it disappears.
Use your facecloth with pride!
How about making a matching soap mat? 
Do the same pattern as your facecloth but this time start with a foundation chain of 14 and make it a rectangle instead of a square.

www.soozintheshed.co.uk

Thursday, 15 October 2015

Knitted Cushion Cardi - free tutorial


This pattern is written in two sizes - the 16" one is shown in RED while the 18" one is shown in GREEN.
You will need:
  3  (4) x 100g Mega Chunky Yarn
  3 (4) Buttons
  10mm Knitting Needles
  Step-by-step instructions
Sewing Up Needle


1. We are going to be using the thumb method of casting on, so start by making a slip knot  about a meter (1.5 meters) in from the end of your yarn and placing it over one needle. Pull close but not too tight.
The loose part we will now call the TAIL, and the bit attached to the ball we will call the WORKING YARN.
2. Holding the needle in your right hand, and the working yarn also in the right hand, use the long tail to twist and wrap around the needle as shown in the first picture.  Bring the working yarn over the top of the needle as show in the second.

3. Take the first loop, as shown in the first picture, and lift it over the top of the needle, trapping the working yarn as you do so.


4. You now have TWO stitches.
5. Repeat Steps 2 and 3 until you have 30 (40) stitches.
6.  Now working back across the stitches we are going to Knit.
Start by inserting your empty needle into the first stitch as shown, wrap your working yarn around the top of that needle....
7. ....bring the needle down, making sure you catch the loop of yarn that you have just put on, and bring it through the stitch.  Then carefully move the stitch up the needle and off.
This will leave your new stitch on the empty needle.

8. Repeat step 7 all the way across.
Knit another two rows in the same way.

9. In this row we are going to make the buttonholes.  Start by knitting 8 (6) stitches and stopping.
Insert your left-hand needle into the second last stitch on the right-hand needle and past it over the top of the last stitch.  This is a "Cast Off" stitch.
Knit one single stitch, then cast off in the same manner, taking the second last one over the new one you have just added.
10.  You will now be left with 6 (4) stitches, a space and a single stitch.
** Knit 7 (9) then cast off 1, knit 1 then cast off 1.
Repeat from **(1) 2 times more. Knit last 5 (3) stitches. 
You should now have 24 (32) stitches and 3 (4) spaces.

11. Knit 6 (4) then stop.  *** Turn your work around as if you are going to work back again.

 12. Now, insert your right hand needle into the top stitch on the left hand needle, wrap your yarn around as if going to knit, but this time pull the loop through and put it back onto the left hand needle.  This is a Cast On stitch and you have just added one extra stitch to your work.  Now add another in the same way.

13. Turn your work around again, so that the working yarn is on the right hand needle and working back along the left hand needle knit 6 (8) stitches.
Repeat from *** 1 (2) times. Then knit the final 6 (4) stitches.  30 (40) stitches in total again.
14. Now you just knit until your yarn runs out!
Too add another ball, try and do it at one end so to save having a knot in the middle of your cushion.  A meter (1.5meters) is usually enough to complete a row so you can judge if you have enough spare to do that extra row.
 15. At the end of your 3rd (4th) ball make sure you have at least 2 (3) meters left for casting off and sewing up. 
To cast off simply knit 2 stitches, then pass the first one over the second.  Knit another stitch and again pass the first one over the second.  Continue.

 16. To finish, pass the yarn through the last loop and pull tight.
17. You should now have a piece that looks like a rectangle.  Don't worry about those ends of yarn just yet as you can use them to sew up your cushion as you go.
 18. Fold one edge into the centre, then the other edge into the centre, overlapping them by about 3 inches. Make sure the edge with the buttonholes is sandwiched at this stage.

19. Start sewing one edge up, making sure you sew through all THREE layers at the join.  Then join the opposite side in the same way.
20. You will be left with an envelope of sorts. Sew in all your ends and turn the cushion cover the right way out.
21. Sew your buttons on to match the holes.  I start my yarn at one button then weave it across for the rest of the buttons, saves finishing the yarn of each time.
Stuff with a 16" (18") cushion pad.

Cuddle your cushion with pride!

www.soozintheshed.co.uk

You can find a printable version of this cushion here:  www.soozintheshed.co.uk/cushioncardi.pdf

Sunday, 29 December 2013

Facecloths & Soaps

Do you remember these cute little packets that I showed you just before Christmas?  Well now it is time for you to peep inside.  :)


Crochet Facecloths in  beautiful natural 100% cotton.  I did a lovely textured stitch - alternative DC and TR then when working back I TR into the DC and DC into the TR.  I then edged them in a row (or two) of DC.


Then I added a bar of my home-made soap. It was lucky dip to who got what fragrance.  There was Poppy Seed and Lemon, Musk & Walnut Shell, Lime, Rose Petal or Lavender.


Rolled it up...


Tied it with a lovely ribbon.


And wrapped it  :)


As I am putting a facecloth in the Birthday Blog Box, I better add a bar of home-made soap in there too - don't you think?  :)

Tuesday, 24 December 2013

Cumberland Rum Butter - gifts for workmates

Last year (- has it REALLY been a whole year?) I made my work colleagues a jar of Rum Butter.

As it went down rather well, I thought I might make it a tradition, and make them some this year too.  (but with an added bonus of a wee bottle of Sloe Gin)

I actually used SIX blocks (250g blocks) of butter for this batch.  I did four to start with and decided it wasn't enough, so did another two.  For the second batch I could only get dark brown sugar though, so the batches are slightly different colours - but equally delicious.

Here is the recipe for you.  (I have broken it down into a smaller portion for you, but the photos show bulk :)  )

You will need:
  • 250g butter
  • 500g soft brown sugar
  • a good measure of rum
What you do:
  • Pop the sugar in a bowl and pour the rum over it.  Let it soak all the way through.


  • Meanwhile, pop the butter in a non-stick pan over a low heat and allow to melt.


  • Once melted, pour onto the boozy sugar and stir.  The hot butter will dissolve the sugar.

  • Give it a good mix with a wooden spoon then plug in your electric whiskers.  (you can do the next bit by hand, but you will have muscles Popeye would be envious off by the time you are finished)


  • On a slow setting give it a good whisk until the sugar is blended with the butter.

  • Now, go away for half an hour, do some crocheting, make a brew, wash the dishes, catch up on Corrie - whatever, just leave the butter to cool slightly.

  • Then go back and whisk it again, it will magically change colour.

  • I leave it another 15 minutes and give it another whisk to make it light and fluffy.

  • Then pipe it into pots.  I prefer to pipe rather than blob it in with a spoon as it's much less messy.  Although on the down side it looks rather like...... let's not go there!


Voilà!   Yummity, easy-peasy, hand-made Rum Butter.


To make it into a gift I added a scruffy hand-made label - or you can take your time with it and make a pretty one  (time was running out fast for me this Christmas)


.... and added a little bottle of highly alcholic, home-made Sloe Gin  (Sloes kindly picked and donated to me by my lovely friend Lezley)


Tied it up with a red ribbon (got Hubster to curl the ends to make it prettyful)
Pretty pressies all round  :)


And there is a pot left in the fridge for me  :)
Perfect on hot toasted crumpets, so the Rum Butter all melts and leaves a puddle of sugary rummy mess on your plate which you just have to lick  :)