Showing posts with label knitting. Show all posts

Friday, 29 January 2021

A little knitted throw.


Working out a scale:

My mini shed measures two foot square. I reckon an average room is about 12 foot square – and that makes it incredibly easy for me to work out a scale for all the mini things I need to go in my shed.

So if a room is 12 foot and my shed is two foot, that gives me a 1:6 scale.


I shall test that theory and knit a small blanket for the mini shed. I grabbed this 4ply sock yarn as it knits up into some nice shades without changing the yarn, and some 2.5mm knitting needles.


So, a regular knee throw blanket is around 120cm square.

I had to knit a small square so I could measure how many stitches and rows I would need for my mini blanket.

This little piece was 3cm square. It has 10 stitches across and I had worked 18 rows in Garter Stitch.


I chose Garter Stitch because the finished piece had no front or back, it looks the same on both sides.

I calculated that using my 1:6 scale, to get the correct scale for a 120cm blanket I would need 20cm.


120 divided by 6 = 20.


20 divided by 3 (the size of my sample) = 6.66 = let’s round it up to 7.

7 x 10 stitches = 70 stitches for the width.

7 x 18 rows = 126 rows for the height.


I got to work…..


Knitting small is actually harden than knitting regular or chunky. The points of the needles hurt your fingers and you have to grip tighter.. plus it’s much harder to catch a fallen stitch if you need to.


It took about 6 hours to make would you believe!  SIX HOURS for a small mini blanket fit for a Barbie doll…if anyone wants to commission one do let me know.  😊


Would you like to learn how to knit?

I do some beginners Youtube videos if you fancy having a go, please find the links below.

How to Cast On with two needles.

How to Cast On Thumb method.

How to Knit and Purl.

How to Increase and Decrease.

How to Cast Off.

Have fun, and feel free to give me a shout with any questions.

Monday, 10 October 2016

But Mummy, I want a Bear too....

Way back last year sometime, not sure if it was a birthday, Christmas or a Mother's Day, I bought my Mum a gift of a book - 'Knit-a-Bear'.
I also bought her bear coloured yarn, patterned yarn, stuffing, buttons so she could make herself a bear - nothing like a birthday gift that you have to make yourself is there ?  ;)

Anyway, she made herself a bear, beautiful it was, then she made my sister a bear.  Then she made my Granddaughter Hope (her Great-Granddaughter of course) a bear.  Then followed Granddaughter Ellie (still in the womb at this point) she got a bear too.
Shona had a bear, in fact the only person that didn't have a bear was me!!

I WANT A BEAR, I shouted rather loudly.

The making of said bear might have been a secret if it was not for the fact that she had not surreptitiously asked me for "bear coloured yarn" from my stash.  To be fair though, the glittery purple dress was a secret.

A little while later I was presented with my new bear, and how cute it was, with her lacy purple frock and matching hair (ear) bow.  She was just a bit too cute.


Someone else loves it too, but she's not having it - it's MY BEAR!!

(Seriously, could anyone love a bear as much as this?)


By the way, this bear book is a fab book if you are a knitter, so many very cute bears to choose from.  My sisters had dungarees on!!

You can find it over on Amazon by clicking HERE.

Thursday, 15 October 2015

Knitted Cushion Cardi - free tutorial


This pattern is written in two sizes - the 16" one is shown in RED while the 18" one is shown in GREEN.
You will need:
  3  (4) x 100g Mega Chunky Yarn
  3 (4) Buttons
  10mm Knitting Needles
  Step-by-step instructions
Sewing Up Needle


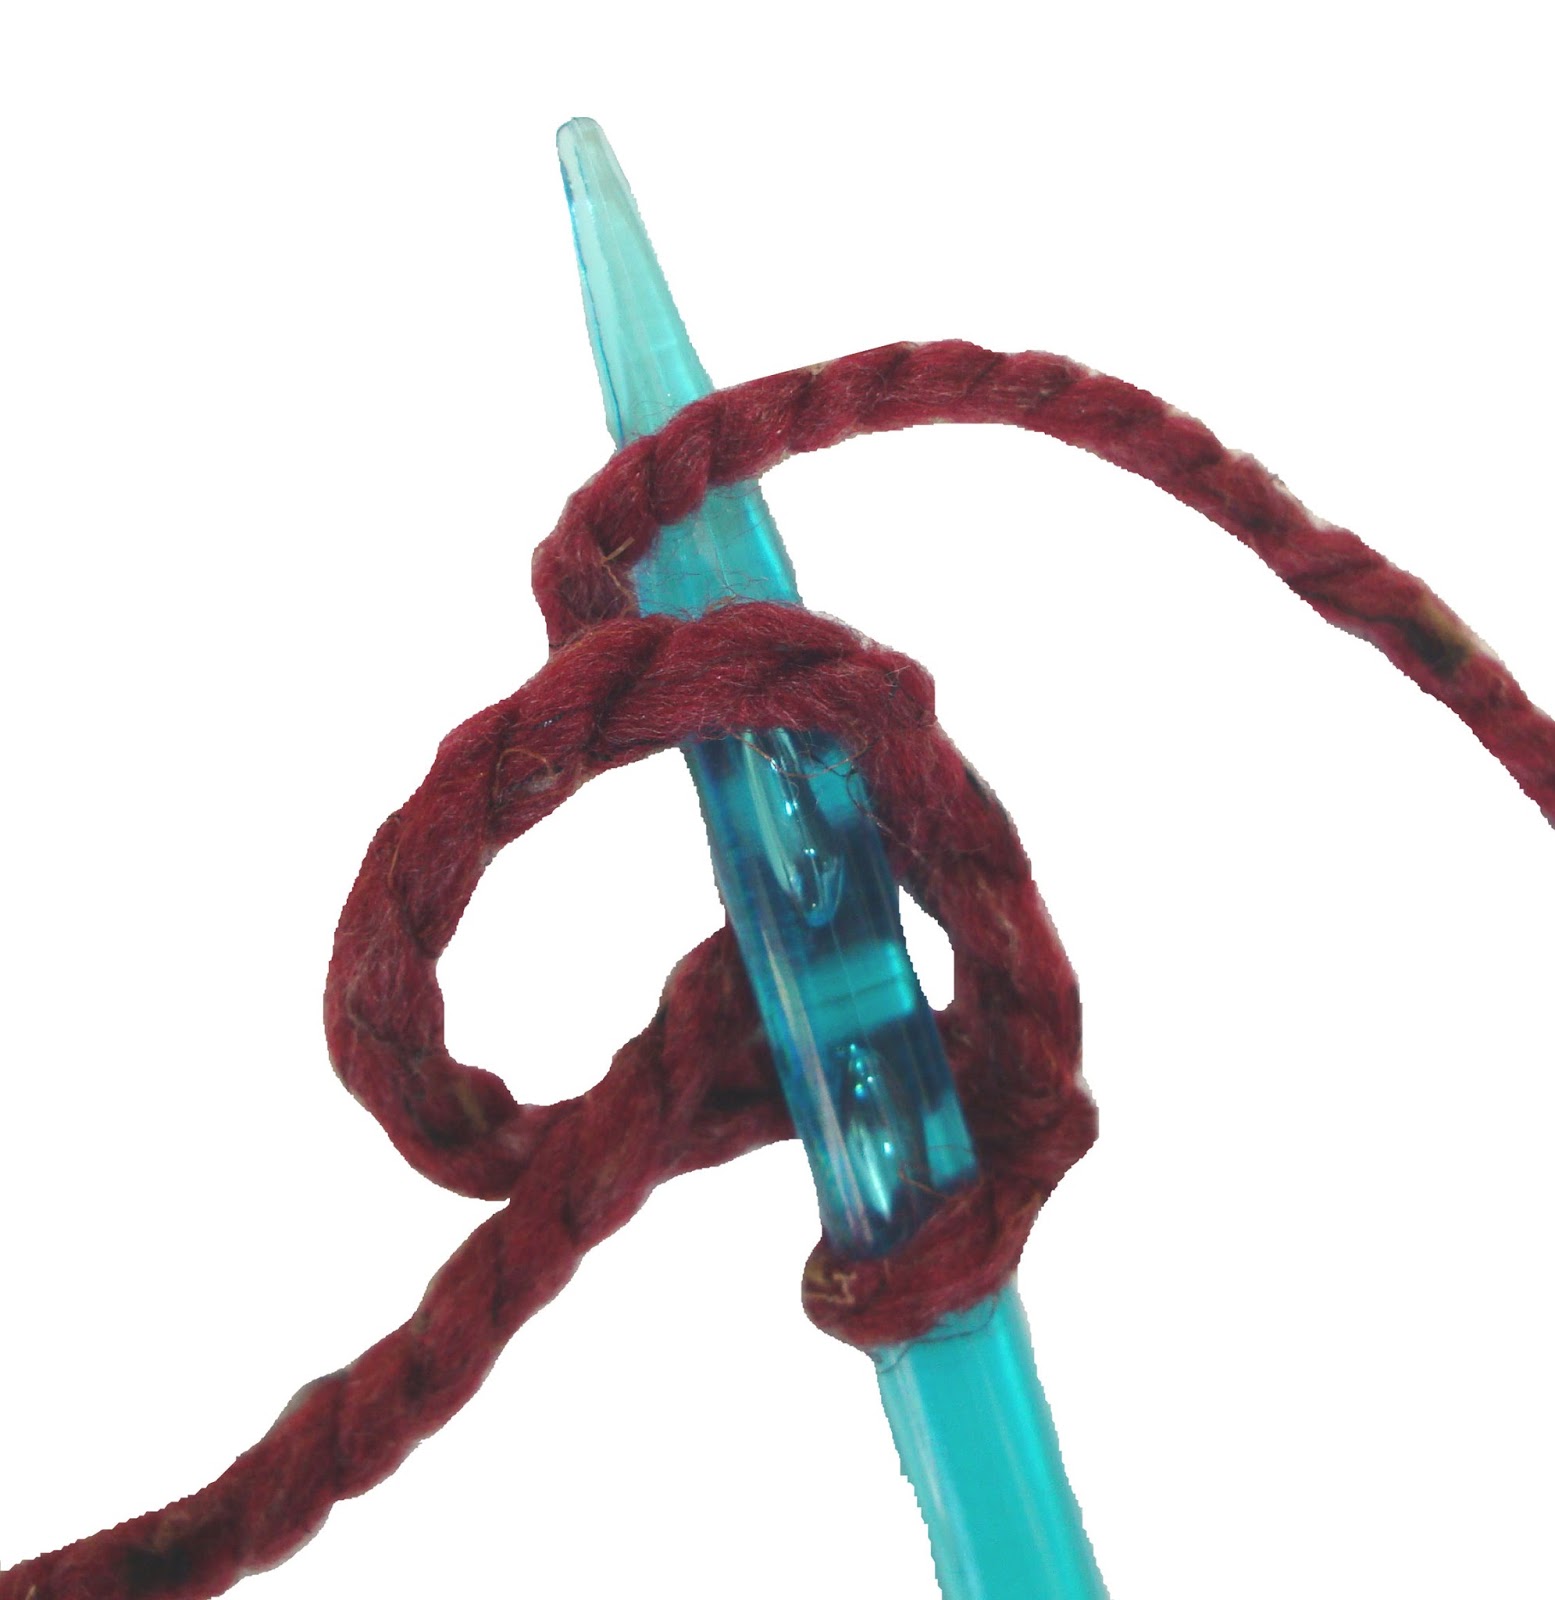
1. We are going to be using the thumb method of casting on, so start by making a slip knot  about a meter (1.5 meters) in from the end of your yarn and placing it over one needle. Pull close but not too tight.
The loose part we will now call the TAIL, and the bit attached to the ball we will call the WORKING YARN.
2. Holding the needle in your right hand, and the working yarn also in the right hand, use the long tail to twist and wrap around the needle as shown in the first picture.  Bring the working yarn over the top of the needle as show in the second.

3. Take the first loop, as shown in the first picture, and lift it over the top of the needle, trapping the working yarn as you do so.


4. You now have TWO stitches.
5. Repeat Steps 2 and 3 until you have 30 (40) stitches.
6.  Now working back across the stitches we are going to Knit.
Start by inserting your empty needle into the first stitch as shown, wrap your working yarn around the top of that needle....
7. ....bring the needle down, making sure you catch the loop of yarn that you have just put on, and bring it through the stitch.  Then carefully move the stitch up the needle and off.
This will leave your new stitch on the empty needle.

8. Repeat step 7 all the way across.
Knit another two rows in the same way.

9. In this row we are going to make the buttonholes.  Start by knitting 8 (6) stitches and stopping.
Insert your left-hand needle into the second last stitch on the right-hand needle and past it over the top of the last stitch.  This is a "Cast Off" stitch.
Knit one single stitch, then cast off in the same manner, taking the second last one over the new one you have just added.
10.  You will now be left with 6 (4) stitches, a space and a single stitch.
** Knit 7 (9) then cast off 1, knit 1 then cast off 1.
Repeat from **(1) 2 times more. Knit last 5 (3) stitches. 
You should now have 24 (32) stitches and 3 (4) spaces.

11. Knit 6 (4) then stop.  *** Turn your work around as if you are going to work back again.

 12. Now, insert your right hand needle into the top stitch on the left hand needle, wrap your yarn around as if going to knit, but this time pull the loop through and put it back onto the left hand needle.  This is a Cast On stitch and you have just added one extra stitch to your work.  Now add another in the same way.

13. Turn your work around again, so that the working yarn is on the right hand needle and working back along the left hand needle knit 6 (8) stitches.
Repeat from *** 1 (2) times. Then knit the final 6 (4) stitches.  30 (40) stitches in total again.
14. Now you just knit until your yarn runs out!
Too add another ball, try and do it at one end so to save having a knot in the middle of your cushion.  A meter (1.5meters) is usually enough to complete a row so you can judge if you have enough spare to do that extra row.
 15. At the end of your 3rd (4th) ball make sure you have at least 2 (3) meters left for casting off and sewing up. 
To cast off simply knit 2 stitches, then pass the first one over the second.  Knit another stitch and again pass the first one over the second.  Continue.

 16. To finish, pass the yarn through the last loop and pull tight.
17. You should now have a piece that looks like a rectangle.  Don't worry about those ends of yarn just yet as you can use them to sew up your cushion as you go.
 18. Fold one edge into the centre, then the other edge into the centre, overlapping them by about 3 inches. Make sure the edge with the buttonholes is sandwiched at this stage.

19. Start sewing one edge up, making sure you sew through all THREE layers at the join.  Then join the opposite side in the same way.
20. You will be left with an envelope of sorts. Sew in all your ends and turn the cushion cover the right way out.
21. Sew your buttons on to match the holes.  I start my yarn at one button then weave it across for the rest of the buttons, saves finishing the yarn of each time.
Stuff with a 16" (18") cushion pad.

Cuddle your cushion with pride!

www.soozintheshed.co.uk

You can find a printable version of this cushion here:  www.soozintheshed.co.uk/cushioncardi.pdf

Wednesday, 19 August 2015

A knitted Clanger - free pattern link

I was asked to make a Clanger using this pattern from the CBeebies website.

I didn't have any 4ply yarn so I did this one on DK using 3mm hooks.


It really is rather a cute pattern, and although easy to follow, it does involve making quite a few pieces.

Don't be put off by the I-Cord technique of knitting certain bits  (the ear trims and the hair), it might sound a bit tricky but it works really well and gives you a 'French Knitting' type of effect.


As well as yarn you will need felt in two shades of pink and black for the clothing, ear lining and feet.


I felt it helped to pin the pieces in place on the body so I knew how to stitch them together.


And then it was done!  Cute little thing isn't it?


And now it has gone off to it's new home where hopefully it will be loved and cherished  :)

Have you made one?


Festival clothing

Summer is the time of festivals, and having just been to one myself I realise just how much effort people put into their clothes for such events.

As these ladies did.

When I first claimed my patch of grass I spotted these jumpers across the back of 6 chairs, I thought to myself that someone had made a lot of effort, or did they have a knitting club and they all made their own.

As the evening drew in on the jumpers started to go on and I grabbed this shot, but then I decided that really I should go and talk to these colourful ladies and find out more about their jumpers.


It turned out that one of their Mum's made them all - a 75 yr old lady no less, I bet she enjoyed seeing them come together with all those wonderful neon colours.  Matching leg warmers too!


Thank you ladies, if you are reading this, for letting me take and use your photo.  Your bright and cheery jumpers made my day.  Always like to see a bit of craft work  :)

So... talking of festival clothing, do you remember the spray paint neon t-shirt I made a wee while ago?

Here is is again....


You can easily make yourself one of these, my tutorial is on the Hobbycraft blog which you can find by clicking below.


What festival clothes have you made?  Pop me a photo on  my Facebook page.

Thursday, 30 July 2015

Knitting Gauge - converting Needle Size from metric to UK

I am often amazed by people's discovery of a little craft tool that makes life so much easier.

There are a few of them about, but the one I am talking about today is a Knitting Gauge.

The conversation usually starts with "Do you have any idea how to convert 'old' numbered knitting needles to today's sizes?"

Well, kinda, I know off by heart the ones I use regularly - I know a number 10 is a 3,25mm and a number 11 (which I am currently using) is a 3.00mm, but as for the rest, I could work it out I guess, but why bother when you can buy one of these.... a knitting gauge!  (Available in Hobbycraft)


It's a small rectangular piece of plastic with holes in. On one side of the holes are the 'old' numbers, while on the other are the new numbers.   The holes are there so you can work it out even if your numbers have rubbed off over the years, which, let's face it, is a common annoyance.  Oh.... and DPN's of course, which come with no numbers on, and unless you are very neat and tidy and keep them in the original packaging, it can be most annoying to work out what size is what.

So, at work, when I show people these, it's like they have discovered the tomb of Tutankhamen, they think it is the most genius thing ever.  Which got me wondering.... do other people know about this clever little device that only costs £1.50 and makes life so much easier?

I should do a blog post.

So, here you go  :)

And for those who don't have access to buy a gauge, here YOU go....

Metric UK
2mm 14
2.25mm 13
2.75mm 12
3mm 11
3.25mm 10
3.5mm
3.75mm 9
4mm 8
4.5mm 7
5mm 6
5.5mm 5
6mm 4
6.5mm 3
7mm 2
7.5mm 1
8mm 0
9mm 00
10mm 000