Saturday 30 November 2013

Colourful Crocheted Coasters


This week, for some strange reason, I have been mainly crocheting coasters.

I needed something little to work on while waiting for new yarn to finish my bag project off  (photos coming soon) so grabbed some of these threads at Hobbycraft.

It is a slightly textured mercerised cotton and I like the multi-coloured ones, although I have done a glittery red one too.


I found loads of free vintage patterns HERE,  I had to browse through loads as nothing was quite rocking my boat.  However, after a while of reading I kinda knew what I needed to do and with a little adaptation I wrote a new pattern, using bits of others and putting them all together.

I will share it soon  :)


They are just so colourful, and the best bit is you can give them a wash if they get a bit grubby.


They are the prefect size for a mug and gives a layer of protection between your hot cup and your table  :) 


I just think they are so pretty, but I can't decide what colour to make for myself!


However, I have made a pair in shades of purples, pinks and blues for the Birthday Blog Box.


Check back for the pattern coming soon.....

Friday 29 November 2013

Sirdar Aruba Scarf Yarn

Aruba Aruba........ (did you finish it off?  I know it's Ariba, but it's close enough)  ;)

Anywhooo, landing in Hobbycraft last week was the biggest bag of new yarn - this one, in lots of different colours.  When new yarn lands it takes me all my time not to dive in the bags and have a good rummage about.  

But this one certainly got my attention with it's curls and blusters of colourfulness.


It is Aruba, by Sirdar, and it is a 100% polyester yarn.  It is a 100g ball, which is enough to knit a scarf.  The pattern is on the inside of the ball band.  Basically though, it's just pick up 6 stitches and knit.....


It is simple enough to knit, you just have to get the normal knitting technique of your head and do something slightly different.  Instead of wrapping the whole strand around your needle, you just have to insert the needle into the holes provided.   This technique is NOT for speed knitters, it takes time to find those pesky little holes.  And casting off is a bit odd too - well not actually the casting off bit, but what do you do with the tail?  It's not as if you can sew it in, so I just cut it as close to the last cast of stitch and knotted it a little.


Makes a nice tactile scarf though, not quite enough to do that thing where you fold it in half and bring the ends through the loop, but enough to throw one end over your shoulder in a seductive manner.  (If that's your thing)


It's on display in Carlisle Hobbycraft, if you want to go and stroke it  ;)


Thursday 28 November 2013

White Choc & Pink Wafer Crispy Cake

These are a little bit nommy.  I only use the budget brands for all of this as it makes no difference when covered with chocolate!


You will need:
  • 150g Malted Milk Biscuits
  • 100g Rice Krispies
  • 300g White Chocolate 
  • 100g Butter
  • 250g Golden Syrup
  • 100g Pink Wafer Biscuits
What you do:
  • Crush the biscuits with the end of a rolling pin, until they are small bits, but not too powdery.
  • Mix in the Rice Krispies.
  • Chop up the wafers into decent sized squares and add to the mix.
  • Melt the chocolate with the butter and syrup in a glass bowl in the microwave.  Use the low setting and do it in short bursts of 30 seconds, stirring inbetween.
  • Add the chocolate to the mix and stir well to coat everything.
  • Pour into a flan dish lined with foil, press down and pop in the fridge to chill.
  • Cut into chunks when cold and set  (about 2 hours)


Wednesday 27 November 2013

Felt Christmas Tree Decos

Yesterday I did a little workshop at Hobbycraft on Felt Christmas Decorations.  We had such fun putting them together and adding embellishments.

I might make some little kits up for these for next year, if I 'd have been on the ball I might have got them done for this year... but you know me!

Anyone for pudding?

S is for Sooz  :)

It's a bauble and the white stitch is supposed to be a reflective shine  :)

Creepy or cute?

Every Christmas tree needs a Christmas tree....

Can't leave the dog out  ;)

An all your round Xmas ornament.

And because it is not too Christmassy, I am going to pop the red folky heart into the Birthday Blog Blox!

If you have lost track of what is now in the box,  you can see each item on my Facebook page HERE.


Tuesday 26 November 2013

REVIEW - MyBoshi Hat Yarn & Pattern

Recently I received a package of yarns to review from DMC. I am slowly working through them, but this yarn excited me most. :)


I think it is because it is a yarn that you do something specific with - like make a hat.  Yeah, I know, you can make a hat with any yarn, but this one is a whole collection of everything you need to make your own designer hat.   You get patterns, yarns, hook and even a label to stick on when you are finished.  DMC kindly sent me three balls (see below) and a crochet booklet.

The yarn is 70% Acrylic and 30% Merino yarn.  It is soft, but it doesn't feel so soft as others - I have tried to find a good word to describe it and the only one I can come up with is 'fiberous'!  (actually, that was Hubsters word and I can't think of a better one)  However it lends itself perfectly to crocheting these hats.


Look at the gorgeous range of colours.


The booklet also have a very clear and concise step-by-step guide to learning to crochet, so ideal for beginners.


Ok, we will make this one I think :)


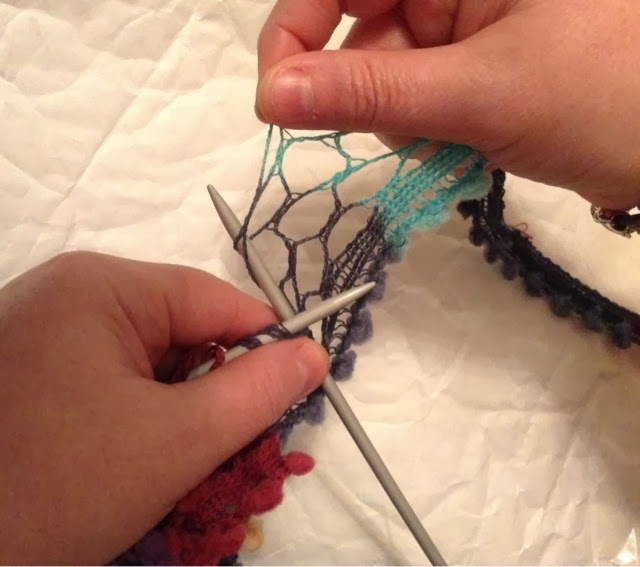
Now, the pattern states for you to do a colour change in the last SS  (slip stitch) of the row - personally, I don't like this as it throws the pattern formation out, can you see by the photo, it just doesn't look quite right.


So I used my own method of finishing off as usual but pulling the yarn through a stitch, only I pulled the whole ball through and left it attached, rather than cutting off and having to sew in loads of ends.  Looks a little better don't you think?


Makes a cute basket  :)


I made the large size, by accident I hasten to add as I couldn't quite work out how the instructions worked. It was a tad confusing as the colourscheme obviously got mixed up with sizes - anywhoooo I got there in the end.  It was a good job I made the large as the medium wouldn't have fitted at all, even the large was snug.

And, this, (below) was it finished apart from one final row.  It was just way too small, and when she moved it just popped off her head.


I added another two rows then the finishing row.  Much better, still very snug, but I could imagine it would be incredibly warm due to the thickness of the yarn.  It's the type of hat that would be perfect under a hood as it fits so neatly.


Personally I would have gone up a hook size, the pattern states to use 6mm, I would have used 6.5mm or even a 7mm.  I am quite tight on tension though so tend to use larger hooks where necessary.

The finished hat is cute, very warm, very thick, and took no time at all to make.   I am just sad I don't have a label to stick on it  :)  I might have to stick my Opus Moon tag on instead  :)


A few questions to myself then.
Did you like it?  I did actually, more than I expected to.  I liked the feel of the yarn and the finished product.  It is a little splitty, but not un-workably so, the bigger hook size I mentioned would aid in this matter.  It's so quick to work though, you can get a hat done easily in an evening - instant gratification.

Would you buy it?  Yes, it comes in at under £4.00 for a 50g ball, and I used about 75g in total on this hat - not a bad price.

Any bad points? None that I can think of about that yarn, but there are a few spelling errors in the pattern book and the pattern I used, although I worked it out in the end, might not be clear enough for a beginner.


Disclaimer:  I was sent this yarn (and others) by DMC to review, the points I make are wholly my own and I am not required or asked to give a good review, just an honest one.

Sunday 24 November 2013

Crochet along .... Mandala (4)

Are you still with me crocheting a Mandala?   If not, click HERE which will take you to the start and you can join in :)  If you have been joining in, this is where you should be at....


This pattern is written in UK Crochet terms, and today we will be using Chain Stitch (CH) Slip Stitch (SS) Double Crochet (DC) Treble Crochet (TR) Half Treble (HTR)  Triple Treble (TR TR).

So, off we go then.  Using the same yarn and hook  (4mm or 4.5mm and DK yarn) 
  • CH 4 and SS into a ring.
  • CH 3 then work 11 Treble Crochets into the ring  (12 in total) SS to join.
  • Break off yarn leaving a long enough tail for sewing later on.

  • Make another in a different colour.
  • Oh go on, make some more then - 12 of each colour  :)
  • Ok, now using that long tail you left, stitch the ring to your main piece.  Use three stitches right above the point of the petal as shown in the photo. 
  • Attach the other colour next to it in the same way, you should again use three stitches and you will have three unused stitches in-between.
  • Carry on, all the way round.  24 little discs.
  • Find the three stitches at the TOP of one of your little discs and attach a new colour to the first one, work 3 x DC's across the top 3 stitches.

  • CH 4, then work 3 x DC's across the top of the next disc. 


  • Repeat all the way round and SS to join.

  • Attach a new colour and CH 2, then using the HTR stitch work around working a HTR into each chain stitch, but when you come to the disc area work 1 x HTR / 2 x HTR / 1 x HTR into the 3 DC's across the disc.


(Forgot to take a photo of that finished round, but I am sure it looks ok  :)  )

  • Attach a new colour and this time CH 5.  We will now be working a TRIPLE TREBLE.  What you do is this..... wrap your yarn around your hook THREE times, go through your work and pull your yarn through  (5 stitches on hook).  **Wrap yarn around and pull through two stitches.  Repeat from ** another three times.  This gives you a nice tall stitch.

  • Continue all the way around and SS to join. 

 It will look a little frilly at the stage but do not worry  :)


And that's is where we end today, part 5 will be along shortly  :)


If you would like to have a go then it is not too late to join in, please find the previous stages here.


Remember, anyone who joins in with this crochet along and provides a photo at the end will be entered into a draw to win a lovely prize of a full set of coloured crochet hooks in a case just like this one...


What are you waiting for?  C'mon, have a go  :)