Sunday, 24 June 2012

Needle Felted Birds

I thought I would treat my Mum, Vera, to a class at Higham Hall.

Leafing through the booklet I spotted a Needle Felted Bird class, in conjunction with Woolfest, just a day class which was perfect as Mum doesn't like to leave Dad on his own too long. (She worries)

So at 8.00am Thursday morning we set of for Higham.

The class was being run by Sue Allan from Sewsister.  

Neither of us have ever done felting of any form before, so we were total newbies.  We walked into the room to find a couple of examples, and got immediately excited.  Not sure what we were expecting, but it wasn't quite this!


We started with two pieces of hand-made felt which we cut into a "segment" shape, sewed it around, (leaving a gap) then stuffed.


We then took lumps of "wool tops" and needle punched them into the felt in whatever pattern we chose.  I picked a load of wool tops in a pinky purple colour-way, and punched them in in stripes, adding squares of silver organza ribbon for patches of sparkle, and a twisted strip of blue for a curly wing effect.


Mum decided she was making a cockerel, so chose reds, oranges and browns for her colour-scheme.


Once the bodies were complete, we then went on to make felt beaks, and wired legs before the final assembly.


I have named mine "Burd", the Cockerel is called "Dennis".


We had a fantastic day, the tutor was wonderful and we were both chuffed to bits with our fantasy birds.
One classmate made this magnificent creature.


And a pic of everyones birds together.  What a colourful display.


I wasn't overly happy with the eyes on Burd though, I had taken a selection of beads and sequins with me but none of them seemed to fit.  So when I got home I took off the googly eyes he had and added a button with a bead on top, he seems to like them  :)


Burd now has pride of place on top of the TV.


Monday, 11 June 2012

My first marbles.

So, you all know I make beads right?  Glass beads that is, made in my workshop using a dual gas torch (propane and oxygen) and then popped into the kiln overnight.

So, yesterday, I fancied a glass session.

Kiln on, check / tanks on, check / glass chosen & washed, check / cup of tea, check.

I sit down to make some beads and........ no mandrels dipped!!!

Now, for those that do not know, the mandrel is a thin rod of steel (in my case, a cut down welding rod) dipped in bead release, which is a kind of clay slip.  This stops the glass sticking to the metal when you are wrapping the glass around to form the hole in the bead.

You can 'flame-dry' bead release, but 9 times out of 10, in my case, it cracks, so I much prefer it to be air-dried.

So, there I am, torch lit, glass in hand, no mandrels.  Bum.

The Hubster is beside me on his whopping great big man torch.  He doesn't make beads, he makes marbles, as beads are girly.  Basically though a marble is a bead with no hole, right?

"Make a marble", he says.

Make a marble?  Well, I suppose I could try, after all we are both booked in on a marble making class with Jan Ridgen-Clay at the end of the month, and I have NEVER even made the smallest marble.

This is Jan's website...

http://www.worldofmarbles.com.au/

So, I took some instruction from the Hubster (trust me, this rarely happens) and made my first marble.


Then I sent him away and made another  :)


This morning, the marbles were waiting for me on the bench.

The colours are rubbish, and the shape is rubbish, but they are recognisable as marbles I guess.

More practise needed I think :)


Oh, and if you are interested, the Hubster has just set up his own Marble Gallery Facebook page, you can find it here...
https://www.facebook.com/iMarblesUK

Sunday, 22 April 2012

Thursday, 5 April 2012

Not every experiment is successful.

You know when you get something in your head, and in your head it looks fantastic?  You can also work out in your head exactly how to make it work and what to use.  It happens to me, a lot.  Sometimes it works, sometimes it fails miserably :)

Yesterday, it failed miserably.

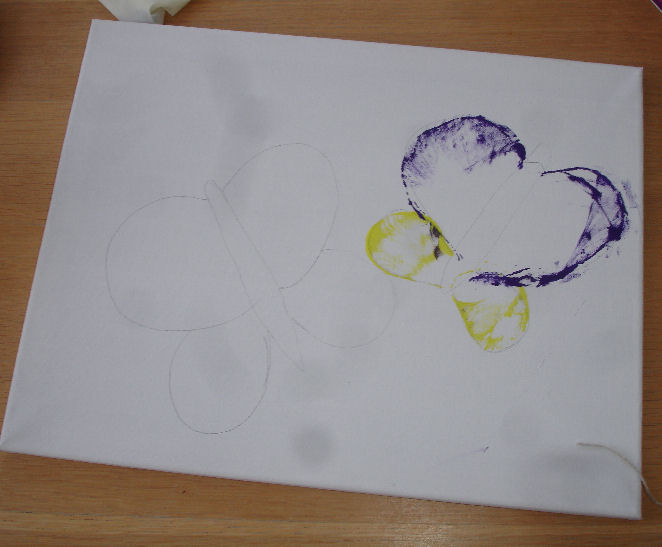
I decided for some really weird reason, that a string picture would look great.  You know those pictures you used to make in school with paint and string? Seeing it written down makes me think it wasn't such a great idea in the first place.

So, I got a pack of acrylic paints, and a ball of string, and a decent sized canvas.  Then I looked at it for about a week not quite knowing where to start.


So, yesterday, with my A Level art daughter Shona on board, we made a start.

I sketched a rough guide onto the canvas, cut up some string, then covered it in paint, layed it on the outlines, and pulled it off.


What a blooming disaster, we laughed so much at the mess, there was paint everywhere, all over our hands like we were 4 year olds.


The whole time my father, Lawrence, sat opposite shaking his head, tutting and laughing at the same time.


I decided not to proceed, as it was just a scribbly mess, so threw out the half mile of toilet roll, loads of paint covered paper plates and dribbled of painted string.

At this point Shona decided she could use the canvas and gave it a back wash in purple. If it is anything like her last one I bet it will be fabulous!  Watch this space.


Shona's last painted canvas. A blue strawberry with red lips for 'pips'.


Sunday, 4 March 2012

My New Coat

Wandering around charity shops looking for clothing and materials to use in my many projects, I can across a lovely coat.


What attracted me was the feel, it is so soft and snuggly, like a heavy dressing gown with lining.  In a lovely rich Charcoal shade of grey.  The material was a mix of Alpaca and Wool.

I looked in the label and it had two tags, "Made In Britain" which I though was quite unusual, and the name "Marilyn Moore".


I tried it on, put it back, then tried it on again.  Then had a fight with my conscience, would I regret going home without it?  I decided I would, so I bought it for Five shiny pounds.


I thought it might be vintage, as it seemed to be 1940's style and cut, and the "Made In Britain" tag looked like it might be old, so I Googled the name. Turns out it wasn't vintage, but very modern, made in 1940's style, and designer.  The best bit is Marilyn Moore's work sells for a lovely price, take this similar jacket at £499  :)  I think I got myself a bargain.

http://www.getmyfashion.com/item/1458/marilyn-moore

The thing that nearly put me off buying it was the buttons.


 I just didn't care for them at all, so I took the scissors to them an snipped them off.  I bought some red (plastic) shimmery ones and popped them on instead.


Then I found a sequinned butterfly, so I sewed that onto the collar.


So, my new coat  :)  I am sure I will get a lot of wear out of it.

Thursday, 1 March 2012

The Kit-Kat Project.

I got this from a friend many many moons ago, but was reminded of it just the other day during a forum discussion.  Of course the other forum members wanted to know what it was that you could do with a Kit-Kat and a brew, so I promised to write a tutorial  :)

So, first of all buy a 4 finger Kit-Kat (you only need one finger, or perhaps two, maybe three) but mistakes can happen ;)


As carefully as you can so not to snap the fingers, break them apart.  Now look down the sides and choose the one with the most chocolate down the edges, if you see too much wafer, then this will not work as the air gets through too quickly.


Nibble the chocolate off each end.


Make yourself a nice hot brew, to your own specifications  (we used a glass mug for photographic purposes,, any mug will do)


Dip the end of your Kit-Kat finger into the brew, count to 5........


........ then suck like mad!!


You will get a hot-chocolatey mouthful of brew!

After three or four good sucks, you need to just swallow up the chocolate as it is a bit warm and soggy by then.


Repeat as often as you like / can.


It also works with Twix, but you have to suck extra hard to melt the caramel  :)

Let me know if you try it.

***Thanks to Iain for being my model/guinea pig***

Wednesday, 22 February 2012

Glass Butterflies

I thought I would try out another tutorial.  Did a little google search and came up with these...

http://www.torchbugs.com/forums/showthread.php?t=6509

They looked easy enough so washed some glass, fired up the torch and sat down.

The first two I did with opaque bodies, this didn't blend well into the wings in my opinion, it made them just look "smudged", plus according to the tutorial you just melted the wings in, this seemed to leave them lumpy and uneven, so  I adapted and gave them a squish flat before separating into two wings.


After that I moved onto transparent glass for the bodies, this blended so much better into the wings.


By adding a sparkly czech crystal bead for a head and wiring up on a pin, it made a quick, yet effective, pendant.


I would have made loads more, but the oxygen ran out.  Waiting for delivery of a new tank now  :)

Monday, 20 February 2012

Tiger Beads

Each time I fire up my torch and go to my shed, I seem to produce similar beads. I seem to be stuck in a style rut and need to break it.

When I am at Higham Hall, teaching basic glass beadmaking, I always take four Lampworking books with me for the students to borrow, but I have to admit I have only ever flicked through them myself, so often the students will come to me with a page open saying how lovely a bead looks.

So, this time I brought the books home with me, and promised myself I would try out some of the tutorials.

The bead I fancied trying first was the Tiger bead from "Passing The Flame", by Corina Tettinger.


I made myself promise not to pick up any other glass, or frit, or tools, than the ones needed to make this particular bead.  I didn't even take my usual glass of wine with me !!

I pulled some stringers, made some twisties, dipped my mandrels and off I went.

I didn't have one of the glasses suggested - Dark Amber - so I made a few with 'Dark Topaz' and some more with 'Straw'  This was the only variation I made.

Of course this morning I was chomping at the bit to get to the kiln.  But when I did I was quite chuffed with the results.

Dark Topaz based beads.


Straw based beads.


And a Straw based focal bead.


Wonder what I shall try next.....

Monday, 6 February 2012

My Rag Rug Inspiration.

Isn't it funny where your inspiration comes from?  Sometimes it can be just spotting something in your day to day life, other times it can be a need of something you would like to own, and others it can be a memory.

The rug making I have been doing comes from a memory of long ago.

This is my dearly departed maternal Grandfather.  Nelson Llewellyn Bray.


I don't have many memories unfortunately as he died when I was about 12.  But I do remember he was an avid gardener and rain, hail or shine he could be found pottering in the garden or in his shed.  (His shed had the most wonderful earthy smell, a cross between old wood and rusty steel mixed with potting compost)

When he was indoors he always sat in a chair near the fireplace with his feet up on the wall.  When he drank his tea it was always poured into his saucer and slurped from there.  He never gave one single kiss when you said goodbye, it was a cluster of 4 or 5 - the cluster kiss was what I remember most.

Then there was the rug making.  Winter he would be sitting in the window of the bungalow he shared with my Gran and Uncle Bob with a piece of sacking on a frame.  He would happily sit and prod, and us Grandchildren would stand by his side and watch.  We would never get to cut the rags, or have a go at prodding, but we were happy to watch.

My Mother, Vera, remembers having to cut up the rags when she was young, and getting "rag-sick" from the dust.  Perhaps that's why we never got the job.

When I was about 8 years old I got presented with this...


The rug my Grandfather made especially for me.  All the Grandkids got one, all different.


Mine is now in the attic, carefully stored in clear plastic.  It was starting to fall apart and I couldn't bare to have to throw it away, so I decided to hide it away for safe-keeping.  It is around 36 years old now.

So, I am proud now to have resurrected this craft within my family.  Both myself and my Mother are now rug-making and enjoying it thoroughly.

My rugs so far...

The first one I made was made from lots and lots of recycled fabrics, I wanted to know how each fabric worked while being 'prodded'. I found wool blend was difficult as the prodder went right through the fabric, velvet was beautiful as it shimmered, t-shirt was the easiest to work with.


The next one was made entirely from t-shirts.  30 in total.  Makes a good bath mat  :)


And this one was made from the lovely shimmery velvet, it's so soft and luxurious, and a dream to tread upon.


I'm thinking Denim next.......  watch this space.