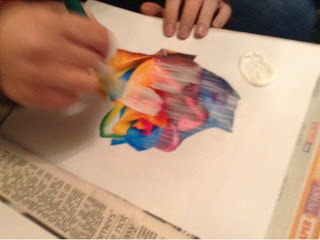
I got this "Dylon Image Maker" from Hobbycraft in order to make something for a display they have there.
I have never played with it before, but like anything new, I jump at the chance to have a go.
The challenge was to make a tote bag and a canvas, for Mother's Day gift ideas.
I found the images I wanted to use.... printed them out, as instructed.
This is the bumph from the Dylon website....
Simply take a photocopy, spread on some Image Maker, place the image pasted side down on the fabric and let it dry overnight. Then all you need to do is wet it, rub off the paper and apply a sealing coat and you’ll have something totally unique.
It doesn't actually say how much you have to put on, so I just gave it a good thick coat.
That should do the trick, don't you think?
Next you had to 'roll' it onto your surface, which worked ok with the bag, but not so well with the canvas, as the canvas was stretched and bounced about a bit.
And leave to dry overnight.
The next day you had to take a wet cloth, or sponge and work off the paper gently.
Now, this is where it becomes tricky - that paper surely did not want to come off!
At first, when I saw the image coming through, I was quite excited, but there was a lot of messy paper residue left behind which make it look very scruffy.
See?
Obviously, at this point, I am realising that perhaps I had spread the glue too far, it should maybe have only gone to the edge of the image.
Doesn't look great does it? I had such high hopes too.
The canvas had the same issues - more in fact. Because it was difficult to roll the image onto the canvas, there was air bubbles where some of the image had not stuck down properly, and again, nasty white paper residue around the edges.
Now a follower of my Facebook page has used this stuff many times, with success, so she was giving me some useful tips.
I persevered.
Then I took it up to Hobbycraft and let the colleagues work on it too :)
It still didn't look much better, although the paper was starting to come off after the 12th scrub! Having said that, it did take some of the image away too. So now we have a very vintage, old looking finish and not the crisp, sharp design I had in mind.
The canvas didn't get any better at all - there are only so many times you can scrub a canvas.
Not something I will be rushing to use again I am afraid.
Have you used it? Show me your success stories please, re-inspire me :)


If you can't make this look fabulous I don't think I'll bother.
ReplyDeleteHaha, thanks Sarah, but I do have failures from time to time :)
DeleteYou can do something similar by coating a piece of A4 paper with PVA glue and printing an image onto it from the computer, then wet the paper and it will leave the image behind. I managed this successfully on wood but haven't tried it on fabric. Hope this helps :)
ReplyDeleteThis was just for a display and not something I really wanted to venture in it, so I am happy to leave it as it is :) Images on wood though........ that does sound rather interesting. Do you have a link to a photo?
DeleteI'm so glad I've found your blog. I just tried using this stuff on wood and it is RUBBISH. Has just left plasticky goo like dried PVA glue and white surround and the image just rubs off even if you use loads of water and rub gently. Not impressed!
ReplyDeleteI am glad (in a way) that it's not just me then. But also sad your project didn't work :(
Delete