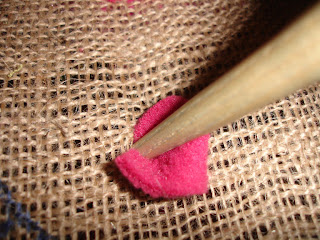
After showing photos of the progress of my Proddy Rag Rug, I was asked how they were made and could I show a step-by-step photo - so here they are.
First of all you need some hessian/sacking (try your local Indian restaurant for Basmati sacks, or places with wild birds for peanut sacks - failing that, eBay) and you need a prodder. This is simply a stick with a point.
I have my hessian on a frame for tension, but it's not necessary.
Next you need some rags, you may want to keep your rug in all the same material - such as t-shirt, or fleece, or wool. As this is my first rug I wanted to try lots of different materials to see how each one worked and how well it prodded into the sacking.
You need to cut your material into strips, my strips are around 2cm x 5cm, but you can have them longer or shorter as you wish.
Hem your hessian, then draw a design onto it and sew it onto your frame if you are using one.
Right, to make the rug. Shove your prodder through the hessian and wiggle it about to make a decent sized hole.
Don't be afraid, at first I was afraid of making the hole too large, but when you add the next strip you end up pushing the hole back in place.
Take a strip of material and push one end through the hole with your prodder. Grab it underneath with your other hand and pull it just under half the way through.
Make another hole about 1cm away.
Push the other end of the material through the new hole and again grab it from underneath. You should be able to feel and adjust them until they are equal length. Add your next strip into the same hole as the previous one ended, and continue across the hessian.
This is your working view as you work on the back.
This is the view from the front.
They all bunch together nicely the more you get in.
This is very addictive, but comes with warnings:
- Rug dust makes you cough.
- Keep your rags seperate from your washing pile (talking from experience here)
- Do not do housework, cook, taxi, work, answer phone or anything else while prodding :)


