Tuesday 26 April 2022

The Kaleidoscope Project - confetti disc

 As part of a uni assignment I am creating a type of kaleidoscope – the viewer will be made from mirrors and the discs will all be different using various forms of architectural glass techniques.

This disc is created to look like confetti

I cut a disc of glass from clear glass and laid it in the kiln where I then placed small pieces of paper thin blown glass shards all over it.


It then went into the kiln overnight to be fused together.

I think it looks quite interesting.


And it looks really pretty through the kaleidoscope.


Monday 25 April 2022

A puddle of circles

One of our lessons in Uni was on how to cut circles from glass.

The easy bit is actually cutting the circle, the harder bit is breaking it out from the rest of the glass…. So it’s good to get a bit or practise in.


I cut nine circles out in total, using three different colours and various different sizes.

Then I thought I might pop them in the kiln to fuse together and make an interesting wall hanging.

After being left overnight to fuse in the kiln, I was quite excited to open the lid and see what I had.

It’s maybe a little more ‘puddly’ than I would have chosen, I should have not fused it as high as I did in retrospect, but I still quite like it.


Sunday 24 April 2022

A really useless jug!

For some random reason I decided to make a useless jug.  

I wanted it to be a challenge to pick up due to a strangely shaped handle, and just in case someone fancied using it as a jug or a vase, I put holes all the way down the back to make it totally leak if water was added.

Why?  No idea.  Just a strange idea.

Anyway… I hand build it using rolled out slabs of clay.


I then painted it in a few coats of different coloured slips.

Can’t even remember what colours I used as I was just grabbing anything from the cupboard, so it will be a nice (or not) surprise when it comes out of the kiln.


I decided to do some random designs on it too with my Sgraffito carving tool.  I marked off some sections to begin…


… then lightly marked a pattern so I could go back and carve it properly once done.


Quite pleased with the outcome so far, it will look a little different once glazed and fired.


Saturday 23 April 2022

Making coloured slips for clay

 Today I spent most of the day making loads of coloured slips, for my Sgraffito work.

I had 7 different coloured stains, which I bought from Bath Potters.

I bought…

Azure / Black / Emerald / Coral / Violet / Honey / Sepia.


The first thing to do was to get my equipment together.  I needed a clean bucket, water jug, 120 gauge sieve, a bowl and a stick mixer.   You can use a wooden spoon but it’s a bit quicker with a mixer.


I weighed out 200g of ball clay powder, 200g of china clay powder, 20g of stain and roughly a litre of water.

I put all the powders (whilst wearing a mask of course) and the water into a large clean bucket.


Then I blitzed it with my stick blender until it was nice and smooth.


Once that was done it was time to run the coloured slip through a 120 gauge sieve, and into a clean bowl, to make sure there was absolutely no lumps left.


Lovely and smooth.  Ready for painting onto leather hard clay.

I then poured it into a lidded container and labelled it.   As slips can look a bit different to the powder colour once mixed.

Then I had to thoroughly clean every piece of equipment properly so not to cross contaminate the next mix.

Can’t wait to try these out now.


Friday 22 April 2022

A hot glass Graal collaboration

I arranged to do a collaboration with a fellow student, Brynn. 

This piece is created in three parts.


1: making a glass ‘embryo’

2: Carving a design

3: Blowing the embryo into a sculpture or vase


The Embryo is made from glass.  First a coloured piece which is then coated in clear before being rolled in a thick coating of frit.  Brynn did this part of the process/

This is then left to cool down in the annealer.


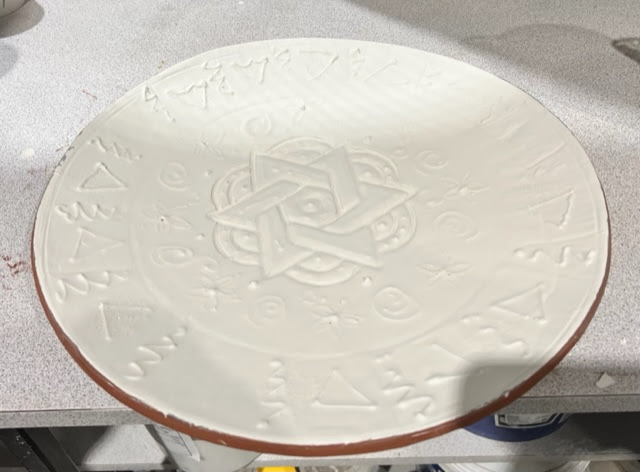
Next it was my job to create a design on the glass.

I covered it completely with a good strong masking tape, then draw an illusion pattern design on it, before cutting it out with a super sharp craft knife.  

This took ages!  Much longer than I anticipated  😊

It was then off to the sandblaster to take off the top layer of glass – the frit rolled part.  This would then show through the clear layer to the colour underneath.

If I thought the cutting took a long time then the sandblasting took forever!  I was soon clocking up the hours on this piece.


Then I handed the piece back to Brynn, who removed all the tape and put it in kiln to bring up to 550 degrees so he would be able to blow it.

Once at the correct temperature it was lifted out of the kiln and warmed up some more in the Glory Hole.

Then it was time to blow…….

Brynn decided this piece would be a sculpture.  He has a little cold working to do to make the bottom nice and smooth and so it stands up properly.


All in all, a good result.


Thursday 21 April 2022

Carving little dishes

 I was working towards making a tea set in a Moroccan style with little lemon dishes and a dish for a sugar cone.

The design I wanted to use was the one from the Ben Yusuf Madrasa  (A place of study) in Marrakesh.

I followed the instructions from Eric Broug’s book on Islamic Geometric Patterns and drew the design using a pair of compasses and a ruler.

I had previously made the little bowls and they had been dried to a leather hard state (not fired) and then coated with three coats of yellow coloured slip. 

(The colour comes out when the firing process is finished.)


I printed out the pattern in various different sizes and placed it into the prepared dish.  I then pin pricked the lines.


I then went in with my new Xiem carving tools and followed the lines to carve out the pattern.


It took a while, but it is quite a mindful and therapeutic process… so you get lost in it a little.

Using different parts of the design I made each one a little different.

Can’t wait to see these once they’ve been fired and glazed and refired.


Wednesday 20 April 2022

Mini Kiln Building

We were given a little challenge by our ceramic tutor to research and build a mini kiln – no bigger than 6” high.

I decided I would build something that resembled a hand-built wood fire kiln.

Using this photos taken from Google images, as inspiration.


I grabbed a lump of clay and some tools and got to work.

It was easy enough to build the bottom part, brick by brick, with a gap in the front to allow the air to fuel the fire.


I added some little clay ‘sticks’ as detail.


Next job was to make a little grate, that would sit on top of the brick kiln for the potter to sit on to be fired.


Then I made the top part of the kiln, where the posts would be housed for firing.  This was a round shape, which I made with little bricks again, sealing the inner walls with smooshed up clay.

I also made a lid and some little pots.

Unfortunately the grid snapped when drying, but it wasn’t going to be fired so all was ok  😊

I assembled and presented my little kiln and got awarded 8 out of 10.

Two marks off, as I didn’t put a hole in the lid, and I didn’t label it saying what type of kiln it was .

It’s an updraught one by the way!  😊


Sunday 10 April 2022

More Pate De Verre

 Last week I tried a little Pate De Verre – and I did admit it wasn’t my most favourite technique…. but today I found myself wanting to have another go.

First I made a couple of moulds.

The first dish was made using a wax cast from a silicon mould.

The second piece I wanted to be a cone shape to represent a Moroccan sugar cone, so I hand built a cone shape out of clay.


Once I had the wax and the clay I made a plaster mould around them. Using the recipe 1lb each of plaster and molochite to 1.5 pints of water.

Once the moulds were dry, I melted the wax out of one, and dug the clay out of the other.


Then I mixed frit glass with a mix of 50/50 glasstac and water into a thick paste.

I pressed this into the moulds, then packed them with a pre-fired plaster powder so the glass didn’t collapse back into the middle.

Then off to the kiln to be fired at 765 degrees for an hour.


Quite happy with the results of these…

A very untactile little dish and a white cone that actually does look like sugar!


Saturday 9 April 2022

Sgraffito dish - glazed

 A few weeks ago I took part in this collaboration - it was part of a tutorial to learn Sgrafitto.

I designed the middle part of the pattern using Sacred Geometry, then I carved it into the clay.

Other decoration was added by other students and some mark making too.


So, I was lucky enough to be allowed to keep it, as long as I glazed it and fired it – well, I was more than happy to do that!

I used a clear earthenware glaze, which was a little disconcerting as it turned the whole thing white!

Then off to the kiln it went to be fired at 1100 degrees.


The finished piece is fabulous!  I love the depth of colour that the stained slip gives, much better than experimenting with glazes I think.

I really enjoy this process and can see me taking it a lot further.


Friday 8 April 2022

Triaxial Blending

Today we did some Triaxial blending onto test tiles.

I really enjoyed this process – and as I am rubbish with numbers  (Dyscalculia) I created a little colour chart to help me along next time.


Working with my uni buddy Amanda, we chose some glaze recipes to make up and use.

We chose a white, a lilac and a green.


All mixed up and ready to go!


Next step was to get 21 different cups and number them.

Then we put the glazes in – 5 parts in each cup, according to the chart above.


The next thing was to pour it onto some prepared test tiles.

These tiles were terracotta, with a strip of white porcelain slip painted down the centre, textured and numbered.

This shows how the glaze looks on different clay bodies, along with how it pools into the textured grooves.


I poured one coat across half the tile, then another coat over half of that, so the tile would then show how different coats would look.

All 21 tiles complete, with an extra tile with an equal mix of all three glazes, and an extra tile with no glaze at all.


So, the finished tiles are not quite as exciting as I hoped, the green and the lilac don’t come through that well.   But that is the beauty of testing your glazes.

It does make a really interesting experiment though, and I am going to do it again soon with some stronger colours.