Recently I have been messing about with Gourds.
One of my uni projects was to embark on something I had not done before, and although I had fancied working with gourds, I had never actually got round to doing anything with the ones that I had ordered on a whim. So now it was time.
I did a little research and found painted gourds, drilled gourds, carved gourds. gourd lamps, gourd instruments, gourd bowls.... so many gourd ideas! So I thought I would try out a few before choosing which technique I liked best to use on my final uni project.
Before starting the gourds have to be cleaned, if you want to have a go at this yourself, do do some research into how to clean your gourds.
The first gourd I carved a hole in the bottom for a light source, then drilled, with many different sized holes. I learnt a lot drilling this gourd. I learnt that you needed to have a little hole for the drill to grip into to start otherwise it would bounce all over the place drilling random gorges in the gourds surface. I also learnt that if you do not apply enough pressure to the drill it will move about and make a bigger, messier hole! Another lesson was not to apply too much pressure as once the hole was done, the drill would slip forward and mark the surface of the gourd. So many learning curves :)
But I was quite pleased with the final outcome, I can position some of the messier holes at the back and no one would ever know :)
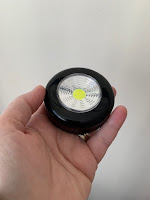
For a light source I bought these little push-lamps, they work really well with the gourd just sitting on top of one. But you can also heighten it by placing it on top of an upside down glass, or bean tin, inside the gourd to make the light hit more holes.
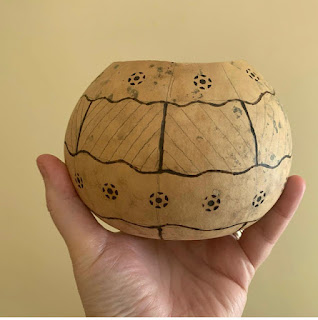
The next technique I tried was pyrography. I researched some more traditional gourd carving designs and tried to apply them to a small practise gourd.
For this project I decided to make a small bowl, so I sawed the top of a gourd and cleaned it out, ready to start,
This was fun, but quite smelly and smoky, and I had to wait a long time inbetween patterns for the iron to cool down enough to enable me to change the tip.
When I explored painting these gourds I considered acrylics, which I think would work really well, but I am not an artist and I prefer just to move colour about in a random way, so after a little research I decided to order some alcohol inks and a bottle of 99% alcohol to help spread the ink about.
I could just blob this ink onto the gourd, then add the alcohol to move it about and make pretty patterns. The one above was a small gourd, but I liked the effect so much that I decided to have a go on a larger gourd.


You manage to see the possibilities in anything. The pyrography patterns and the blending colours are gorgeous.
ReplyDelete