Saturday, 26 September 2009
Sunday, 20 September 2009
A Glut Of Gloves !
Having had no inspiration to bead for a little while, I took to knitting.
I am not a person who can just sit on the sofa, my hands always need to be busy, so I quite like Knitting, you can sit in front of the telly and mindlessly knit (as long as the pattern is simple of course).
These Gloves are incredibly easy to make (the pattern is in my blog somewhere if you want to have a go) and teamed with an extra large button (to help the wearer work out which way they go) they look quite funky too.
A girly night was planned last night, there are 6 of us that are a similar age, and meet up regularly to let our hair down, so I made them all a pair in "their" colours.
Saturday, 12 September 2009
Curly Wurly Crochet Scarf - The Pattern

A simple easy to make scarf, but it looks so groovy when finished that everyone will want one.
I made this in a gorgeous fluffy lemon and lime coloured wool.
So, all you need is your yarn - any weight yarn is ok up to Aran Weight. (amount depends on length and width of scarf) and a size 4.5mm crochet hook.
If you need to learn how to crochet have a look on You Tube, loads of stuff on there.
- First of all you will need a chain stitch. Make a long chain in simple chain stitch the length of how long you would like your scarf to be.
- Working back along the chain -Treble Crochet into each chain stitch. (PLEASE NOTE: in the USA the UK TC or Treble Crochet stitch is referred to as the DC or DOUBLE CROCHET stitch)
- ***The next row is 2 x Treble Crochet stitches into each of the stitches on the previous row. This increasing is what will make your scarf curl.
- Repeat from *** for each row until your scarf is as wide as you would like it to be. Tie off.
Sunday, 6 September 2009
Chunky Wrist Warmers - The Pattern
After a good few lovely comments on my last pair of chunky wristwarmers I was asked how they were made, so here, for you all to enjoy, is the simple, easy pattern so you can make your own.
You will need:
100g Chunky Wool (I like the random colourways, but any is fine)
- 2 Large Complimenting Buttons.
- Size 5.5mm Knitting Needles.
- Large Sewing (Tapestry) Needle.
1st ROW: *Knit 2, Purl 2, Repeat from * to end.
2nd ROW: **Purl 2, Knit 2, Repeat from ** to end.
Continue these two row until your work measures 7".
Cast off, and leave a length of wool for sewing.
Decide which is your top and bottom, then sew the two edges together from the top, for 1.5". Sew in your wool, and re-attach it at the bottom of your work. Sew the sides together for 3.5" work, which will leave a thumb-hole of 2". Sew in your ends.
Attach the button so it sits on the back of your wrist.
*****If you need to make these wrist-warmers smaller or larger, either add on or remove 4 stitches from the cast-on amount.
Enjoy !
And in true Blue Peter fashion, here are some I made earlier :)

Wednesday, 2 September 2009
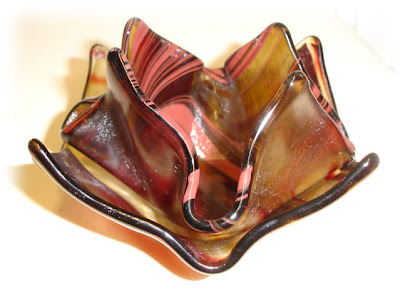
Hanky Bowls
Made a couple of Hanky Bowls last night.

First you fuse the glass to melt down the sharp edges, then you have to find something interesting to slump the glass over, something that will not melt, like Stainless Steel, or Terracotta.
I had two cocktail shakers and a bowl, so put a pink one in and two brown ones, as it happens when they were done the brown ones went together quite nicely, which was a bit weird as only the evening before (whilst these were "cooking") a friend showed me a photo of something very similar - thanks Kellie :)
Subscribe to:
Comments (Atom)


