Showing posts with label crochet. Show all posts

Monday, 10 May 2021

Working on a brand new Blanket Course.

 If you follow me on Instagram you will have seen that I have been busy with this cheeky little blanket. (as yet, still unfinished).


I wanted to create a Granny Square blanket.. but with a twist. So each square has something different going on.

This is going to be a course - probably about 14 weeks long I reckon, covering 10 different squares along with joining, edgings and borders. I would say 'Advanced' level, but for those wanting to try a little bit different.

Now, I know I will get asked for the pattern - and I always feel bad saying no.... the reason is this. I am not confident that my patterns will stand alone. I am a teacher not a pattern writer. My patterns are always written to be a REMINDER of what you learn in class.

I fear if I sell the pattern I will always be answering emails asking 'what does this mean?' and 'how do you do this bit?' .... and this is exactly why I offer my designs up as a course. I know I can spend the time explaining each part separately via video then, and be on hand to answer any questions after that via WhatsApp.

I try to price my courses at around £3.50 per session (which is a weekly update), which I think is pretty good value considering the time it takes me to put it together.

  • First I make the blanket. As I create each part I scribble down (in really bad shorthand) the pattern. Then I remake each piece to write down the pattern correctly.
  • Next I make it again but this time with the video camera on, explaining the steps as I go.
  • Then I edit all the swear words out.
  • Next I re-watch the video while making the piece again, to check the video works correctly.
  • The next step is to again watch the video while typing the pattern up in full so they both correlate with each other.
  • After that I add parts into the written pattern like colourways and little tricks.
  • Then I save it as a PDF so I can send it easier.
  • Next I upload the video to YouTube so I have a link to share with the course members.
  • A video is made separately for every part of the pattern, and for joining, edging , borders and anything else that might be needed. Patterns are written to match them all.
  • After that, I make the whole thing again, from scratch (usually in another colour) to check that it really does work.
  • THEN... I release it as a course. :)

Just thought you might be interested in the process and why it sometimes seems that I have disappeared - I have not, I am usually just working hard in the background.
And also why I feel my courses are good value for money. :)


Anyway, this particular course should be ready to go in the next couple of weeks. Shout back at me if you fancy it :)

Thursday, 22 April 2021

Crochy The Crochet Caterpillar.

 If you live in the UK I cannot imagine that you have missed all the kerfuffle about some supermarket Caterpillar cakes.


I say we should embrace ALL of the caterpillars, so I have made a cuddly one that you can keep forever.  He won't melt, go mouldy, make the kids sick..... he's just completely huggable.

I used Stylecraft Special DK yarn in Dark Brown, with scraps of cream for the face and feet, and tiny scraps of whatever colours for the sweeties on the top.

You can stuff him with regular toy stuffing, but I used some wadding that came in one of those monthly food boxes, I rolled it into a tight roll and it worked well.


So, here is the pattern for you.   Enjoy  :)

Stitches explained:

Chain Stitch (CH)- Yarn around hook (from the back) and pull the new yarn through the loop on your hook.  This is ONE chain.  Repeat as needed.

Double Crochet (DC) Put hook through work and draw yarn back through (2 loops on hook) yarn around hook, draw through 2 loops on hook.

Half Treble Crochet (HTR) Yarn around hook (from the back) put hook through work and draw yarn back through (3 loops on hook) yarn around hook, draw through 3 loops on hook.

Treble Crochet (TR)- Yarn around hook (from the back) put hook through work and draw yarn back through (3 loops on hook) yarn around hook, draw through 2 loops on hook, yarn around hook, draw through 2 loops on hook.

Double Treble Crochet (DTR)- Yarn around hook twice (from the back) put hook through work and draw yarn back through (4 loops on hook) yarn around hook, draw through 2 loops on hook (3 times).

Slip Stitch (SS)- Put hook through work and pull yarn through both work and stitch on your hoo


Special Stitches explained:

Front Post Double Crochet (DC) Put hook around the stitch, bringing the hook back to the front and finish the DC as normal.


BODY  (Brown)

Round 1. 6 DC into a Magic Ring.   OR…. CH 2, then work 6 x DC's into the 2nd CH from your hook. (6 st)   Pull up a length of scrap yarn into the last stitch (to use as a stitch marker)

Round 2. Work 2 x DC's into EACH of the 6 stitches  (12 st)  Pull the scrap yarn up through the last stitch.  DO THIS AT THE END OF EVERY ROW TO MARK YOUR PLACE.

Round 3. (DC 1 into next stitch, 2 x DC's into the next) Repeat all the way around (18 st) 

Round 4. (DC 1 into next 2 stitches, 2 x DC's into the next) Repeat all the way around (24 st)

Round 5. (DC 1 into next 3 stitches, 2 x DC's into the next) Repeat all the way around (30 st)

Round 6. (DC 1 into next 4 stitches, 2 x DC's into the next) Repeat all the way around (36 st)

Round 7. (DC 1 into next 5 stitches, 2 x DC's into the next) Repeat all the way around (42 st)

Round 8. (DC 1 into next 6 stitches, 2 x DC's into the next) Repeat all the way around (48 st)

Round 9. (DC 1 into next 7 stitches, 2 x DC's into the next) Repeat all the way around (56 st)

Round 10. Working into the BACK LOOPS of the stitch only, DC into every stitch. (56 st)

Round 11-15. For 5 more rows - working into the FULL STITCH, DC into every stitch. (56 st)

Round 16-19. For 4 rows – Work a DC front post stitch  (56 st)

Round 20-25. For 6 rows – (back to working a regular DC) DC into every stitch. (56 st)

Round 26-29. For 4 rows – Work a DC front post stitch  (56 st)

Round 30-35. For 6 rows – (back to working a regular DC) DC into every stitch. (56 st)

Round 36-39. For 4 rows – Work a DC front post stitch  (56 st)

Round 40-45. For 6 rows – (back to working a regular DC) DC into every stitch. (56 st)

Round 46-49. For 4 rows – Work a DC front post stitch  (56 st)

Round 50-55. For 6 rows – (back to working a regular DC) DC into every stitch. (56 st)

Round 56-59. For 4 rows – Work a DC front post stitch  (56 st)

Round 60-65. For 6 rows – (back to working a regular DC) DC into every stitch. (56 st)

SS into the next stitch, end yarn leaving a long tail for sewing up, remove marker.


BUM END  (Brown)

Work Rounds 1-9 from the body, (56 st) SS into the next stitch and end yarn.


FACE  (Cream)

Work Rounds 1-8 from the body, (48 st) ... carry on straight away from this stitch to shape the ears..

Ch 1,  (TR, DTR, TR, HTR) in the next stitch, DC in next, SS in next 3, DC in next, (HTR, TR, DTR, TR, HTR) in next, DC in next, SS in next and end yarn.  Leave a long tail for sewing.


EYES  (Brown – make 2)

Work Rounds 1-2 from the body, (12 st) SS into the next stitch and end yarn.  Leave a long tail for sewing.


TONGUE  (Pink)

Round 1. (DC, TR, HTR, DTR, TR, HTR, DC)  into a Magic Ring.   OR…. CH 2, then work (DC, TR, HTR, DTR, TR, HTR, DC)   into the 2nd CH from your hook. (7 st)   SS into the first stitch, end yarn. Leave a tail for sewing.


SWEETIES  (Mixed colours – make 10)

Round 1. 8 HTR into a Magic Ring.   OR…. CH 2, then work 8 x HTR's into the 2nd CH from your hook. (8 st)    )   SS into the first stitch, end yarn. Leave a tail for sewing.


FEET  (Cream – make 6)

Row 1. CH 5, DC into the  3rd CH from the hook, DC 2 (4 st) TURN

Row 2-4. For 3 rows  - CH 1, DC 4 (4 st) TURN

Row 5. CH 4, DC into the 3rd CH from the hook, DC into the next st, then DC 4 across the main piece (7 st) TURN

Row 6-8. For 3 rows  - CH 1, DC 7 (7 st) TURN


ASSEMBLY

Stuff your tube, then using the BACK LOOPS only sew your Bum End in place at the bottom of the tube.

Sew your eye and tongue onto the face, then sew the face onto the end of your tube.

Position the feet so that they touch the surface, then sew them in place, three on each side.

Sew the sweeties on as shown in the photo.


I hope you have enjoyed making this caterpillar...I am not on anyone's side in this debate and I think all Caterpillars should just learn to get along and live with each other  :)

Send me a photo if you make one, would love to see it  :)


Tuesday, 2 February 2021

A teeny weeny crochet blanket.


My mini shed project would never been complete without a little bit of my speciality in there – Crochet!

Working on a 1:6 scale I ordered some funky 2ply crochet thread (sadly I didn’t have any of this laying about in my stash) and dug out my small 2.00mm crochet hook and got to work.


I decided to make a traditional Granny Square blanket.   It doesn’t matter how far your crochet journey goes in respect of difficulty, most people will always return to a Granny Square at some point.


I made sure I used all of the colours to make it as bright and colourful as I possibly could.  Then laid it out to plan the finished piece.


To join I used the ‘join as you go’ method, favouring this because you don’t have to thread a needle and sew all the edges together. It’s a quick but effective way of joining.


I finished it off with a couple of rows or a plain stitch to edge it.


The finished measurement is 17cm x 21cm which is a perfect size for my mini shed.

This took about 4 hours to make.


Monday, 27 April 2020

How to make a crochet wreath cover.

Hello Crafters,

I hope you are finding loads of projects to do during this lockdown period - although of course you might be a keyworker and working lots of hours, for that I praise and thank you.

I have been digging out lots of projects and finishing them off - and that makes me feel rather pleased with myself, let me tell you!!

But one evening, when I had finished the latest "Work In Progress" I had an hour or so before bedtime, but couldn't be bothered to find a new project, so I grabbed the rainbow yarn I was working with and started to crochet a cover for a styrofoam wreath.

People often seem surprised when I show them how to do these covers, they think there must be a lot of shaping involved when in fact there is none at all!

So, I have put it all in a video for you - all you need to do is a Double Crochet  (UK terms), it really is that simple.

Then once you have the cover done, you can decorate it in any way you like... bubbles, flowers, hangy things in the middle - the choice is yours!

Have a look at my video below and you should be able to make your own straight away.  I have added some photos below of my wreaths which you can use as inspiration.

Have fun!!


Tuesday, 16 January 2018

Crochet Chevron Baby Hat

Following on from my Chevron Cushion post a few days ago, whilst in the process of making the cushions I suddenly realised with a little bit of tweaking it would make a super cute hat for a toddler.

So, grabbing some leftover yarn I had laying about  (as we all do), I started work.  I did have to undo and redo a few times to get the size and stitch count right, but that's what designing is all about.

Eventually I ended up with the cutest little elf style hat.


I added a pompom and turned the points up, adding some fabulous little Dolly buttons to the peaks.


I am working on another right now for an adult head - I can tell you it's going to be such a fun hat!  Watch this space.

Monday, 1 January 2018

2018 Temperature Blanket project.

Have you heard of the Temperature Blanket project?

Well, quite simply it is a row of crochet (or knitting, if you prefer) each day, matching the colour of the yarn to what the temperature is that day.

If you Google 'Temperature Blanket' you will come up with load of ideas and patterns, but if you would like to join in with mine then please feel free   :)

I have set up a Facebook group so we can all share our progress as we go along - you can find it HERE, just click the JOIN button.

So, we are going to make this one in 8 colours - it is impossible to know just how much you will use of each as each day might be different, so one ball of each is a good place to start, buying more as you might need it.

I chose to do mine in Stylecraft Special DK, which is a gorgeous soft acrylic yarn in delicious colours.  These are....Matador, Tomato, Grass Green, Lime, Aspen, Petrol, Emperor and Magenta.


I have devised my own temperature chart to go with these colours, basing it on the UK weather system.  Hopefully at some point we will get to use all the colours.

A little bit about my design idea then....... some people quite fancy the idea of doing a blanket, but if you do a row a day, you are looking at a 356 row blanket, which if you are using Trebles is going to be rather large.  Large is ok if you want large of course, but it's also quite a commitment in time, so my plan is to work four separate pieces and join them at the end.  It means that we will work for 364 days as it's dividable by four  :)

We shall call them "Quarters".  We will need to 'borrow' days from other quarters to make the pattern fit, but I will remind you of that as we progress - so don't worry about it now.

Jan / Feb / Mar (90 days)  (Quarter 1 - Lowest Temp)
Apr / May / Jun (91 days)  (Quarter 2 - Highest Temp )
Jul / Aug / Sep (92 days)  (Quarter 3 - Highest Temp)
Oct / Nov / Dec (92 days  (Quarter 4 - Lowest Temp)

So, how to check your temps.  To get the most out of each colour, I suggest taking either a low or high temp reading for each quarter as shown above.  If you were to pop over to the Met Office Website and put in your area, you will get both a low and high reading for that day.  (or you can use any weather apps you might have on your phone.)


And here are the colour rules..... so, as you can see from above, the temp for Carlisle today was a low of 3 degrees and a high of 8 degrees.  As we will be working on Quarter no:1 we will use the LOW number.

3 degrees on the colour chart means you would use PETROL for this particular day.


If you find you do not have time one day to do your row, DON'T PANIC, just jot down the temp for that day and play catch up when you do have time.

The pattern!   Finally, we have come to the part where the pattern is revealed.  As promised, it is a very easy pattern, basically just stripes, but every Sunday we shall pop a different row of stitches in so you can see your weeks work build up, I think that would be quite nice.

So.... shall we begin?

I choose to use a 4mm crochet hook, it is my hook of choice for DK yarn, but you may wish to use a 4.5mm or a 3.5mm - whatever you are most comfortable with.

We will be using the HTR stitch, which works like this......  Yarn round hook, insert hook into stitch, pull yarn back (3 loops on hook). Yarn round and draw through all three loops.

FOUNDATION ROW:

Chain 93, work a HTR into the 3rd chain from the hook and HTR into each chain following.  (91 stitches)  Leave yarn attached just in case tomorrow is the same colour  :)


FOLLOWING ROWS:  (not Sunday)

Ch 2, HTR into the BACK loop only of each stitch.

If you are not familiar with using the back loop of the stitch, let me show you where it is.
When you put your hook through your stitch you usually get two strands of yarn above your hook (ignore the one already on there)


We will just be using the back loop of each stitch, the one marked by the green thread.  It gives a lovely ridged finish to the work.


Do a stitch count every so often to make sure you keep to the 91 stitches, otherwise you will end up with a triangle  :)

Tomorrow, I will show you how to join a new yarn colour.

I will pop back in a few days with Sunday's row.

Happy hooking!!

Sunday, 30 July 2017

Caron Cake Cardigan

I succumbed and bought some Caron Cakes yarn when they came into stock in Hobbycraft in Carlisle.

I bought the shades Rainbow Sherbet, Mixed Berry and Lilac Frosting.


I think it is always difficult to know what to do with a colour change yarn until you can actually see how the colours change.  I could see that this one was going to be quite 'blocky' so I thought I might do little colourful cardigan jackets for my Granddaughters.

I knew roughly what design I wanted so have a browse through Ravelry for a pattern.   I found this one..


You can find it here..
http://www.ravelry.com/patterns/library/sweet-baby-hoodie

I decided to use the Rainbow Sherbet one first and got to work.
I got all the pieces done, some colours lasted the full piece, while others changed within.  The photo looks awful in this one, the 'orange' is really mustard, and the 'mustard' colour is more of a pea-green.


I decided to join all the seams with a visual join, making it part of the design and adding a touch more colour. Just the buttons to add now, trying to decide between pink pawprint buttons or daisies  :)


I am going to make another, but this time I think I will re-write the pattern so I make the back and front in one piece, therefore spreading the colour a little more evenly.

Tuesday, 16 May 2017

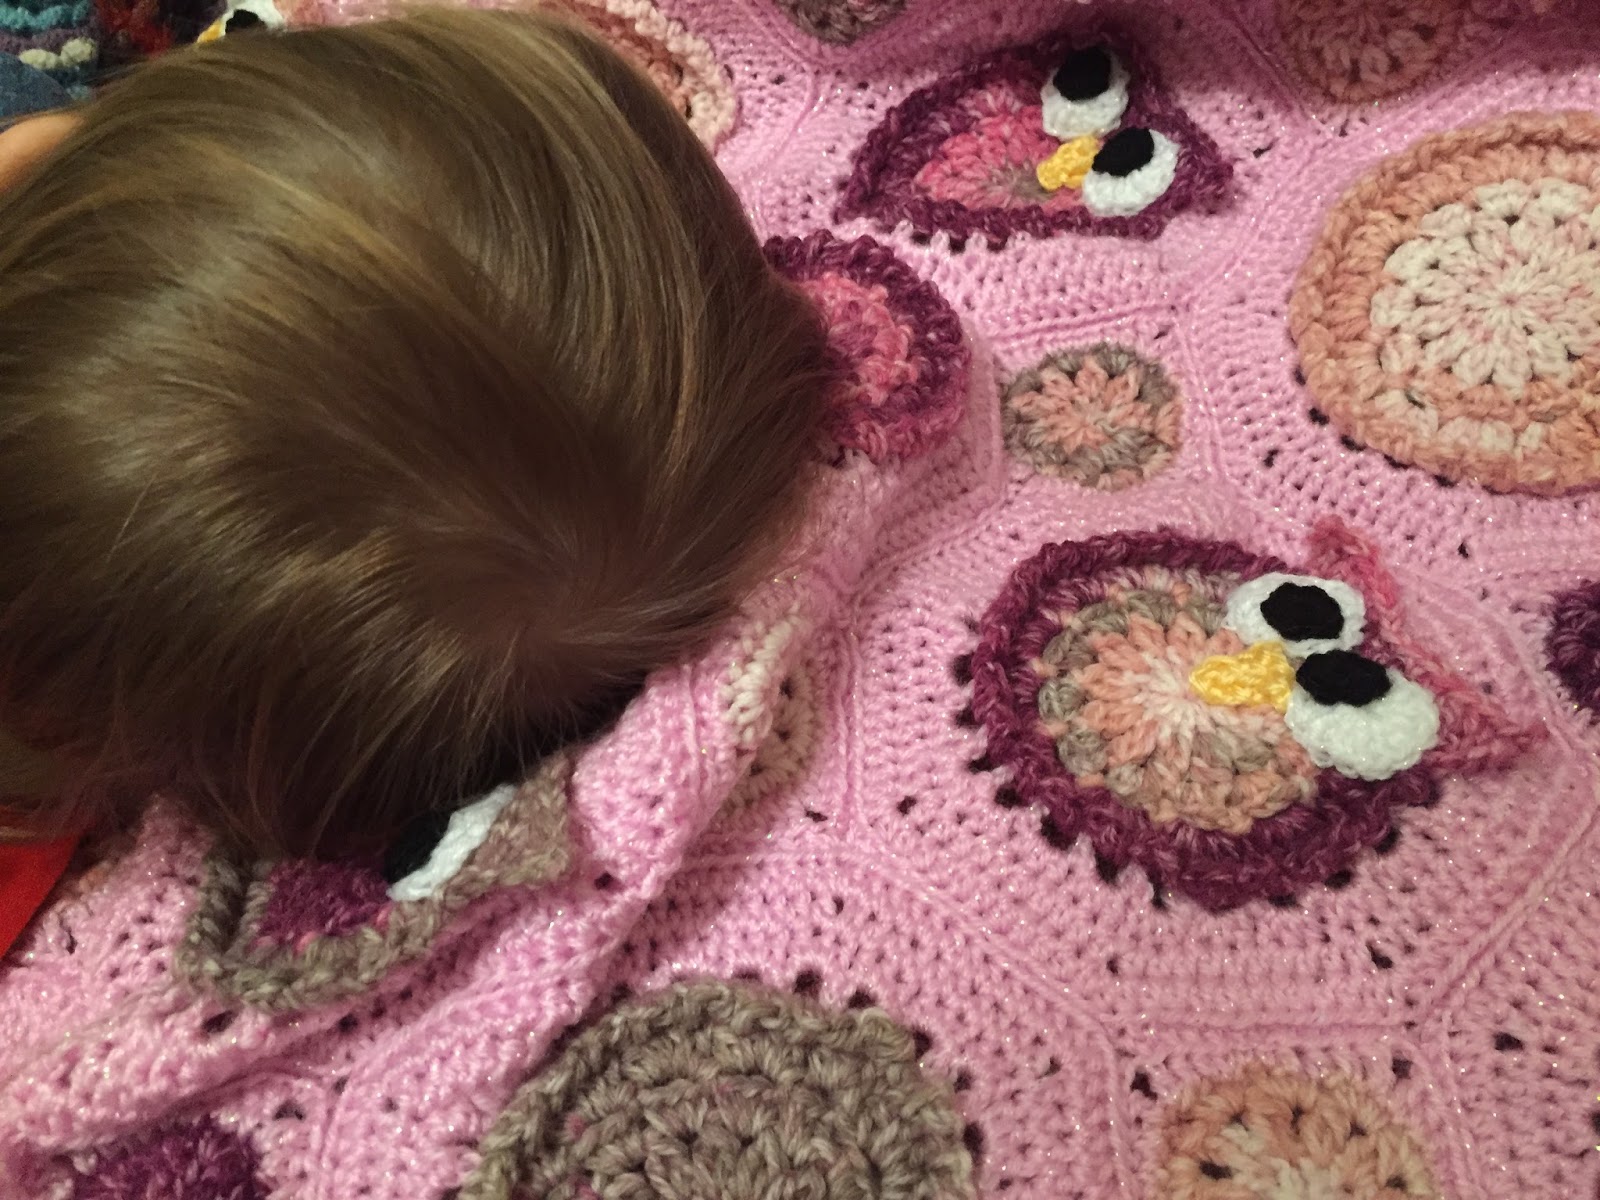
Owl Obsession Crochet Blanket

I don't think I ever showed you my second Owl Obsession blanket. I made it a wee while ago now when Granddaughter Hope was going into a big girl's bed and needed a bigger blanket.

I used the James C Brett Woodlander yarn in shade L8.


I edged them with a sparkly glittery pale pink yarn.


Lots of little owls appearing.


And more... they breed quickly!


I mentioned it was the second one of these I made, the first one I made for a colleague who was leaving work to have a baby.  I did that one in a Rainbow Glitz yarn edged with white.


This new one was a set of owls wider and a set of owls longer, perfect size for a toddler bed.


And the toddler seems to approve  :)


Wednesday, 26 April 2017

Crochet waistband Tutu

I made the cutest Tutu for Grandbaby no: 1


What is is about Tutu's that make them incredibly cute.  I wish I could wear one, but I would look a wee bit odd, at my time of life!  Think, Mavis.


Anyhoo, this one is pink, frilly and perfect for a little girl who is just starting dancing lessons.


So, I crochet the waistband in a pink DMC Natura Cotton with a 3mm hook, I crocheted it over a band of thick elastic for sturdyness.


Then added a picot fan edging to make it look pretty.


The Tulle is added to the loops created, I only added two layers of Tulle, but I did enough loops for a third layer, so if she ever wants the Tutu "puffier" I can add the third layer easily.


It fit beautifully, and will look super cute on the dancefloor, don't you think?


I lent it to Hobbycraft, Carlisle for their display, looks quite good like this!

If you would like a copy of the tutorial, please email me and I will send you one through FREE of charge  :)