Showing posts with label decopatch. Show all posts

Tuesday, 9 February 2021

A 'Napkin Decoupaged' mini table.


The last largish thing I planned to build for the mini shed was a table.  Having already made a smaller mosaic table, I needed a larger table to go with the bench.  Somewhere where mini people could work 😊

I am a bit more confident with my woodworking skills now so I thought this would be a piece of cake.

I cut up some dowel for legs and found a square bit of wood in the scrap box – perfect!  The scale worked well with my mini bench.


Having learnt from working on previous parts of the mini shed, it is beneficial to drill a small hole first for your screw to grip onto. So I drilled into the top of the leg and through the table top.

But, then I thought about how the screw would be sticking out of the top of the table. How could I sink it?   It’s called ‘countersinking’ I have since found out with the aid of Google.  So with a larger drill bit I drilled a slightly larger hole, just a couple of millimetres down, so that the screw head would be below the top of the table.

Then I screwed the legs onto the table.  Not hugely straight mind you, but at least there was no wobble.

Now I had to deal with the holes on the top of the table so I could have a nice smooth surface.  I didn’t have any wood filler so I used a blob of wood glue. It worked quite well luckily.

The next step was to smarten it up a bit. I decided to do some Napkin Decoupage on the top, but first I would need a coat of paint.  I used a basic white acrylic to give it an undercoat.


Then I painted the underside of the table and the legs in a couple of coats of metallic brown acrylic, to match the mini bench I had just finished.

Once that was all dry I could add the napkin to the table top.

Napkin Decoupage is a lovely craft, and you can put your napkin onto all sorts of things like glass bottles and slate coasters.  First of all you have to separate the napkin plys – these are the layers of paper within the napkin. There are usually three, occasionally four.  You need only to use one single ply with the pattern on.


Having separated the plys, I then coated the table top with Mod Podge – this is a glue brand with a good formula that works really well with napkin decoupage, but PVA glue can work just as well.

Once coated I then laid the singly ply napkin down on the top and with a piece of cling film wrapped around my finger I smoothed out all of the wrinkles.   Stupidly I pressed too hard at this stage (you do have to be quite gentle) and took some of the napkin back off, so I had to strip it back off.  I was very annoyed with myself for being so careless.  The now took me back a couple of steps as I then had to repaint the table top!


The second attempt went much better as I was extra careful with my smoothing out.  Once the napkin was in place I gave it another coat of Mod Podge and left it to try before trimming the excess napkin away.


And that is my little table finished.  The top is very scuff proof thanks to the Mod Podge top coat and I think it looks rather good(even if it does have a wonky leg!!)


This mini table took me around two hours to make in total, not including drying time.  so my whole mini shed project is now up to 44 hours in total.

If you would like to have a go at Napkin Decoupage, then have a look at my YouTube Tutorial on how to do a flat slate HERE or a bottle HERE.


Saturday, 11 June 2016

Decopatching an old school chair

I managed to lay my hands on a few of these fabulous old school chairs.  Do you remember them from your days at school?  I certainly do!  I recently wrote about running a decoupage workshop with them, so I thought I should show you the sample chair that I made before the workshop went ahead.


These are the paper I chose, one for the frame and legs, one for the seat and one for the back.


With the TV remote and a glass or two of wine, I got to work.  Blue on the legs...


Butterflies on the back...


But, oh no!  I had run out of blue paper, and would you believe it?  I was a discontinued pattern - I couldn't get any more!!

So, a change of plan was needed.   And something dark enough to cover over the blue.  Red.  Roses.  Yep, that will do nicely.


I finished the seat pad off with a gorgeous multi-floral, and it was done.


Rather pleased with it, even if I do say so myself.


Now, where can I find to put it?

Monday, 6 June 2016

Decoupaging old School Chairs

I had managed to  get my hands on a few very old wooden school chairs. In not bad condition too.  

But what could I do with them?   I buy these things without a plan, and have to think of the plan later.

Aha!  I could run a decoupage workshop with them.

And that is exactly what I did.


Some lovely ladies joined me and got to work with some sandpaper at first, scrubbing the varnish off the chairs to give it a rough edge for the paper to stick.  

Just look at that wee baby enjoying the movement at Mummy scrubbed the chair!  (she was picked up by Dad soon after, before the messy play started).


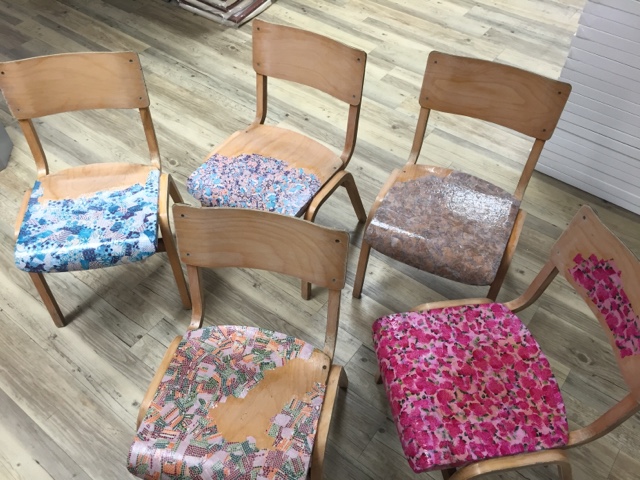
Each lady picked a completely different colour scheme, some went for pastels, some for vintage, some for brights and bolds.   I wished I had picked all of them as they all worked up really nicely.


The workshop was just two hours, and of course you can't decoupage a whole chair in two hours, but they made a good start on the seats, then took home the skills and materials to complete the chair in their own time.


Just how fabulous are these?  I think the pink is my fav... no wait, the blue.... no wait, maybe the....... agghh, I just cannot choose!


And a close up so you can see just how nicely the papers worked.


I cannot wait to see these chairs finished, and if you are reading ladies, please do not forget to send me photos.


Tuesday, 26 April 2016

A rather posh lady with a fascinator

At Hobbycraft in Carlisle they like to inspire their customers with finished projects dotted around the store.  I had the chance of messing about with a styrofoam head to make it look interesting.  Well of course, I have to be dragged kicking and screaming into any crafty project, but, you know, I thought I would help them out.  (in other words, I grabbed the head and ran with it before they could change their mind!)


So, I gathered supplies.  The head, of course, and a couple of nice decopatch papers to compliment each other.  A fascinator base and some ribbons along with some beads on a length.


I covered half the head with one decopatch paper design.


And the other half with the other, trying my hardest to keep a straight line down the middle of the face.


Then it was time for the fascinator.  No feathers in this fascinator, I hate the blooming things!!


I started by attaching the thickest ribbon with a couple of stitches, then looped it randomly around securing it with a few stitches as I went.


I quite like the effect, but of course, it needed more than that.


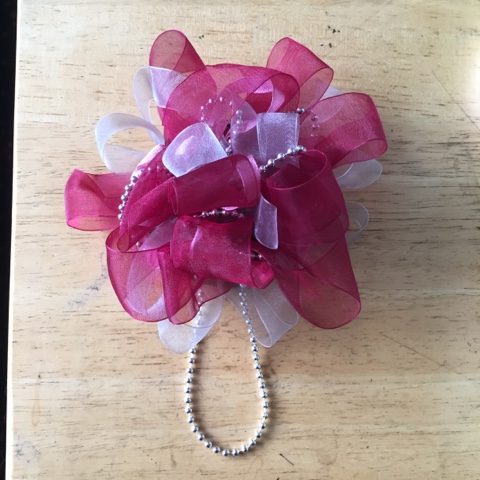
I added a second ribbon in this same way, and then a third  (It's hard to see from the photo but the second and third are pale pink and silver)


Time for the length of beads, added in exactly the same way, but then I decided to add a dangle bit, as you do.


I hot glued it to the side of her head - don't worry, she didn't feel a thing.


Now she is all ready to go on display above the styrofoam section in Carlisle Hobbycraft.  Pop in and see her if you like  :)


Wednesday, 10 June 2015

Candle Lantern Jars

I like messing about with empty jars, seeing what I can do with them, as it seems such a shame to throw them out.  (I know they get recycled, but still...)

Remember the kid's craft animal jars that I did for the Hobbycraft blog last week?  Well, these are for adults as they look quite good with a tea-light candle in once the lights are down low.


To find the tutorial on how to make some for yourself, visit my blog post featured on the Hobbycraft blog .....


Let me know if you make some, would love to see photos.