Showing posts with label pimp it up. Show all posts

Saturday, 11 June 2016

Decopatching an old school chair

I managed to lay my hands on a few of these fabulous old school chairs.  Do you remember them from your days at school?  I certainly do!  I recently wrote about running a decoupage workshop with them, so I thought I should show you the sample chair that I made before the workshop went ahead.


These are the paper I chose, one for the frame and legs, one for the seat and one for the back.


With the TV remote and a glass or two of wine, I got to work.  Blue on the legs...


Butterflies on the back...


But, oh no!  I had run out of blue paper, and would you believe it?  I was a discontinued pattern - I couldn't get any more!!

So, a change of plan was needed.   And something dark enough to cover over the blue.  Red.  Roses.  Yep, that will do nicely.


I finished the seat pad off with a gorgeous multi-floral, and it was done.


Rather pleased with it, even if I do say so myself.


Now, where can I find to put it?

Thursday, 9 June 2016

Vintage sewing box

A rather quick blog for you today... just wanted to share a recent find.  A vintage sewing box, heart shaped with a pink satin and felt lining.   

It's just so pretty...... but I am going to pimp it up.

Not sure how just yet, so watch this space.......


Monday, 6 June 2016

Decoupaging old School Chairs

I had managed to  get my hands on a few very old wooden school chairs. In not bad condition too.  

But what could I do with them?   I buy these things without a plan, and have to think of the plan later.

Aha!  I could run a decoupage workshop with them.

And that is exactly what I did.


Some lovely ladies joined me and got to work with some sandpaper at first, scrubbing the varnish off the chairs to give it a rough edge for the paper to stick.  

Just look at that wee baby enjoying the movement at Mummy scrubbed the chair!  (she was picked up by Dad soon after, before the messy play started).


Each lady picked a completely different colour scheme, some went for pastels, some for vintage, some for brights and bolds.   I wished I had picked all of them as they all worked up really nicely.


The workshop was just two hours, and of course you can't decoupage a whole chair in two hours, but they made a good start on the seats, then took home the skills and materials to complete the chair in their own time.


Just how fabulous are these?  I think the pink is my fav... no wait, the blue.... no wait, maybe the....... agghh, I just cannot choose!


And a close up so you can see just how nicely the papers worked.


I cannot wait to see these chairs finished, and if you are reading ladies, please do not forget to send me photos.


Tuesday, 26 April 2016

A rather posh lady with a fascinator

At Hobbycraft in Carlisle they like to inspire their customers with finished projects dotted around the store.  I had the chance of messing about with a styrofoam head to make it look interesting.  Well of course, I have to be dragged kicking and screaming into any crafty project, but, you know, I thought I would help them out.  (in other words, I grabbed the head and ran with it before they could change their mind!)


So, I gathered supplies.  The head, of course, and a couple of nice decopatch papers to compliment each other.  A fascinator base and some ribbons along with some beads on a length.


I covered half the head with one decopatch paper design.


And the other half with the other, trying my hardest to keep a straight line down the middle of the face.


Then it was time for the fascinator.  No feathers in this fascinator, I hate the blooming things!!


I started by attaching the thickest ribbon with a couple of stitches, then looped it randomly around securing it with a few stitches as I went.


I quite like the effect, but of course, it needed more than that.


I added a second ribbon in this same way, and then a third  (It's hard to see from the photo but the second and third are pale pink and silver)


Time for the length of beads, added in exactly the same way, but then I decided to add a dangle bit, as you do.


I hot glued it to the side of her head - don't worry, she didn't feel a thing.


Now she is all ready to go on display above the styrofoam section in Carlisle Hobbycraft.  Pop in and see her if you like  :)


Saturday, 16 April 2016

Toy Cars and a mirror.

I finally got round to doing something I had in my head for ages last weekend.  I made my grown-up son a gift.  He is car mad, and loves the colour red - which made the decision of what to make a little easier.

First of all I sourced some toy cars - the matchbox size ones.  I paid £5.00 for a shoe box full on a Facebook selling site and got to work with a can of Plastikote enamel spray in metallic red.


This bit was quite enjoyable, seeing all the different shaped vehicles all turn a vibrant shade of red.  (I also managed to spray my wheely bin, which I was using as a table!)


Don't they look great?


I then scoured the charity shops for a suitable mirror and found this lovely oval one with a wooden frame for just £2.00 - the dust was free and there was plenty of it, but after a good squirt of Mr Muscle it was nice and sparkly.


I decided that hot glue would probably be the best way of sticking the cars to the wood.


Bostik glue gun, Hobbycraft's own glue sticks  :)


They did the trick perfectly.  So much so that I can pick the mirror up by a single car and it still holds.
Not that I will do that very often of course, but these things need to be tested.

I wasn't going to include this little crane vehicle, but when I saw how the arm draped across the mirror I knew I had to  :)


Not sure which is my favourite vehicle - the cement mixer is up there I think.


And then we were done!  Now to find somewhere nice to photograph it so you don't see all the moss on my conservatory roof!


Dining room.... that'll do.  :)


He seems to like it anyway, and I am pretty pleased with the result too.   Now, what can I spray and stick next?

Wednesday, 26 August 2015

Glow-In-The-Dark Pineapple T-Shirt - free tutorial

I had so much fun with this tutorial I did for the Hobbycraft Blog.  The Tulip 3D paint is just brilliant for decorating t-shirts with, and the fact that this one glow-in-the-dark..... what's not to love?

The paint goes a long way too, which is a bonus, as it is so annoying to run out of things mid project.

The t-shirt was just £3.00 from George at Asda.  It's quite thin, but that makes it better to work with as you can see through it easier to trace the lines of the template through.


Of course, you can put any design you like on in the same way.


To find the full step-by-step tutorial click on the link below, and do let me know if you make one for yourself   :)

http://blog.hobbycraft.co.uk/how-to-print-a-pineapple-t-shirt/

Friday, 20 February 2015

Upcycled Denim Scrap Bag

My jeans had seen better days, the hems were all frayed and the seams were starting to go, but I just cannot bear to throw things out!  Not when they could be made into something new.  But what???

I had already made dog toys for Ruby out of old jeans, which incidentally she still loves and plays with even though many of her toys were ruined within minutes of her getting them.  If you want to read about those you can find them HERE and HERE.

So I decided to make a bag.


I cut out 24 squares out of the jeans.  I didn't cut around seams and pockets though, I cut to incorporate them into the design as a bit of a feature.

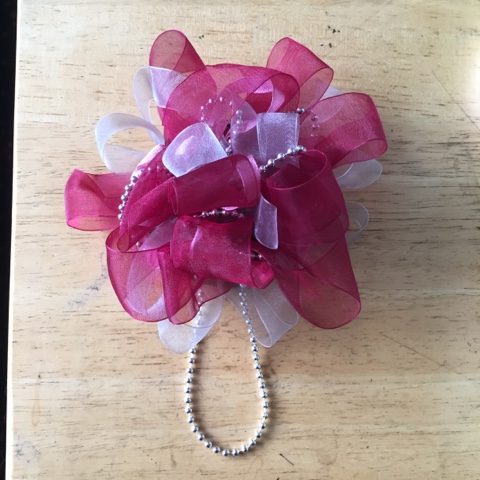
Some of the plainer squares I sewed ribbon and buttons and charms onto.


Then it was time to attach them together.  At this point I decided to have the seams outwards and scruffy, but it looks equally good with the seams inside too.


I trimmed the seams back with a pair of Pinking Shears to give it a bit more scruffyness.


Soon I had the 24 all sewn up, just like this....  Now if you fold this in half, all you have to do is sew up the side seams and you have a bag shape!


Ta dah!


This is it turned inside out, so you can see the inside seam way of doing it might look nicer for you if you don't like the scruffy look.


Next I cut a piece of lining fabric, just a wee bit bigger than the bag - about a centimetre all the way round.

I sewed the bag around from the side part before it slopes to a point, but left a gap in the bottom hem so I could turn it right way in later.  Trust me, you need this hole!


After turning my bag inside out and keeping the lining right way in, I slid the lining into the bag, pinning the top hem ready for stitching.


Then I stitched all the way around the top hem, then using the little gap I left in the bottom hem of the lining, I turned the bag right way in again before sewing up that hole.


Next the straps.  I simply cut two lengths of denim the length I needed the handles to be, then two lengths of the lining fabric, slightly thinner.


Placing the lining fabric on top of the denim, I threaded my machine with a rainbow thread and sewed three straight lines down the fabrics to join.


I then top sewed all the edges on my bag to give it more definition  (and because I wanted to use the rainbow thread again   :) )


Then I attached the straps to the outside of the bag with a really scruffy square  - it was supposed to be straight, honest!


And there we have it, a roomy, perfectly usable, denim bag, made from scraps.  The only money it cost me was for the lining which was on special offer and worked out at about £2.00.


You can add a couple of press-studs too if you want to have it able to close.