Showing posts with label glass casting. Show all posts

Saturday, 19 March 2022

Silicon Mould – tiny trainers

Todays demo was on making Silicon Moulds.

The benefit of silicon moulds is that they are reusable over and over again – for various uses too – wax, resin, polymer clay etc…

The silicon I used for this project was a 1-1 mix which you can find on Amazon.


As the silicon is quite expensive I wanted to try it on a smaller item first… so I had a look about my local B&M shop and found these little trainers  (they seem to be collectable and come in a blind bag).  I thought they would work really well.


The little shoes are hollow which I thought might cause an issue with the silicon going right inside, so I partially stuffed them with a dog-poop bag.

Then I stuck them into a little plastic pot using a glue dot.

If I didn’t stick them down I thought they might float up when the silicon was added.


Time to mix and add the silicon.

I had just enough to cover the shoes luckily.

The price of this was £10.00


Then it was a long, overnight wait, for the silicon to set.

Then next day I could turn it out of the plastic pot and flip it over. The silicon had covered the bottom of the shoes every so slightly with a thin layer, but I could easily cut this away with a craft knife.


They came out nice and clean and left a good impression in the silicon.


Now it was time to see if the mould had worked.  I poured warm melted wax into it… and waited until it had set.


They turned out better than I expected.  I would need to give them a little tidy up, and go around the inside of the trainer with a hot tool to melt the wax a little and make it a little neater.  But quite pleased with those.


Monday, 31 January 2022

Lost Wax Casting - my own hand!


We were learning how to use silicon casting material today to take a nice detailed cast of items – which can then be made into wax and finally glass.

 So, I thought I would do my hand, complete with jewellery to see how much detail I could get.

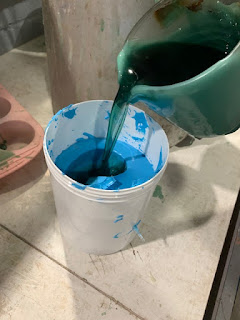
 So I plunged my hand into the bucket and waited a little while for it to set – then after a slight wriggle or two, I was free!

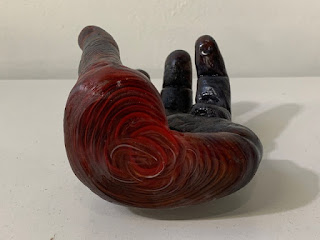
The next step was to pour melted wax into the mould, and wait for that to harden.

Once the wax was set I could break away the silicon mould – I then set the waxy hand on a lump of clay to form a base.


Plaster Recipe for refractory mould:  (to be measured up as required)

·       1lb plaster powder

·       1lb molochite powder

·       1 pint water

Now it was time to cover the hand in the plaster mix.  Adding layers at a time to ensure all the parts were covered.


When the mould was dry, it was time to scrape out the clay and melt out the wax. 

This was done over a steamer, allowing the wax to drip into a tray which meant it could be reused.

Once the wax was out I have to fill the mould with water to measure how much glass I would need  (2.5 x the amount of water)

The mould was then put into the drying cupboard.

Once dry, I filled a terracotta plant pot with the correct amount of glass and they went into the kiln.

The mould was positioned with a table above made from kiln props, on this sat a plant pot with my measured amount of glass in it.  Once the glass melted it dripped through the hole in the plant pot down into the mould.

I used some scrap glass from the HotShop to make this as I fancied a little colour.


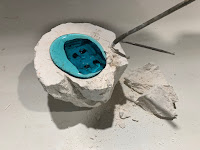
Now it was time to very carefully chip away the mould, making sure not to damage the glass inside.


Dah da!    A lovely glass hand …. minus a little pinkie  😊

 It was at this point that I realised I had not added any cocktail sticks to help air and glass flow – lesson learnt.

The silicon mould doesn’t last long and is not really reusable over time, but I managed to get another wax cast from it.

This piece didn’t need any coldworking at all, I purposely underestimated the glass amount needed so I didn’t have much (or any) overspill, and it all came out quite smooth.


Sunday, 30 January 2022

Poor Man's Silicone Moulding

 This was an interesting technique – called ‘Poor Man’s Silicone’ and you actually use a tube of cheap silicone from a DIY shop and plenty of washing up liquid.

It’s a very messy job – and smells unpleasant too.


You squeeze a tube of silicone into some warm very soapy water, then get your hands in and mix.  Add more washing up liquid if it is too sticky.  (You will need a lot more than you think!!)

Once it is a pliable putty type consistency, wrap it around the item you want to make a mould from – in this case I used a vintage old Nokia phone.


I added a layer of mod rock around this (bandage soaked in plaster) – it was to stabilize it, but there was no need really – I did use the mould a second time and just Duct taped it – and it worked ok.


Once the mould was set I sliced across the side and slipped the phone out.


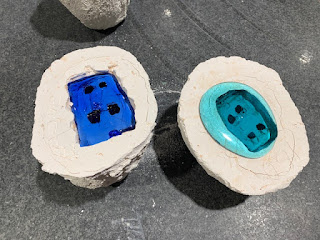
It came out nice and cleanly, leaving a good copy of the phone within.


Time for the wax…….


And voila!   A wax version of a vintage Nokia phone.


I can now use the lost wax casting technique's to turn this wax into a glass piece  😊


Tuesday, 25 January 2022

Lost Wax Casting - Linking Elephants

This project was to learn how to create a sculpture from wax and convert it into a glass object.

I decided to make two little elephants that had linking trunks.

It took a while to form the wax, I melted it then had to wait for the right temperature to be able to mould it by hand.  I had to keep it quite warm to make it malleable.

Next step was to insert cocktail sticks to create air holes so the glass can flow more freely when it melts into the mould.

Plaster Recipe for refractory mould:  (to be measured up as required)

·       1lb plaster powder

·       1lb molochite powder

·       1 pint water

Now it was time to cover the elephants in the plaster mix.  Adding layers at a time to ensure all the parts were covered.


Once the moulds were done and dry, it was time to melt out the wax. 

This was done over a steamer, allowing the wax to drip into a tray which meant it could be reused.

Once the wax was out I have to fill the moulds with water to measure how much glass I would need  (2.5 x the amount of water)

The moulds were then put into the drying cupboard.


Once dry, I filled a terractotta plant pot with the correct amount of glass and they went into the kiln.

The mould was positioned with a table above made from kiln props, on this sat a plant pot with my measured amount of glass in it.  Once the glass melted it dripped through the hole in the plant pot down into the mould.


There was a little bit of glass overspill, nothing too dramatic.


Now it was time to very carefully chip away the mould, making sure not to damage the glass inside.


And Voila!  Two little elephants emerge.


Now it was time to do some coldworking. I used a flat bed grinder to remove the bottom slabs of the elephants, taking the glass right back to where the feet would end.


I also used a diamond Dremel bit to grind off any dribbles caused by the toothpicks – like under the trunk and excess around the ears.

Quite pleased with how these turned out, and I learnt so much along the way.