Showing posts with label glazes. Show all posts

Friday, 8 April 2022

Triaxial Blending

Today we did some Triaxial blending onto test tiles.

I really enjoyed this process – and as I am rubbish with numbers  (Dyscalculia) I created a little colour chart to help me along next time.


Working with my uni buddy Amanda, we chose some glaze recipes to make up and use.

We chose a white, a lilac and a green.


All mixed up and ready to go!


Next step was to get 21 different cups and number them.

Then we put the glazes in – 5 parts in each cup, according to the chart above.


The next thing was to pour it onto some prepared test tiles.

These tiles were terracotta, with a strip of white porcelain slip painted down the centre, textured and numbered.

This shows how the glaze looks on different clay bodies, along with how it pools into the textured grooves.


I poured one coat across half the tile, then another coat over half of that, so the tile would then show how different coats would look.

All 21 tiles complete, with an extra tile with an equal mix of all three glazes, and an extra tile with no glaze at all.


So, the finished tiles are not quite as exciting as I hoped, the green and the lilac don’t come through that well.   But that is the beauty of testing your glazes.

It does make a really interesting experiment though, and I am going to do it again soon with some stronger colours.


Monday, 14 March 2022

Glazing Ugly Pots

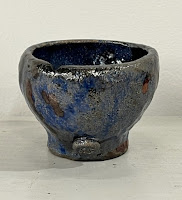
 I had a couple of pieces of hand built pottery that I wasn’t particularly over happy with, so I thought I would use them as glaze test pieces.

This has taught me that I really need to make all of my own glazes and test them properly, as this piece stuck to the kiln shelf as the glaze ran so much!

At Uni we have a system that nothing goes in the bin and we are encouraged to use any left over glazes from other peoples projects, should we wish to do so – the issue with that is you never know what you’re going to end up with.

With this one I dipped one half in one colour and the rest in another colour, then splashed it for added effect.


It’s still ugly  😊

But, it’s all a learning curve.


Sunday, 27 February 2022

Raku Firing Glaze Results

We made our own Raku glaze for firing….

Description: Satin, smooth, light blue iridescent surface.


  • 80 parts Borax Frit
  • 15 parts Ball Clay
  • 4 parts Tin Oxide
  • 1 part Bentonite
  • 1 part Cobalt Oxide
Results:

Shown as raw clay, glazed ready for firing, Raku fired.


The next glaze I used was one I found on the shelf in the glaze room – we are encouraged to leave our spare glazes for others to use, and to use any leftovers.   There was no recipe printed on this glaze so it was a case of pot luck with how it might turn out.  Not sure I like the bright green, but it is certainly very vibrant!


Saturday, 26 February 2022

Raku Firing

Today we did our first Raku firing.


Raku firing is done quite differently to a regular firing, as id is generally done outside, using a gas kiln rather than electric.

The pre-glazed pieces  (using a special Raku Glaze) are placed into the kiln and brought up to around 1000 degrees – but, ours was really done by watching the glazes change through the viewing hole on the kiln, as different glazes take different times to react to the heat.


Once the pieces are up to the correct temperature, they are placed gently into a metal bin full of sawdust and combustibles.  These combustibles then stick to the glaze, burn away and form interesting patterns.


Extra sawdust is added to cover, then the lid is placed on and the burning allowed to take place.


Once removed from the metal bin, the pieces were dunked into cold water and set on the grass to cool down.


Then it was time to clean off the carbon to reveal the true colour underneath.


Raku firing is quite a faff and I haven't yet decided if I like the uncertainty of the results yet or not!