Thursday, 4 October 2012

Travelling Bracelet Adventures


Do you remember me telling you a couple of weeks ago about the Travelling Bracelet Project?

Well, if not, CLICK HERE for a little reminder  :)

Sadly, my time with the bracelet is now up and I have to pass it onto to another lucky beader, but in the meantime let me show you where the bracelet has been whilst in my care.

First, it took a little trip into my workplace, Hobbycraft, Carlisle.


Where it said hello to lots of lovely beads.


My colleagues were all very interested and a few were talked into being included in this blog  :)

Here is the beautiful Amy, a lovely picture with the flowers making a stunning backdrop.


And this is Nathan... of course boys can wear travelling bracelets  :)


At this point I entrusted the bracelet to my Manager's care and she took it down to Bournemouth for a meeting (360 miles away) and managed to get the CEO of Hobbycraft - Catriona Marshall to pose for a photo with it  :)  How fantastic!

Catriona Marshall - CEO of Hobbycraft


When I got it back, the next stop was Higham Hall, where I teach various crafts throughout a residential weekend.


Unfortunately the weather wasn't too kind for a decent photo against the magnificent scenery, but this mountain is Skiddaw, usually under some cloud, but under a lot that day.


I shall miss the bracelet, it is packed up and waiting to go to the next person once I have an address.  It was very comfortable to wear and attracted a lot of attention.  I shall follow it's further adventures with interest  :)

If you fancy signing up for a go, visit this website.


Wednesday, 3 October 2012

Jewellery making class at Higham Hall.

Last weekend I did my first jewellery making for beginners class at Higham Hall.

I usually do glass-bead making, so this was a new class for me.

The class was from Friday evening through to Sunday morning.  There was just four people booked on the course so it was nice and friendly and the students could grab some one-to-one tuition  not that any of them needed it  :)

Some of the students were a little camera shy, except Sarah & Jose, so I only took pics of them, but somehow the one of Sarah is missing, so sorry Sarah, if you are reading this  :)


These are some of the samples I did at the class....


And the students work  :)  Didn't they do great?

Monday, 1 October 2012

First attempt at quilling.

My Mother-In-Law makes the most stunning greetings cards using the art of quilling.  I am always in awe at her stunning designs.

Quilling is the method  of rolling up little strips of paper to form shapes.  Everyone looks forward to getting a card from my M-I-L, so I thought I might have a little play myself.

My daughter's girlfriend, Marie, also 'Quills', so she offered to give me a little lesson.


So I learnt how to use a little tool and roll the paper, then pop it into a shape and let it uncurl slightly.


Then I had to, very carefully, remove the curl from the shape, glue the edge, then place it on a board to dry.


My flower  :)


I then did a little green stem and stuck it all to a blank card.


I am just about to email the photo to my M-I-L, although I am not too sure if it will impress her  :)

I really enjoyed this, might have another go sometime soon.

Saturday, 22 September 2012

The Ukrainian Travelling Bracelet.

I am so pleased to be part of the fantastic travelling bracelet project.

http://travelingbracelets.blogspot.co.uk/

The Ukrainian bracelet arrived with me last week, in a HUGE box.


The bracelet is so well made, and beautifully designed.  It really is a pleasure to have it, if only for a little while.


I will be taking it on my travels next week, wherever I might go, it will accompany me.


Wednesday, 19 September 2012

Knitting with Rococo Yarn.

In Hobbycraft we have this yarn for sale  - Rococo, by Wendy.


It is pretty, curly, and sparkly as it is dotted with sequins, and I thought we needed a sample to help sell the yarn.

So I took a ball home.

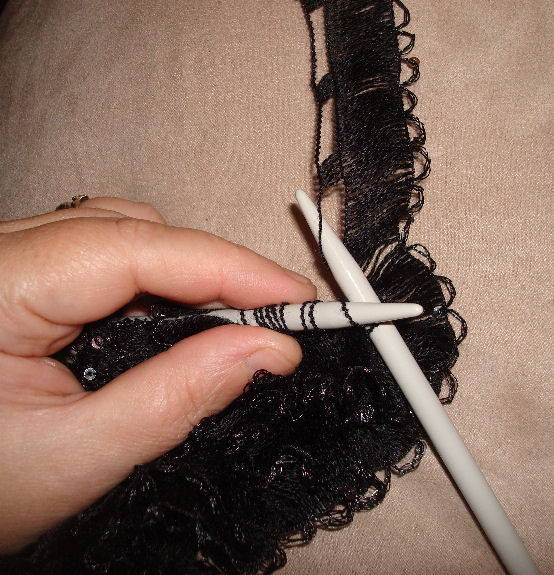
On the inside of the label was a pattern for a very simple 10 stitch scarf and the suggested needle size, so I thought I would work with that.

Illustration on the label...


Actual yarn...


Now, the difference with Rococo (also Can-Can yarn + others) is that you knit into the SIDE. 


It is not a yarn for speed-knitters as you need to concentrate and make sure each loop is caught on the needle.  And it is an absolute PAIN IN THE BUTT if you drop a stitch, you simply cannot find it again!  Trust me, I had to start afresh.

Still, it makes up into a beautiful crinkly, sparkly tube shaped scarf, very classy.


Thursday, 6 September 2012

A Gift from an Aunt.

I just wanted to share this with you.


My Auntie Winnie, who was the grand age of 80yrs old last month, is a beautiful painter.

I believe she only took up painting upon retirement, but she produces the most beautiful art.

She painted a huge canvas of poppies for my Father (her Brother) and I took a liking to it immediately.


Jokingly, well - half-jokingly, I sent a message back with an order for a Sunflower picture.  Sunflower is my birth-flower and I have always been quite fond of them.  I got it yesterday, painted by my Auntie and mounted and framed by my Dad  :)

I love it.

Monday, 3 September 2012

My sad attempt at Silk Painting.

As part of the training program at Hobbycraft, we were asked to investigate a craft we had never done before, and do it.  (Yep, we actually get paid for this!!)

For most people this might be an easy task, for me the hard bit was finding a craft I had not already had a go at!

After a good hunt around the Hobbycraft store in Stockton I came across a Silk Painting Card Kit.  Looked interesting, and I had never painted on silk before, so I purchased it.


In the box it had enough stuff to make four different greeting cards.


I started with a cat design.  After washing and drying the silk to remove the creases, I started to trace the design using the 'Gutta', which is a paint resist, it is used to only allow the paint to spread to the edges.  If you accidentally leave a gap in the gutta, the paint will seep through into the next section.


The gutta needed 24 hours to dry properly, so I did the design and left it on the mantelpiece overnight.  The next day when I sat down to add the paint I realised I had missed the facial features off the cat, so I had to put them on and wait another 24 hours!  The sample  on the box lid had very thin smooth lines, I found this almost impossible to achieve as you needed two sets of fingers & thumbs to squeeze the tube resulting in it coming out in blobs rather than a nice smooth stream.

Then it was time for the paint.  The box only contained three colours, so I had to do some cunning paint mixing.  One drop of paint and it spread all over the silk, I quite liked that effect.

So, the finished picture, I am sure a 4 yr old could have done a better job.


I think I prefer the reverse side as it looks a little 'smoother'.


I mounted it into the card provided (reverse side up as I preferred it), of course it's all floppy whereas the one on the box is nice and taut, but there wasn't anything I could do to stretch it and make it nice and tight.


I took another piece of silk and just blobbed paint on it, I think I much preferred this effect, so I googled more about Silk Painting.  I found out that I would need a steamer to seal the colour, not sure I could be bothered with all that.


I will not be doing the other three designs, in fact I gave the kit away to the first person that showed an interest.

Not a craft for me.

Saturday, 1 September 2012

Needle Felted Bag

Another little project made for Carlisle's new Hobbycraft store.

The brief was very basic - decorate this bag.


What to do?  I took a look in my vast craft cupboards and found some felting wool,  Hobbycraft sells a similar wool, and the tools to do this project, so that was perfect.

Tools needed then are something to felt onto, a foam board underneath to stab into (I use a garden kneeling pad, I find they work well and only cost £1.00 from Morrisons)  A felting needle (you can also buy a tool to hold a few needles, which would have been easier for this project). and felting wool.


I started by drawing a heart - badly, but never mind, it would be soon covered with wool.


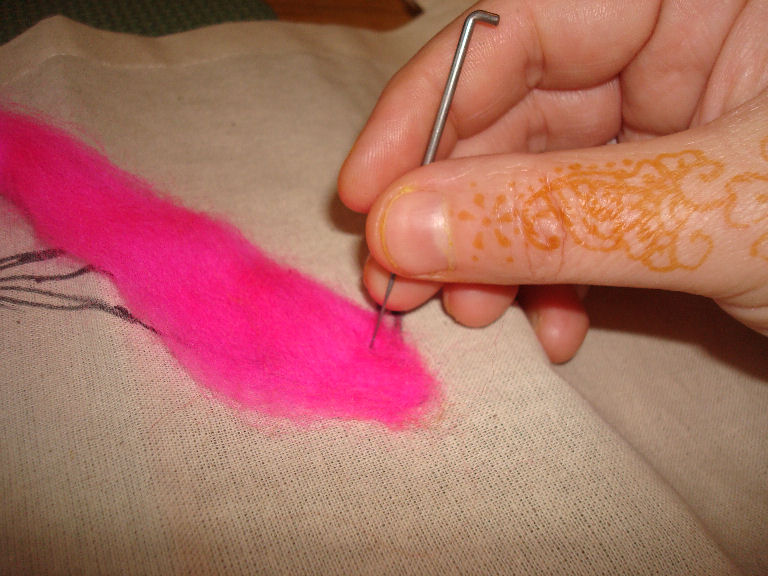
You take a piece of wool, stretch it out a little, then simple STAB, STAB, STAB into the bag (with the foam pad inside so it doesn't go right through).


I carried on until the heart was done, then I added another row (just coz I could)


Once done it looked a little bare in the centre, so I took some scraps of wool, rolled them into a ball and stabbed it into the middle of the heart.