Showing posts with label Easter Crafts. Show all posts

Friday, 1 April 2016

Easter chick cover for a Creme Egg - Tutorial.

Ok, so it is way too late for Easter this year, as in ..."Zoom, where did it go"... but Creme Eggs are nearly here all year around and you could get started for next year, after all, I am sure it will be back around pretty quickly!

Anyway, here is a tutorial to make these little cuties.  Please link back to here or my Facebook page if you make and share, credit is always appreciated  :)


BODY - Round 1. CH 2, then work 6 x DC's into the 2nd CH from your hook. (6 stitches)
Pull up a length of scrap yarn into the last stitch (to use as a stitch marker)
Round 2. CH 2, DC in same stitch (DC 1 into next stitch, then work 2 x DC's into the next) Repeat all the way around (9 stitches)  Pull the scrap yarn up through the last stitch on every row from now on.
Round 3. CH 2, DC in same stitch (DC 1 into next 2 stitches, then work 2 x DC's into the next) Repeat all the way around (12 stitches)
Round 4. CH 2, DC in same stitch (DC 1 into next 3 stitches, then work 2 x DC's into the next) Repeat all the way around (15 stitches)
Round 5. CH 2, DC in same stitch (DC 1 into next 4 stitches, then work 2 x DC's into the next) Repeat all the way around (18 stitches)
Round 6. CH 2, DC in same stitch (DC 1 into next 5 stitches, then work 2 x DC's into the next) Repeat all the way around (21 stitches)
Round 7-12. CH 2, DC into the next 20 stitches  (21)
Round 15. CH 2, DC into the next 4, DC2tog, **DC into the next 5, DC2tog, repeat from ** one more time and break off yarn.

WINGS (Make two) - Row 1. CH 2, then work 2 x DC's into the 2nd CH from your hook. (2)
Row 2. CH 2, DC into the same stitch, then work 2 x DC's into the next stitch. (4)
Rows 3-4. CH 2, then work 1 DC into each stitch. (4)
Row 5. CH 2, DC2tog, then DC into the last stitch. (3)
Row 6. CH 2, then DC into the next stitch then SS into the last.

BEAK - Row 1. CH 2, then work 6 x DC's into the 2nd CH from your hook.   Break of yarn with a tail for sewing.  Fold in half ready for assembly.

ASSEMBLY - First sew the wings in position, next the beak and finally the eyes. Pop a Creme Egg in and there you go!

Friday, 11 March 2016

Crochet Easter Bunny Basket


I was asked by Hobbycraft to design and make an Easter Bunny basket for their blog.   I love these commissions, they really challenge me to think of something different.

This cute bunny basket is what I came up with.  The ears and nose are a soft pink, but they don't show up very well in the photograph.

You can find the tutorial HERE on the Hobbycraft blog   :)   Let me know if you make one.


Tuesday, 1 March 2016

Dreamcatching Bunny Wreath

When the new Easter lines arrived in Hobbycraft this year, I spotted this unusual Bunny Wreath. Made from rattan, it was such an interesting shape, I just had to do something with it.   But what......

I started by grabbing some cream yarn and wrapping it around the wreath.  


Obviously one wrap wasn't going to be enough, I ended up wrapping it three times in total to try and hide as much rattan as possible.


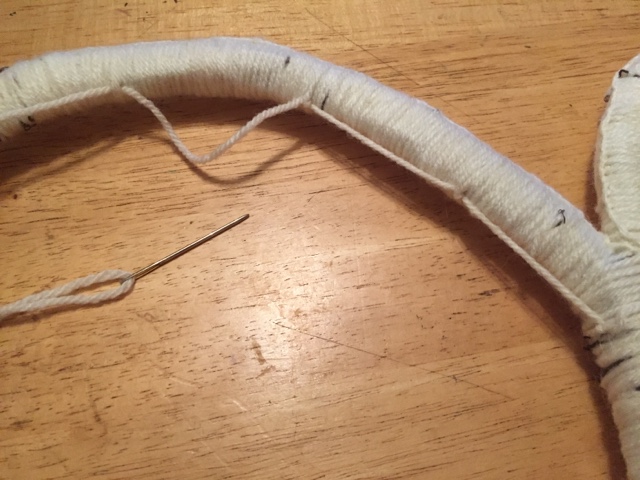
Then I decided I would add a kind of "dream catcher" design to the centre.   I threaded a needle with yarn and looped it through the wraps at equal intervals.  I then went back around looping each new wrap until it all met up in the centre.


Doesn't look too bad does it?  So I did the bottom hoop as well  :)


Time for the ears.  This time I picked a cream yarn with splodges of pinks and lilacs in it, and started to wrap.


I added the design in the ear gaps just like the large hoops.


What else did I need to finish it off, I thought.  Ahh yes, a pom-pom for a fluffy tail.
Using the same cream, pink and lilac yarn, and a pom-pom maker  (as we don't need to cut cardboard circles anymore) I quickly made a big fluffy pom-pom.


And that was it finished.  It did take a little while to wrap the wreath form, but worth it I think.

Now little bunny is ready to catch those nasty dreams   :)


Wednesday, 15 April 2015

The Devil's Porridge Museum - Easter Crafts

Easter weekend saw me trotting (well driving) down the M74 to Eastriggs in Scotland, where the Devil's Porridge Museum is now situated.  It has recently moved from it's former building into this nice, clean and modern place, which is a contrast from the WW2 exhibits nestled inside  :)

It is on the main road at Eastriggs, just past Gretna, towards Annan.


This was my working area, on the mezzanine floor, above the exhibits  (I will share more about the museum at a later date).


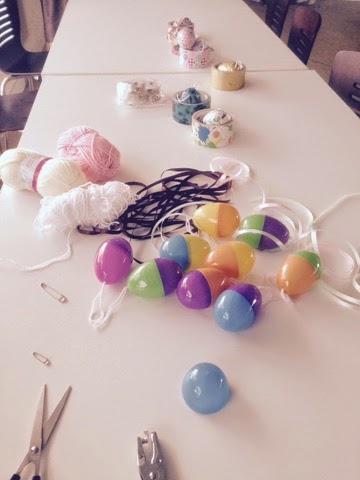
The Easter crafts on offer was some Duck Taped rattly eggs....  (eggs with beads in them  :) )


And some Easter Egg bunting.


I was there for three days in total and had a great time.  So if you popped along, and are reading this, then thanks for coming. Hope to see you again soon :)


Friday, 3 April 2015

Duck Tape Egg Rattle

A little bit of fun for you to make, it makes a good cat toy or a baby rattle  (but please, always supervise baby with any toy, do not leave alone)


First of all get a fillable egg - you can get these ones in Hobbycraft for just £1.00 for 8 eggs.
You will also need something that makes a noise - buttons are good, or little bells, even little pebbles would work.


Pop them in and close it up,  Give it a rattle, does it sound ok?


Now grab some Duck Tape - also available in Hobbycraft for £3.00 a roll in lots of fab patterns.  I chose this "Patchwork Quilt" design.


You can cut it or rip it.  If you cut it it has a nicer edge, but really glues up your scissor blades, so each cut is harder.  The glue isn't the easiest thing to get off your scissors either.  Or you can rip it, it tears quite easily.   You need little squares about half an inch (12mm) square.


Stick the pieces firmly on your egg, concentrating on the join first.


Stick them all over, making sure all the edges are down flat, and rattle away....