Thursday, 10 July 2014

Craving Curries review

I stumbled across this place on the world wide web, that did Curry packs.   As it happens, co-incidentally, it is based in my home town of Carlisle - not that that makes a difference as they sell online  :)

Anyway, after searching through their website for more details as to what a pack contains, I have to say I was a little confused.  I mean, what do you actually get?   The bumph states....

 In your curry kit, you will receive a number of spice packs that are individually packed to suit your chosen curry, saving you the cost of purchasing the many spices required which often end up unused taking up valuable kitchen storage space. 

Clear?   Hmmmmm, so presumably just spices?  

But on browsing through the curries on offer, the vegetarian ones were quite a bit cheaper, so did that mean the meat ones actually contained meat?  Surely not - not for that price. And if they don't contain meat, why called it a 'Chicken Tikka Massala', or a 'Lamb Rogan Josh'? As I said, I was a little confused.
Added to that, none of them actually state that they are suitable for vegetarians, so I wasn't going to take the risk and order one with a meaty name - just in case.

I decided to plump for the "Freedom Curry" - sounds unusual, not one I have heard off before.

It arrived like this.....


Cute packaging, nice quality paper bag with a sticker. Inside was the recipe and 3 bags of ingredients.  2 bags of spices, obviously ready mixed for the recipe and the third was a bag of salt!


Now, I couldn't make the recipe as given as I was short on ingredients, yet craving curry  (see what I did there?)  So I thought what I would do was to use half of each bag bashing up a quick tasty tea, and leave the rest for when I can do it properly.

I fried off some mushrooms and added the Spice mix in bag 1.  Wonderful smells wafted through my kitchen.


Chucked in some spinach and a small tin of chopped tomatoes and Spice bag 2 with some of Spice bag 3 (salt)


Cooked it until it reduced a bit.


And served it on a Stuffed Paratha which I got from HDM Spice Shop in Carlisle.


Right then, conclusions.

Beautiful curry, a real good kick to it, you can add yoghurt to make it milder though.
Easy to follow recipe, gorgeous smells right through the house.   Would certainly make an impressive meal if having visitors over for dinner.

Price wise, not great for me, but that's because I have an extensive spice rack of my own already. Some of the spices are quite expensive to purchase now, you can pay quite a bit even for one spice, so if you do not make curries often enough to keep your spices up to date and fresh, this could be the way to go.

Plenty of spices in the pack, generous amounts.

Still confused about the meat options being dearer than the veggie ones though, perhaps I could invite someone from Craving Curries to clear that up for us?  I am presuming different, more expensive spices, but clarification would be great.

Also, clearer labelling on the website would be good - marking the 'meat' labelled dishes as "suitable for vegetarians", would help a lot  ;)

When I have made the proper version, I will be back to tell you all about it  :)

In the meantime, if you fancy having a go yourself, you can find the website HERE.

Wednesday, 9 July 2014

"Something useful for your holidays" challenge

June's challenge that I lay out to all my groups was "something useful for your holidays"

Over on the Bead Buddies forum, Gail won the challenge with her beautiful bag.  This challenge was judged by the fellow bead buddies casting a vote.


At "crochet & craic" last monday evening, there were three entries.  Another amazing bag from Vera.  Crocheted in cotton, fully lined with adorning flowers.


A 'campsite' by Stacey, which kind of missed the 'something useful' guidelines, but so much effort had been put in that it simply had to be included.


And an 'itsy bitsy teeny weeny yellow polka dot bikini' by Pat - isn't this fun? 


And the winner was chosen by putting the name of all who entered into a hat and randomly picking one out.  The winner was Stacey, who won a little bottle of wine   :)

The next challenge, should you wish to take part is "Something for a Wedding", you can enter via any of the monthly classes I run at Hobbycraft  (Bead & Banter and Crochet & Craic) or by joining in at the Bead Buddies forum where you will find all the rules   :)


Tuesday, 8 July 2014

Crochet along .... Mandala (11)

Welcome back, it was a quick break this time as we have very little to go and I thought we should plough on with it  :)

If you are wondering what all this is about, then click HERE to find out - we are crocheting a Mandala.

This is the stage you should be at right now.


Let's make a start on the final few rows then.
Attach a new colour and CH 7 (counts as 1 x DC and 5 CH)


DC into the space between clusters from the row below, then CH 5.


Repeat this last row all the way around, then SS to join, do not cut yarn.


Work 4 x DC's into the chain spaces all the way around.


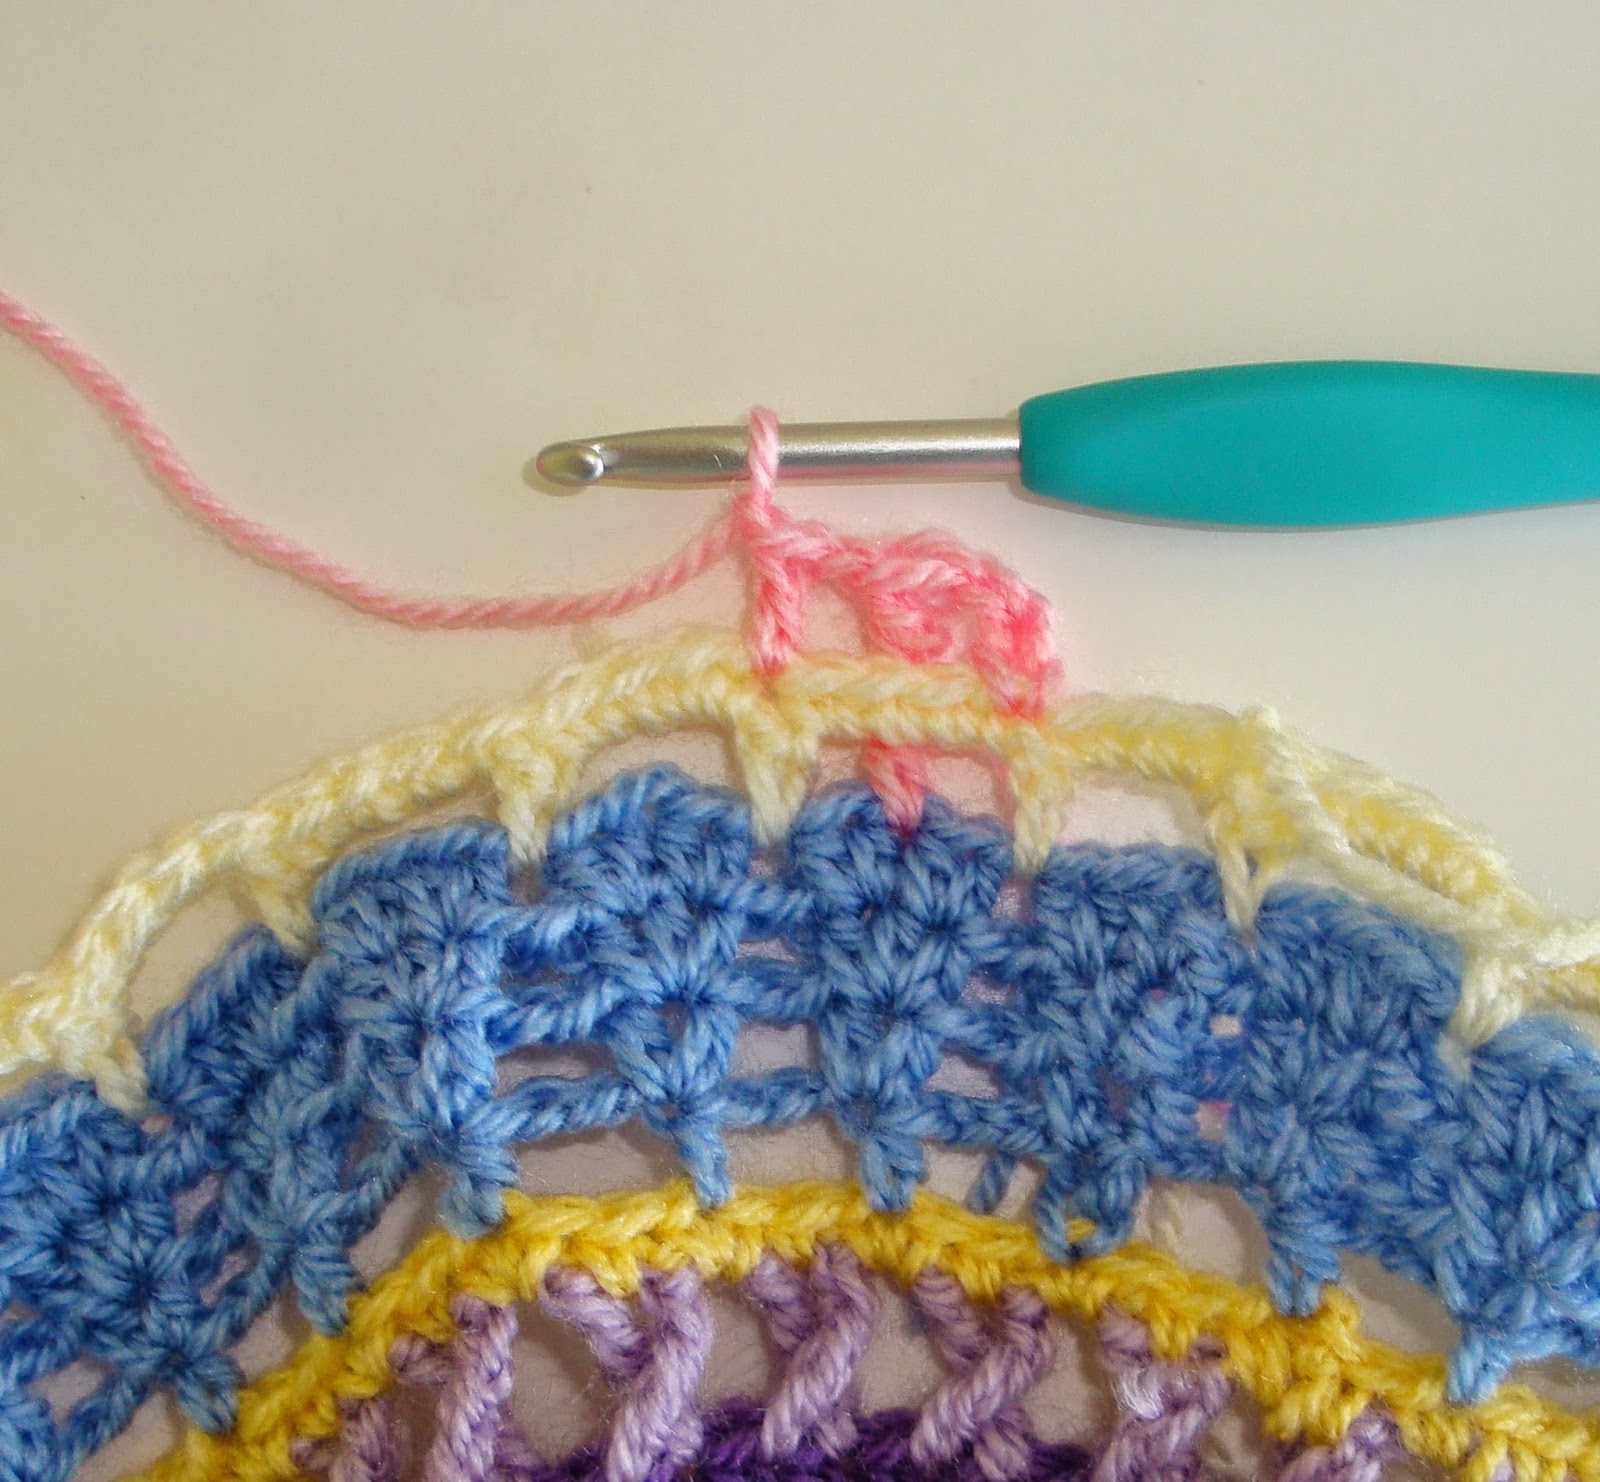
Join a new colour into the stop of any of the DC's and CH 4 (counts as 1 x TR and 1 CH.


The next stitch will be a TREBLE TREBLE - you wrap your yarn round the hook THREE times before going through your work and bringing your yarn back through (5 loops on hook), ** wrap yarn around and take two off (4 loops)  Repeat from ** until you only have 1 loop left.

*** So, make that TR-TR inbetween the clusters of 2 DC's from the top of the 4 rows of colour BEHIND the last row.


CH 1 and work a TR into the top of the DC from the previous round.


Repeat from *** all the way round and SS to join.


Add a new colour into the BACK LOOPS only and DC all the way around, SS to join.


Add a new colour into the BACK LOOPS only and HTR all the way around, SS to join.


Whoooosh!!  I do believe that is both Mandalas very nearly finished.  Well done you!!  


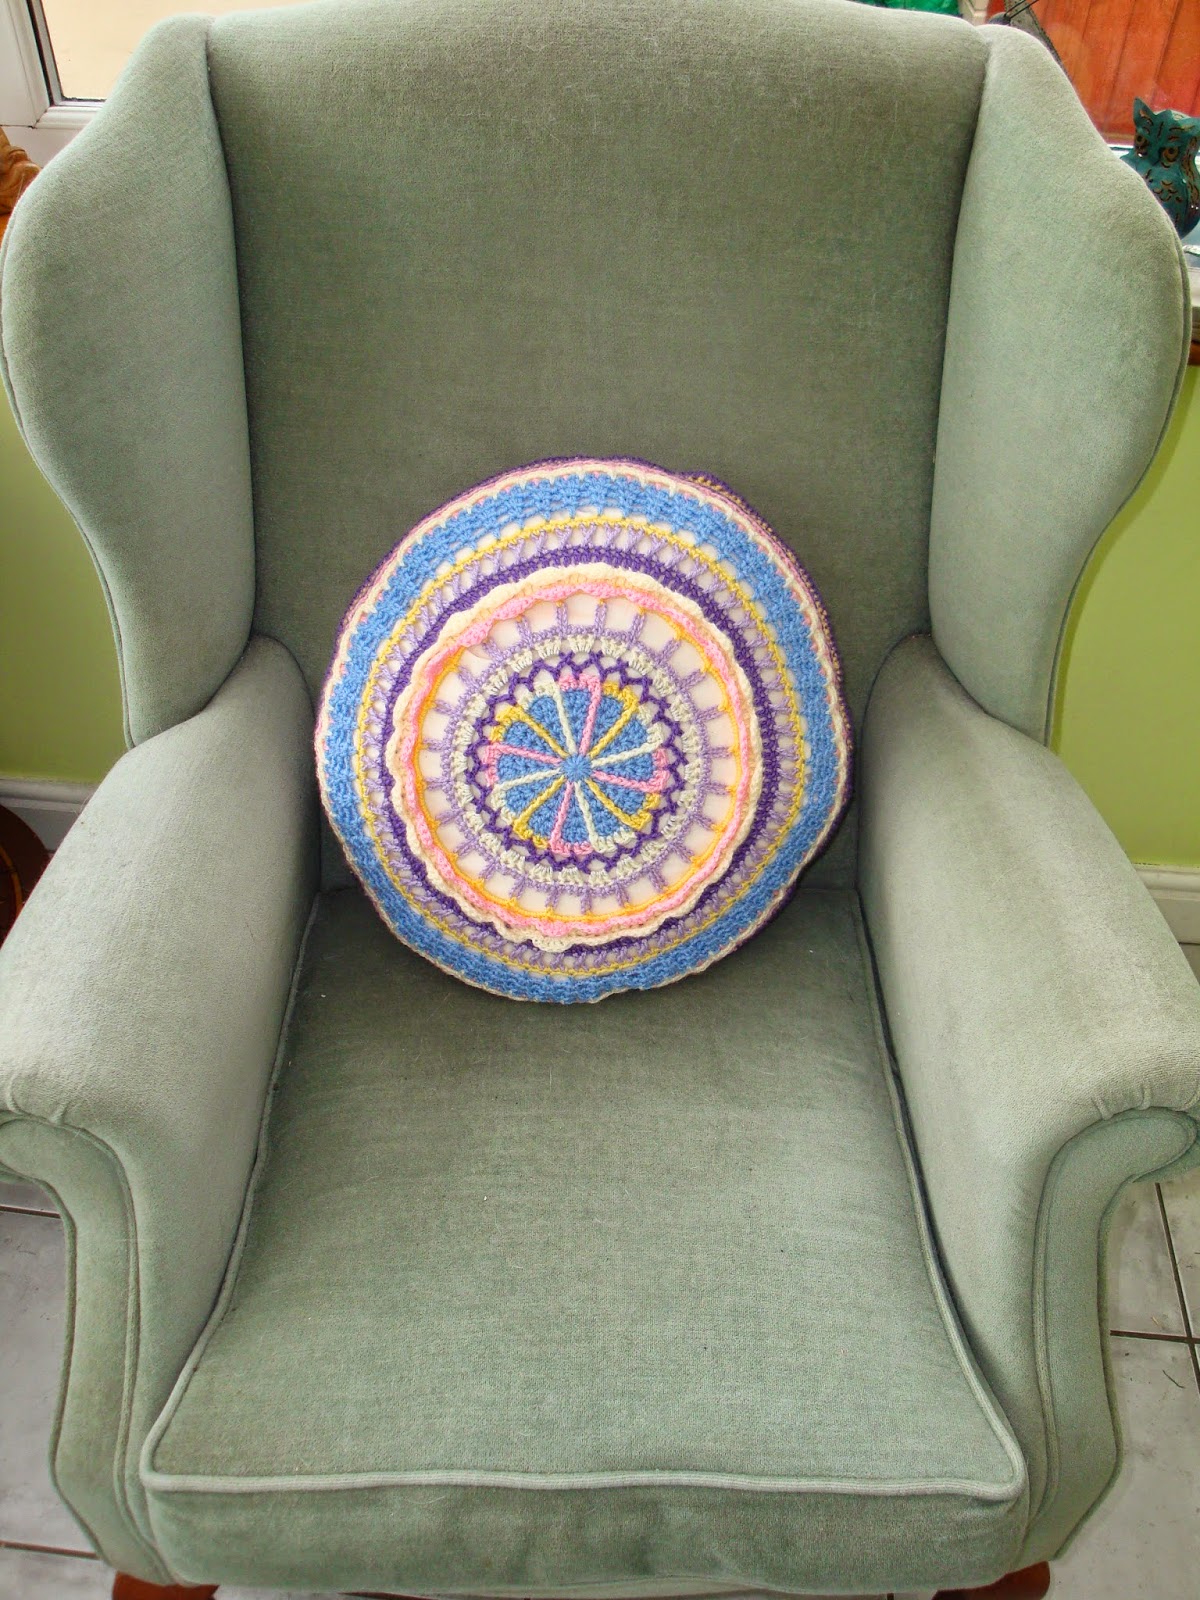
Right, you might want to finish them off with an edging, or you might want to put them together to make a cushion cover - it should fit an 18" round Cushion pad - you can find them at Dunelm.

The next stitch I am going to show you is Crab Stitch - it is a Double Crochet, but worked in the opposite direction to what you would usually work, giving a nice twisted rope effect.  If you want to leave your Mandalas as single pieces, work each one with the Crab stitch separately, if you wish to make a cushion cover we are going to join them together by using Crab Stitch.

FOR THE CUSHION COVER: Place your Mandalas nice side outwards (for both).


I then put a marker stitch at 4 places so it would hold it all in place and I could use it as a guide that it was joining nicely.


Join a new yarn into a stitch from each of the Mandalas (or a single one if you are doing flat pieces) and CH 2.

Now, insert your hook into the stitch BEFORE, like this...  and make a DC as you normally would, the yarn passes over the previous stitch creating a rope like effect.


Ohhh, sorry, blurry photo.


Work around 3/4 of the cover before inserting the cushion, then work the rest with the cushion in place.


And there you go, a beautiful, reversible cushion, for you to show off your crochet skills.


Right then, if you have joined in with this crochet along - whether you have done the two single pieces or the cushion cover, send me a photograph - either to my email, soozintheshed@gmail.com, or by adding a message to my Facebook page Sooz In The Shed.

You have until the end of August 2014 to complete the project and all photos that are sent in will be entered into a random name generator and a single winner picked.  They will win the set of crochet hooks as detailed below.

It's not too late to join in  :)


The links below are all the instalments for both Mandalas, feel free to work through them at your own pace and I would love to see any finished pieces  :)

Side A.

Side B
Crochet along .... Mandala (10)

And remember, anyone who joins in with this crochet along and provides a photo at the end will be entered into a draw to win a lovely prize of a full set of coloured crochet hooks in a nice purple case just like this one...

Monday, 7 July 2014

An interesting dog walk.... kinda

On Saturday evening we decided we would see if we could get Ruby to Talkin Tarn, a local beauty spot where Dotty used to love to go.  It's only about 10 miles from home and we got there ok, but accompanied by big piles of puppy puke, still she had a lovely run about, even dipped her paws in the Tarn before coming home again accompanied by more puppy puke.


So, on Sunday we thought it best to stay closer to home and took her for a walk around Kingmoor Woods, another of Dotty's favourite haunts.

The plan was to walk her through the woods, which leads out onto the industrial estate that is home to Hobbycraft, were she would go and see hello to my old work buddies, have a coffee at MacDonalds  (as Hubster had some free coffee vouchers) then wander back home again.

We set of from home in nice bright sunshine. Hubster decided to turn back to get his sunglasses, I could still see my front door and him yelling from it, but couldn't hear what he was saying - then it struck me, it was pouring down where he was standing, and blazing sun where I was and we were only a few doors away from each other!   Of course the rain hit me, but we decided it was just a summer shower and we carried on.

A few minutes later it was persisting down, and we had to take shelter under a tree in someone's garden.  Ruby was steadfastly refusing to move.  Just look at those clouds!


Ten minutes on and the rain had dried up, so we continued on our way, we were only yards off the entrance to the woods at this point, and of course, it was nice and sheltered in there.


The rain stayed off as we walked through the industrial estate and reached Hobbycraft, where Ruby got a big fuss and a few cuddles, but then the rain started again so we decided to abandon our free coffee (as we would have had to sit outside) and try to get back to the shelter of the woods.

Ruby wasn't having it at all, 4 paws firmly planted on the floor and a cast iron will that stopped her moving an inch.  So Hubster had to carry her - all 12.7 kilos of solid puppy, all the way through the estate and back to the woods.  She was heavy.... apparently.....  I carried the lead  ;)


Again, under the canopy of the trees and sheltered from the big scary raindrops, she was happy to trot about on her own, but once we reached the exit of the woods that led into the housing estate, her feet were stuck like glue to the floor.  Would she move?  No, she would not!


The decision was made for Hubster to make a mad dash, through the rain, through the housing estate and back home to pick up the car, so he could drive to the woods car park and pick her up.  Even tugging her along the car park was an ordeal!

Note to self:  Puppy does not like rain...... or wind.... .or car journeys.

:)

Sunday, 6 July 2014

Pesto & Mushroom Spaghetti

A quick meal suggestion for that Pesto recipe I blogged about a couple of days ago.  If you make up a batch it will keep in the fridge for a few days so you can use it for various things.  Try it spread on a pastry base with sliced tomatoes on top and baked, or you could make this pasta...

It's quite delicious.


So, you will need your bowl of pesto - recipe can be found HERE if you have not already got it.
Then put some pasta on to cook, I particularly like the wholemeal spaghetti for this dish.


And I used some chestnut mushrooms, wiped and chopped.


Chuck them in a pan with a little Olive Oil and a touch of garlic and cook until just soft.


Add a good couple (maybe three) spoons of the pesto and stir.


Drain the pasta and chuck that in the pan, stir well to coat with the pesto mixture.


Serve!


With wine, of course  ;)


Saturday, 5 July 2014

My first sewing class, for beginners.

A few times I have heard the words "I have a sewing machine, but no idea how to use it/thread it/wind a bobbin", so I thought I might offer a class showing just those things.

Aimed at people who have a sewing machine and don't really know what to do with it, or those thinking of buying on, the class would show them how to thread a basic machine, wind and insert a bobbin correctly, do some basic stitching, and go on to make themselves a little pin-cushion with their newly found skills.


I had two ladies at the first one, which was great as you are never quite sure how a new class is going to work out - they were Georgina and Sheila.   Georgina had her own machine, which she brought with here, Sheila was considering buying one.


They got to grips really quickly with the workings and the stitches, I was most impressed.


And they went on to make beautiful pin cushions each.


Which made them both very happy  :)


It was lovely to meet you ladies, if you are reading, hope you enjoy your new skills and start using them.

And if you should fancy this class, then the next one is on 28th August 2014, 4.00pm-7.00pm  (You book a 2 hour slot to suit)  It costs £10 which includes all materials to make a pin-cushion, and you can find the booking information HERE.