Tuesday, 22 December 2009

Fused Glass Cufflinks


My first attempt at cufflinks, for the men in my life :)

I might need to work on some more masculine colours, but other than that I am quite pleased with them :) Although one pair does look a little like eyeballs !!!


Maybe I shall try some stripey ones next, or does anyone have any other suggestions?


Monday, 16 November 2009

Stained Glass Course with Mo Wallis

Just had an exciting weekend.


Once a year, myself and my good mate Carol, go off on a Jolly, I mean an educational trip to learn something new about glass :)


This year we decided on Stained Glass, both of us make beads, and fuse, so now it was time to learn another glassy skill.


We found a fabulous stained glass worker called Mo Wallis (check out her website http://www.mowallis-artglass.co.uk/) and booked a two day course with her.


I have to say, it was worth every penny. We did copper foiling stained glass.


So, first I drew a design - I thought it was childish, but Mo said I was a "naive artist" :)


Then came the tricky but of cutting the glass, I am used to cutting glass in straight lines for pendants etc... so this was a little different.


After grinding down all the edges of each piece, it was time to copper foil them, this is a self-adhesive foil which was stuck firmly to each and every piece.

After tacking it together with masking tape, it was time to solder the gaps.

Wow, this was tricky, it took a while to master, and it still looks a little rough in place. You have to do both sides, my reverse side was a bit better than the front, so I have turned it round to display :)


Finally, it was edged in lead, then given a coat of black patina to make the bright shiny solder look more antique.

Taaa Daaaa, the finished piece. I have to say, I was quite chuffed with myself.


Wednesday, 21 October 2009

Knitting Roll

Following my recent re-awaking of the love of wool, and my constant knitting of wrist warmer gloves, I decided to treat myself to this superbly gorgeous knitting roll from Emma Jones of Meg&Millie.


(photo is Emma's own)

I have been drooling over her designs for some time now, but when this knitting roll came up I simply HAD to have it, well you just do don't you? :)

And now it is here I love it more, thank you Emma, my needles will be nicely tidy and easy to find.

Check out the rest of her lovelies on her Facebook page here... http://www.facebook.com/home.php?ref=home#/MegandMillie ..... Keep an eye out for the gorgeous bangles too.

Saturday, 26 September 2009

Shaggy Gloves


Ok, I will make it a quick blog as these are still Wristwarmer Gloves, but I did them with an ultra shaggy supersoft wool, teamed with the large button of course to finish them off.

These have gone on their travels as gifts., hope they like them :)


Sunday, 20 September 2009

A Glut Of Gloves !

Having had no inspiration to bead for a little while, I took to knitting.

I am not a person who can just sit on the sofa, my hands always need to be busy, so I quite like Knitting, you can sit in front of the telly and mindlessly knit (as long as the pattern is simple of course).

These Gloves are incredibly easy to make (the pattern is in my blog somewhere if you want to have a go) and teamed with an extra large button (to help the wearer work out which way they go) they look quite funky too.

A girly night was planned last night, there are 6 of us that are a similar age, and meet up regularly to let our hair down, so I made them all a pair in "their" colours.


I wrapped them all in complimenting tissue paper with black ribbon, and wrote each one a Limerick about themselves which I tied on as a tag. They all seemed to like them lots :)


Result !


Saturday, 12 September 2009

Curly Wurly Crochet Scarf - The Pattern


A simple easy to make scarf, but it looks so groovy when finished that everyone will want one.

I made this in a gorgeous fluffy lemon and lime coloured wool.

So, all you need is your yarn  - any weight yarn is ok up to Aran Weight.  (amount depends on length and width of scarf) and a size 4.5mm crochet hook.
If you need to learn how to crochet have a look on You Tube, loads of stuff on there.


  • First of all you will need a chain stitch. Make a long chain in simple chain stitch the length of how long you would like your scarf to be.

  • Working back along the chain -Treble Crochet into each chain stitch. (PLEASE NOTE: in the USA the UK TC or Treble Crochet stitch is referred to as the DC or DOUBLE CROCHET stitch)

  • ***The next row is 2 x Treble Crochet stitches into each of the stitches on the previous row. This increasing is what will make your scarf curl.

  • Repeat from *** for each row until your scarf is as wide as you would like it to be. Tie off.


Let me know if you make it, would be interested to see any piccies.

Sunday, 6 September 2009

Chunky Wrist Warmers - The Pattern

After a good few lovely comments on my last pair of chunky wristwarmers I was asked how they were made, so here, for you all to enjoy, is the simple, easy pattern so you can make your own.
You will need:
100g Chunky Wool (I like the random colourways, but any is fine)
  • 2 Large Complimenting Buttons.
  • Size 5.5mm Knitting Needles.

  • Large Sewing (Tapestry) Needle.
Using the Thumb method (this makes a tighter, neater edge) cast on 38 Stitches.
1st ROW: *Knit 2, Purl 2, Repeat from * to end.

2nd ROW: **Purl 2, Knit 2, Repeat from ** to end.

Continue these two row until your work measures 7".

Cast off, and leave a length of wool for sewing.

Decide which is your top and bottom, then sew the two edges together from the top, for 1.5". Sew in your wool, and re-attach it at the bottom of your work. Sew the sides together for 3.5" work, which will leave a thumb-hole of 2". Sew in your ends.

Attach the button so it sits on the back of your wrist.

*****If you need to make these wrist-warmers smaller or larger, either add on or remove 4 stitches from the cast-on amount.
Enjoy !
And in true Blue Peter fashion, here are some I made earlier :)


Wednesday, 2 September 2009

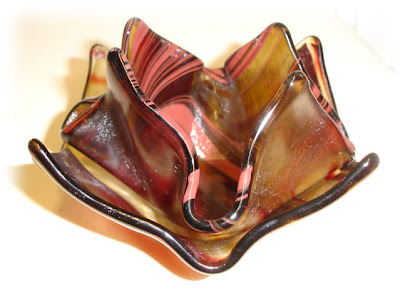
Hanky Bowls

Made a couple of Hanky Bowls last night.


First you fuse the glass to melt down the sharp edges, then you have to find something interesting to slump the glass over, something that will not melt, like Stainless Steel, or Terracotta.


I had two cocktail shakers and a bowl, so put a pink one in and two brown ones, as it happens when they were done the brown ones went together quite nicely, which was a bit weird as only the evening before (whilst these were "cooking") a friend showed me a photo of something very similar - thanks Kellie :)


So they can be used together as an interesting glass petal bowl, or apart as two matching dishes.


I feel the need to go and order more glass now :)

Monday, 24 August 2009

Chunky Wrist Warmers


I know it's not yet winter, but I was wool shopping, and spotted this gorgeous random chunky wool.

"What can I do with that" I thought to myself, luckily the shop had some patterns hanging around, and you could get a free photocopy of a pattern if you bought some wool. Result !


So this was what I ended up with, chunky wrist warmers in a random shade of burgundies. I nipped over the road from the wool shop to the craft shop and bought these huge wooden buttons to adorn them with - mainly so I would remember which way to put them on :)

They work great, lovely toasty warm hands, and free wiggly fingers :)

Have already started another pair, all of my mates with end up with these for Christmas no doubt........unless I get bored :)


Friday, 21 August 2009

Art Clay

Isn't it great when you trade skills?

I gave a Lampie Lesson and got an Art Clay lesson, result !

First of all I made a leaf, I painted a real pretty leaf with Art Clay paste, many layers, all dried with a hairdryer inbetween, then fired and then dipped in Liver Of Sulpher to give it a gorgeous deep colour.

Next I made a pendant for my daughter Shona's birthday, stamped with an alphabet stamper set, and textured with a swirly design. Then I added a green sparkly for her birthstone and polished it to a nice shine :)
Chuffed with myself I am :)

Tuesday, 4 August 2009

A distaster in the Kiln !

I was in such a good mood this morning, expecting to come into work and find some gorgeous glass handkerchief bowl. I have made a few in the past so I should know what I am doing - you would think !!
Instead I lifted the lid and my heart sunk. It looked like a glass explosion, I had forgotten to change the kiln setting and left them to get so hot that they totally collapsed into a motlen lump.


Even my beautifully planned dish came out wonky.


Big intake of breath, puff out the chest, grab the hoover, clean the kiln and start again !


Now what could I make out of this? :)


Wednesday, 22 July 2009

Splosh - Bottle Art Wall Hangings.


I had a cunning plan, but it didn't quite work, so the next best thing was to turn it around and try something else. Bring on Splosh ! Bottle Art.


Smashed up wine and beer bottles, arranged in an abstract manner and melted in the kiln, then a little strong wire added for a hanger, and in some cases a little matching dangle too :)


I have ideas for advancing this design, so watch this space - once I can figure out how to use the bottle cutter to cut perfect rings !!


Saturday, 18 July 2009

Fused Pendants

It has been ages and ages since I did anything creative. I know people think that because I am surrounded by beads, and charms, and glass, and clay, that I play all day. The truth is I rarely do, every spare minute in the shop is spent working - bagging, pricing, counting, listing....and so it goes on.


But on Wednesday I scheduled in a whole afternoon to make glass pendants, and I really enjoyed it. Although I decided to use the big kiln and was rapidly running out of inspiration by the time I had filled it !


I made 50 in total, but I won't bore you with them all, so here is a taster :)


Tuesday, 7 July 2009

Disc Necklace / Beads & Beyond Aug 2009


Another submission, this one I called Chocolate & Marshmallow, and it consists of a series of complimenting BRICK STITCH (not Peyote as it states in the magazine) discs - each with a Swarovski Crystal centre.

The beauty is you can make as few or as many as you like, varying sizes and colour, and just hang them from a ready made polyster chain - funky !

Featured in Beads & Beyond August 2009, page 26.


Sunday, 28 June 2009

A Pink Rocking Chair.

My sister, Julie, always wanted a Pink Rocking Chair. I set myself a challenge to try and sort one for her.
When one came up on Freecycle, I emailed and luckily got it, the lady said it was in need of some TLC, so it sounded ideal for my project.

First, my son Iain stripped it down, got every tiny little bit of varnish off it, quite a fiddly and drawn out job. Then husband Andrew glued the spindles back in and re-screwed the screws in to make the rockers secure.


Next , my daughter Shona gave it a couple of coats of undercoat, this part took ages as the top had to be done, then when it was dry, 24 hours later, it had to be turned upside down for the rockers and the base to be done. It had two coats.


We had to get the paint especially mixed as we could only find satinwood paint in pale baby pink, or deep burgundy. We opted for a Cotton Candy shade in satin so it wasn't too shiny. Again two coats, with lots of drying time inbetween.


I found a gorgeous grey material with a silver flower pattern which reflects every colour it is close to. From this I made a pad for the seat of the chair, and there was enough left for a little scatter cushion. I added two complimenting cushions from Morrisons, in Silver with Beads, and Burgundy.


She loved it :)....and I get my dining room back !!

Friday, 19 June 2009

Blueberry Cluster- Making Jewellery (4)


Making Jewellery Magazine, issue 4.

Chuffed to see my "Blueberry Cluster" design in the Supplement.


Made using varying sizes of Cats Eye Beads in 4mm, 6mm & 8mm, in a rich Royal Blue.

Each single bead was threaded on a pin and attached to a cable chain, its very bold, tactile, and heavy - you just have to shake it from hand to hand when you hold it :)

I would say it was around 300 pins in total, so it took a little while to make, I won't be making another in a hurry :)

Saturday, 13 June 2009

Crocheting a Bag

Years and years ago...to many to mention, my Mother taught me to crochet. I started basic with the coloured squares with random scraps of wool, any thickness and every colour of the rainbow.

A couple of days ago my interest was pricked again, looking at a friends photos on Facebook, she had made a gorgeous crochet bag, have to have a go at that, I thought.

Nipped into town and bought some wool - when I say 'some', it was actually 2 carrier bags full, but I had to make sure I had a good selection of colours didn't I ? :)

Anyway.... here is the owner of the pattern.....

http://attic24.typepad.com/weblog/crochet-bag.html

And here is the base of my first bag........


I think, perhaps, I have picked a bit too bright colours, maybe next time I shall tone them down a little :) Just in case you cannot see the colours, it is purple, mustard, coral pink and turquoise blue.

Tuesday, 9 June 2009

"Lilly Bells" Bracelet in B&B Magazine.


The New issue of Beads & Beyond has just popped through the door, and my "Lilly Bells" bracelet is featured :)

It combines Beadweaving with stringing.

I loved doing this bracelet, it is so delicate, but so lovely to make. Wether you make the cups in a solid colourway, or a mix, it can look equally as good.

I notice a stray thread in the photo on page 29 though, it is annoying me immensly, I might not have to look again :)
Let me know if you make one, I would be very interested to see :)