Monday, 12 April 2010

Introducing QUIRKIES - Chocolate Tie.

For those of you who have been following my blog, you will have seen my little odd bits & pieces, namely the ties, the bras and the butterflies.

Well, now they have a name ! QUIRKIES

An online Dictionary says that Quirky means "odd, unusual, eccentric, idiosyncratic, curious, peculiar, unpredictable, singular, fanciful, whimsical, capricious, offbeat, out there"

The Urban Dictionary gives the following definition: "something that is strange/not normal but cool"

So I think that name might just suit them very well, big thanks to my good mate Tan, who came up with the name.

So this one is a Tie Quirkie, in dark chocolate brown, with cream, pumpkin and turquoise patterns, oh and there is a touch of gold in there too - these little gold beads are real 24k gold plated delica beads, and they cost a fortune :)


I have strung it on Tigertail wire, with complimenting glass beads and gorgeous sparkly turquoise Swarovski beads.


Now let me show you one of the beads I use for the tie part. Tiny aint they? :)


If you have any suggestions of things I can do to make into a Quirkie, shout out and let me know.

Coming soon..... more Bras, more Ties, and a Crown :)

Saturday, 10 April 2010

A Bead Giveaway....but with a difference.


It is quite a mad idea, but I am very impulsive, and when an idea hits me I have to run with it :)

This is a Bead Giveaway, but with a HUGE difference. You have to find me and ask for the beads in person.

The Bead Hunt will happen tonight....(Sat 10th April 2010)...yep TONIGHT....between the hours of 8.30pm and 10.00pm. If they are not collected tonight, then I will hide them for some lucky person to find at a later date. :)

They are handmade glass beads, made by myself in my little studio, and are one-of-a-kind.

So you will want some clues?

I will be in the City of Carlisle, in a family pub on Scotland Road, which has a Premier Inn attached to it.

This is my Weemee avatar, you have to be able to work out who I am from that (unless you have already met me of course, then it will be relatively easy)


...and this is a snippet of the top I will be wearing.


All you have to do is march up to me and say "May I have the beads, please" and as long as you are the first person, I will hand them over. I will try and update our Facebook page (http://www.facebook.com/TheBeadShed) as soon as they are collected, so try and keep an eye on it.
If you are not near Carlisle, then do not worry, I will be hiding beads all over the place in the next few months, so you might be lucky then :)
Good luck.

Thursday, 8 April 2010

A Blue Bead Day

On Easter Monday, the weather was unpleasant, so dog walking in The Lakes was out of the question. So what a fabulous excuse to turn on the torch and make some beads.

I decided it would be a blue day, and only use blue glass - mixed with a bit of this and a bit of that.

To start with, while the kiln was heating and the mandrels were drying, I made some simple fritty gravity beads. These are made by rolling a basic bead in broken glass "glitter" and melting in, then letting them droop to drag the colour round.
These next ones are a deep deep cobalt blue, encased thickly with clear, and dotted with white. They are a Laura Sparling style :)

Next I used an Ivory base bead, put a wiggly stripe of aquamarine transparent blue, topped with a turquoise.

And these have to be my favourite. An aquamarine transparent base, with a covering of silver foil, fumed to give it a depth of different colours and encased in thick clear.


Tuesday, 6 April 2010

Free Tutorials.


I have put some of my designs on my website as downloads, some are chargable, but most are free :)


There are some tutorials for total beginners, and also for intermediate. Along side are a couple of useful "how to's" for basic beadweaving stitches.


Do let me know if you make anything, and I will include your photo in one of my next blogs :)
I hope you enjoy making them as much as I enjoyed designing them.
Here is the link for you :) http://www.thebeadshed.co.uk/tutorials.htm


Monday, 5 April 2010

Bra !!!


Some say I am a little mad, some say I am a little odd, I just think I am a little eccentric :)

And here is the proof...... yep, it is indeed a little bra, made from tiny Delica beads.

Why, you may ask? No idea, it just popped into my head and I had to do it.

It measures around 4" across, and I have strung it onto tigertail wire adorned with Czech pressed glass flower beads and Swarovski Crystals for a little sparkle.


A pink lacy one next I think :)

Saturday, 3 April 2010

Tartan Cuff.


Well, this piece was a labour of love. It was a case of three rows forward, two rows back !!

What a nightmare, I have never unpicked so many beads in my life, even then I see a few stray ones where there should not be, but I got to the point that if I did not get it finished, I never would.

Maybe I made the pattern a little complicated, the next one will not be quite so detailed :)

So..... it is Peyote stitch, made in Japanese Delica beads, a nice thick cuff with a huge chunky button, measuring around 40mm, as a clasp.


Bay City Rollers fans, eat your hearts out :)


Thursday, 1 April 2010

Some more Klimt Cane Beads

Today, my daughter Shona, and her mate Hannah decided to have a play day.

They decided on Fimo beads for this morning activities, as Hannah is studying Klimt at school for her GCSE Art, and I had previously made some Klimt Beads, we decided to revisit the technique.

After the last attempt at these beads (http://soozintheshed.blogspot.com/2010/03/klimt-complex-cane-beads.html) I had bruises on the palms of my hands from pushing the clay through the extractor! A friend who makes the most magnificent fimo pieces, suggested I bought a wind-down extractor, rather than the push one I was using - I have to say it was worth every penny of the £22 I paid, it made making the beads so much easier.

All three of us picked totally different colours, I did mine in a muted grey & pinks with a touch of turquoise, while both girls picked vibrant psychedelic shades.

Here are mine, a set of eight beads with a matching pendant, which is very large at around 60mm.

The girls hard at work, Hannah is the blonde, and Shona..... well, the non blonde :)


These are Shona's beads and a matching pendant.....
...and last but not least, Hannah's beads and matching pendant.


After lunch the girls went on to bake !!


Shona + Hannah + cake making ingredients = MESS !!!

Still, at least they had fun :)

Tuesday, 30 March 2010

Glass Bead Making Therapy

Sometimes you just need to take some time out. Undisturbed time out !

So Sunday saw me trotting off to my workshop to play with glass. I tend to get undisturbed peace in there due to a nasty burnt thumb once when someone popped in and made me jump ! Now, everyone steers clear when the torch is on.

I just needed to play, but without thinking too much about shapes and designs.

I had my iPod on my favourite toons playlist, a large glass of White Zinfandel, and a few rods of glass. What more could you possibly want?

(Note: It is probably not a hugely good idea to partake in alcohol whilst operating a propane & oxygen torch, so please do not follow by example) :)

I made these......


Some simple gravity frit beads, love the colour they ended up being.

and these......

A simple striking yellow glass with a Silvered Ivory stringer band.

and these.....


Inspired and taught to me by the fabulous Laura Sparling, she is an encasing genuis, and I love coming back to re-make these beads, they always look so cute.

Sunday, 28 March 2010

Klimt & Complex Cane Beads

I went and bought a whole pile of different colour packs of Fimo, for another project..... but as usual got sidetracked and made cane beads instead :)
Kilmt cane is where you roll your Fimo into a sausage then cut it into slices, do this with a few colours and then lay the discs together to form a long coloured sausage, push this through a clay extruder and you get some fabulous coloured canes. You then bunch these all together and roll slowly to combine, then lay on your beads.


I made a pendant first then the matching beads.


Then I made a complex cane, like a kaleidoscope, using sausages of colour, wrapped in other colours, cut and re-wrapped to make many different canes, of varying shapes and sizes. I bundled it together, chopped it into 6 and bundled it all together again before wrapping it all in purple. I then reduced by rolling it into a sausage.


I made the pendant first using the larger slices of cane, then I reduced it further by rolling to make the beads. On reflection I think I reduced it too much for the beads, as the pattern has become a little too small to see. These beads I shaped into lentils.

I had two left over slices of cane from the pendant, so I just put a little hole in each to make earring charms.
And this is my left-over bead. All the left over bits of clay, mushed into one, swirled and shaped into a large lentil measuring around 35mm. I quite like it :)


Friday, 26 March 2010

The Tie Project

I had this mad notion...... blame it on too much cheese, or wine...but it seemed a good idea at the time :)

The idea was to take a Tie and reproduce it in as many different ways as I could.


The tie I was initially after was one I spotted on David Dickinson, him of the antique fame, it was a patchwork of different patterns and colours - a riot of colours, and very interesting.

However I failed miserably to find one, so instead I trailed around the local charity shops and found some different ones.

I decided on this one in the end. A navy blue tie, with 6 stripes of different shades of green.


THE BEAD WEAVE TIE

Ok, so the first project was to recreat it for a necklace - imagine his and hers for a posh party, this necklace strung over a little black dress would look so eyecatching :)

This was stitched in Peyote Stitch, using Delica beads, it was tricky to match the greens in the fabric exactly, so I tried to do it as close as I could. The actual tie measures around 7" long.

I then strung it onto some wire with some cat's eye glass tube beads alternated with Swarovski Crystals and Fire-Polished for a bit of sparkle :)


THE GLASS TIE

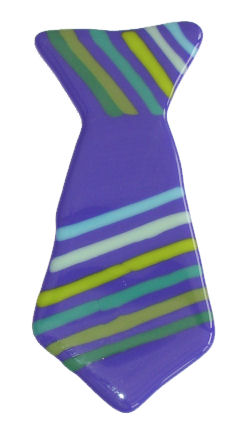
The next thing I had planned was a glass tie, to be used as a pendant. Only when I started cutting the glass I realised that the thinnest strips I could cut would make it way to large to wear, so it is now a wall hanging measuring approx 10" long.


Have you noticed the not so deliberate mistake? :(

Keep your eye out for the next instalments :)

Wednesday, 24 March 2010

Another Patchwork Flutterby


I thought I would show you my second Patchwork Flutterby, if you missed the first here is a link :)


I have designed about 12 so far (only stitched two), this one though I decided to do in just two contrasting colours. The original was designed in black & white, but when I came to stitch it I picked Chocolate Cherry and Cream AB for a little sparkle.


It is around 5" across, so it really is a statement piece when worn.

The 'chain' is made up from gorgeous Pink Aventurine gemstone beads, teamed with some deep red AB coated Fire-Polished beads. The antenna is a eyepin, threaded through the top beads.


I really love doing these, they are so therapeutic, until you get tired and end up having to pull out 8 rows because of one wrong bead!! But that's another story :)


Tuesday, 23 March 2010

A Dragon Bracelet by Donna Sanders

You may remember a couple of months ago I made Raphael the Delica Dragon.

http://soozintheshed.blogspot.com/2010/02/raphael.html

Well, over on the Bead Buddies Forum I entered Raphael in the "Myth & Magic Challenge" as set by Donna Sanders.

I was chuffed when the entries were put in a poll, and Raphael won !!

But, if I was chuffed then, I am much much more chuffed now.....just look at my amazing prize, as made by Donna herself.


It is an amazing beadwork Dragon bracelet, using a variety of stitches, AMAZING ! I totally love it.

Check out her website.. http://www.delicatesparkles.com/ you can also fan her on Facebook "Delicate Sparkles"


Thanks Donna :)


Thursday, 18 March 2010

Japanese Delica Dolly


Let me introduce you to Mizuki (Japanese meaning: - Beautiful / Moon)

This piece was originally thought up for the Bead Buddies Forum Japanese Challenge.


She is made in Miyuki Delica Cylinder beads, which are very uniformed and lay beautifully when stitched together, but they need patience and lots & lots of time. She took a good few hours to complete :)

If you would like to have a go and make her yourself, you can find the pattern in Bead Magazine - Issue 21, out this week.


I would be very interested in seeing how you get on if you decide to have a go. Email me your pictures to thebeadshed@gmail.com and I will show them in a blog, and send you a little gift :)

Monday, 15 March 2010

Glass Beadmaking at Higham Hall.

This weekend was my first as Glass Beadmaking Tutor at Higham Hall College.

Of course, I was a little pensive, having not taught there before, but it was a blast !

I had four students, all of them lovely ladies, who I hope to keep in touch with, they made the weekend so much fun and filled with laughter, so if you are reading Ladies, I thank you :)

If you have never looked at the Higham Hall website, do have a peep, I can totally recommend doing a course, the food they serve is amazing - with everything hand-made and mouthwateringly yummy. In fact I have booked on one myself, Silver Clay Rings :)


But hey, it's not all about the food, so back to the bead talk. This is the brand new equipment, ordered in just for the course. All shiny and spangly :) (Well, it was!!)


The students, Gill & Lucie and Jackie & Veronica.


So, none of the students had ever melted glass before, but look at the stash of beauties they managed to produce!


By the end of the day two they were making a tree bead which pulled together all the techniques they had learned throughout the course - pulling stringers, twisties, shaping, pressing. I think you will agree they did really well.


The Ladies with their Tree Beads...


....and a closer view.


Can't wait until the next one :)