My very first go on the potters wheel – and I LOVED IT!
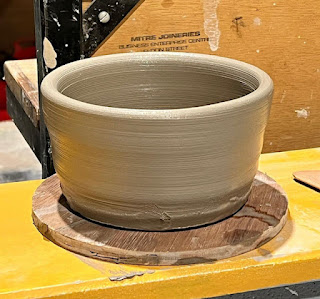
I really didn’t think I would enjoy it at all, but it was so
much fun, and felt really intuitive.
So I had another go… and another.


I think I am gonna like this part of the module 😊


My very first go on the potters wheel – and I LOVED IT!
I really didn’t think I would enjoy it at all, but it was so
much fun, and felt really intuitive.
So I had another go… and another.
I think I am gonna like this part of the module 😊
I thought I would have a go at grinding a hole out of the side of a bottle – for no particular reason, other than I can! The grit was 120 grade.
I had to hold the bottle really tight so it didn’t get caught
by the wheel and would go flying off in any random direction…. then I just waited
while the grinding wheel did its stuff.

After grinding one side I decided I would do the other too, making
a hole all the way through.

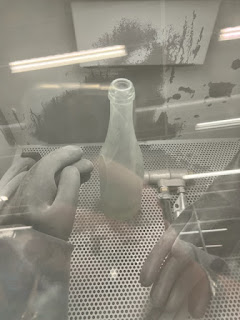
I think I might display this with a wire form in it, poking out of the sides and top.

So, this was something very different for me. Glass Painting! - I don’t mean painting o glass with those Vitrea paints, this technique is painted and fired making it permanent.
The piece is fired in between layers so once you are happy with a layer, you can fire it, then work on it again without risking the layer you’ve already done.
First I needed a photo to work from – I used this one of my Dad, taken about 30 years ago.
Black and white photos work best as you can then copy the
shades.

The paint powder was mixed with gum Arabic to make it a good consistency for painting with.
I placed the photo under a piece of glass and painted on the outlines.

This then went into the kiln to bake at around 650 degrees.
Quite pleased with the outcome – it does resemble my Dad somewhat.

The next step was to work in a kind of reverse painting style, but covering the whole thing in paint and scraping back the light areas.
This was all very new to me, I have never done much art, but it was good fun.

There were quite a lot of scraping involved to get the light bits back to how light I wanted them.
Then I textured the background – I could have removed the paint from the background, but I thought it looked quite nice with a criss-cross texture instead.

And this is my finished
piece.
I am so pleased with it as it
really does look like my Dad!
I am definitely trying this technique again.

Another first in ceramics today for me – learning how to slab build.
With slab building you have to roll out the clay to your desired thickness (using a clay roller, rather the by hand) and leave it to dry to the correct dryness.
If it is too soft the slabs will not be sturdy enough to
build with, and it it’s too dry then with just crack and break. – this may take
some time to get right!

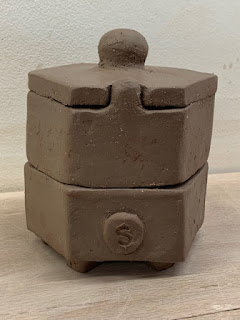
Our task was to build a box with a fitted lid, a knob on the lid and feet on the base.
I thought I would do a hexagon shaped box, I had to mitre the sides so they all fit
together nicely – this was a good bit of guesswork to be fair, rather than mathematical
preciseness.

My feet were a bit rubbish to be fair, a bit clunky – but it had feet so I had ticked that box.

The lid needed to fit without
falling in – but because my hexagon wasn't a true shape, my lid would only
fit if placed in one direction. To
solve this I added a knob to the front of the box and cut a gap in the lid,
which means the lid can only be put on in the way it will fit. (Hope no one notices !)


I will be really interested to see how this turns out, I hope it survives the kiln firings.
These boxes are going to go
into a Raku firing later on in the module. Before then it will be fired in a biscuit fire
at 800 degrees, then glazed with a Raku Glaze.

It was the first of my ceramic lessons today – not a module I was particularly looking forward to, I must admit.
Having done ceramics at school (I was bad!) and then at Adult evening classes (I was just as bad!!) I didn’t hold out much hope at all for being even half decent at it.
Our teacher was the marvellous Rob Winter – a superb ceramicist.

Our first lesson was handbuilding and to make a pinch pot.
We took a lump of stoneware clay and formed it into a nice smooth ball by banging it slightly with the palm of our hands whilst turning in the other hand.
Once smooth I would continue to turn whilst pressing my
thumb into the centre.

This wasn’t so bad after all – I managed to turn and press my thumb into the hole making it bigger and thinner each time.
Then I added a ‘signature’
button so I could tell it was mine when it came out of the kiln.

Considering the very first effort that I had made way back in school over 40 years ago… I don’t think I did too badly.

This piece is going to go
into a Raku firing later on in the module. Before then it will be fired in a bicuit fire
at 800 degrees, then glazed with a Raku Glaze.
My first attempts at making coil pots.
With this technique you make a base then build the sides of the pots up using coils, which you then squish together.
First I went for a straight sided pot, which I then textured to look almost like wood.

The second one I wanted to be more sculptural – this was
harder – and yet, it looks like it’s a mistake! 😊
I don’t think I like it at all – but maybe it will be a little more exciting once it is glazed.

I thought I would have another go –
this time I build the shape of the pot then added loads of curly features to
the outside.

The weight of the extra clay on the outside caused the pot to sag a little, so I held it up inside with a wooden tool while drying it with a hair dryer. It helped a little but is still a little misshapen.
They went into the kiln for a biscuit firing at 800 degrees
A lesson in using the sandblaster today.
First of all I cut 12 small squares of glass, then piecing them back together I stuck some sticky backed vinyl all over them.
I then drew a basic flower image that I had found on the
internet.

Next, I cut the lines out of the flowers with a sharp craft
knife. The parts I cut away were the parts that I wanted blasted by sand.

The sticky backed vinyl wasn’t
quite sticky enough, so I started again with strips of masking tape which was a
bit stronger.

Once I had given them a good
blast in the sandblaster, I removed them from the tape, cleaned them off and
started to wrap each square in copper foil.


Not the neatest work I have done, but I think it looks ok, and shows off the sandblasting nicely.


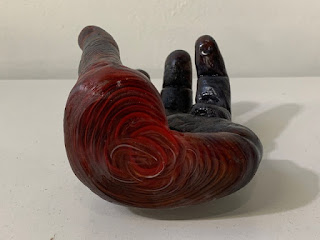
We were learning how to use silicon casting material today to take a nice detailed cast of items – which can then be made into wax and finally glass.

The next step was to pour melted wax into the mould, and
wait for that to harden.
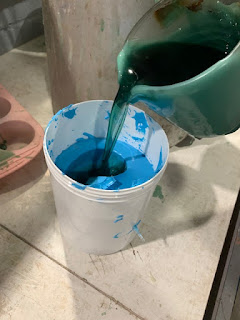
Once the wax was set I could
break away the silicon mould – I then set the waxy hand on a lump of clay to
form a base.

Plaster Recipe for refractory mould: (to be measured up as required)
·
1lb plaster powder
·
1lb molochite powder
·
1 pint water
Now it was time to cover the hand
in the plaster mix. Adding layers at a
time to ensure all the parts were covered.

When the mould was dry, it was time to scrape out the clay and melt out the wax.
This was done over a steamer, allowing the wax to drip into a tray which meant it could be reused.
Once the wax was out I have to fill the mould with water to measure how much glass I would need (2.5 x the amount of water)
The mould was then put into
the drying cupboard.

Once dry, I filled a terracotta plant pot with the correct amount of glass and they went into the kiln.
The mould was positioned with a table above made from kiln props, on this sat a plant pot with my measured amount of glass in it. Once the glass melted it dripped through the hole in the plant pot down into the mould.
I used some scrap glass from the HotShop to make this as I fancied a little colour.

Now it was time to very carefully chip away the mould, making sure not to damage the glass inside.

Dah da! A lovely glass hand …. minus a little
pinkie 😊

The silicon mould doesn’t last
long and is not really reusable over time, but I managed to get another wax
cast from it.

This piece didn’t need any
coldworking at all, I purposely underestimated the glass amount needed so I didn’t
have much (or any) overspill, and it all came out quite smooth.

Today at Uni we were playing with the sandblaster, and creating images from blasting away layers of glass.
I thought I might do a photo of Freddie Mercury – my all
time musical hero.

First I found a nice simple photo that I wanted to use on Google images, laid a nice piece of flashed glass on top and draw around it.
Flashed glass is a clear glass with a thin layer of colour
on the top, so when you blast the colour away you get back to the clear glass
beneath.

I quickly realised that drawing on the glass was a silly idea as I had to mask it off – so I cleaned the glass up, covered it with masking tape and started again.
This time I cut out the shape
with a sharp blade.
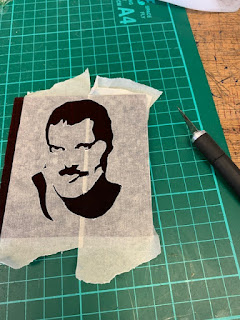
After quite a lot of sandblasting – it takes longer than I thought to get through a 1mm layer of glass – my masking tape started to come away, so I called it a day at that point.
But, quite happy with this…
not sure if it immediately shouts Freddie Mercury, but I know who it is 😊


