Showing posts with label fused glass. Show all posts

Tuesday, 26 April 2022

The Kaleidoscope Project - confetti disc

 As part of a uni assignment I am creating a type of kaleidoscope – the viewer will be made from mirrors and the discs will all be different using various forms of architectural glass techniques.

This disc is created to look like confetti

I cut a disc of glass from clear glass and laid it in the kiln where I then placed small pieces of paper thin blown glass shards all over it.


It then went into the kiln overnight to be fused together.

I think it looks quite interesting.


And it looks really pretty through the kaleidoscope.


Monday, 25 April 2022

A puddle of circles

One of our lessons in Uni was on how to cut circles from glass.

The easy bit is actually cutting the circle, the harder bit is breaking it out from the rest of the glass…. So it’s good to get a bit or practise in.


I cut nine circles out in total, using three different colours and various different sizes.

Then I thought I might pop them in the kiln to fuse together and make an interesting wall hanging.

After being left overnight to fuse in the kiln, I was quite excited to open the lid and see what I had.

It’s maybe a little more ‘puddly’ than I would have chosen, I should have not fused it as high as I did in retrospect, but I still quite like it.


Wednesday, 6 April 2022

The Kaleidoscope Project - Tartan disc.

 As part of a uni assignment, I am creating a type of kaleidoscope – the viewer will be made from mirrors and the discs will all be different using various forms of architectural glass techniques.

This disc is a fused ‘tartan design.

I started off by cutting a circle out of glass, then I cut some glass ‘ribbons’ and stringer to fit the circle and laid them onto the class.

I actually worked directly into the kiln for this disc as I knew that trying to move it after placing the ribbons and stringers would be very stressful – and probably unsuccessful 😊


I then fired it at 760 degrees to fuse the decorations to the disc.


I was really pleased with this one when it came out of the kiln, I really do like the Tartan effect.

And it looked great through the kaleidoscope viewer.  😊


Tuesday, 5 April 2022

The Kaleidoscope Project - candy stripes disc

 As part of a uni assignment, I am creating a type of kaleidoscope – the viewer will be made from mirrors and the discs will all be different using various forms of architectural glass techniques.

This disc is a fused ‘candy stripes’ design.

I started off by cutting a circle out of glass, then I cut some glass ‘ribbons’ to fit the circle and laid them onto the class, not in any particular order.


Then it went into the kiln and I fired it at 760 degrees to fuse the ribbons to the disc.


The finished disc was lovely and smooth, and the ribbon lines were nice and crisp.

It made a really interesting pattern when looked at through my kaleidoscope viewer.  😊


Sunday, 20 March 2022

Kaleidoscope Project – marble disc


As part of a uni assignment I am creating a type of kaleidoscope – the viewer will be made from mirrors and the discs will all be different using various forms of architectural glass techniques.


The first one I wanted to make was to include shop-bought marbles.


First I put the marbles in the kiln to melt down so they had a flat bottom.

This meant I could arrange them neatly onto a disc of glass without them rolling all over the place.

I cut a 15cm glass circle out of window glass and placed the marbles onto it.

Then into the kiln it went up to 820 degrees.

The next morning I was way too impatient and had a sneaky look while the kiln was still at about 100 degrees  (not really recommended in case the piece thermal shocks and cracks.)


Happy with the result.. I think it should make a good disc to view through a kaleidoscope.


Monday, 28 February 2022

Fused Glass experiments.

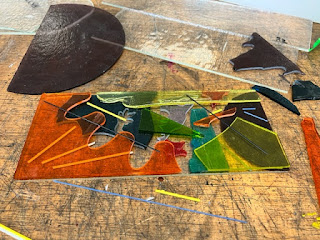
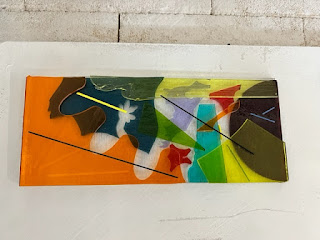
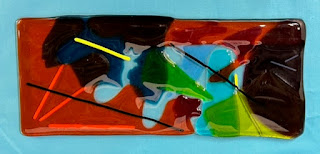
 Today we got to play with pieces of glass – layering them up to create some interesting patterns and designs.

I have done this for quite a few years now in my own studio, but it was nice to just ‘play’ and see what happened rather than creating something purposeful to perhaps sell or gift.


I just layered up some pieces that I had found left over from someone else’s waterjet cutting project, I thought they formed interesting shapes and was interested to see what would happen when they were layered on top of each other.

It was fired at around 780 degrees – normally at home, I would have gone a little higher to create a smoother surface.  But the texture was quite nice.


Saturday, 17 April 2021

My finished Uni Cosmos / Universe piece

  I have finally finished my Cosmos / Universe piece.  I am calling this piece 'My Universe'.  It is made from glass, both cold and hot worked.


I think it worked out how I originally planned it.  My idea was to take a 'core' sample of the universe, how I depict it, and create a glass mobile to represent this small sample .

My rough sketch looked like this.  


And this photo was always in my mind as a guide to what I wanted to show.  A sample digging down into the earth from deep space.


I made five different layers, each representing something that I felt was there, but perhaps we could not always see.


Deep Space

My first layer was to represent Deep Space.  I would have liked to have used black glass, but unfortunately didn't have immediate access to any, so dark amber it had to be.  I deliberately designed it to have the open weave kind of effect rather than being a solid slab, because I wanted to show that there was more to consider even outside of what we know about the Universe and Space.  This layer was created cold in the kiln, then the kiln is turned on allowing the rods to fuse together within a large metal ring that measures 40cm in diameter.  


Nebula

The next layer I wanted to depict was Nebula.  The colours of Nebulas fascinate me and are actually quite easy to translate into glass beads, due to all the beautiful coloured frits (broken glass) and enamels you can buy.   

Using a hot torch and some glass rods I made a lot of coloured beads, mainly in blues and pinks and purples because I felt these colours worked well between the (supposedly black) top layer and the next layer which wasn't going to have any colour at all. I didn't plan any particular effect of finished bead, I just picked up whichever glass I fancied working with, and poked it, swirled it, allowing the colours to implode which in turn allowed the bead to design itself.  Almost like I didn't want any control over the final outcome, I wanted it to be as chaotic and self-forming as it could be... with only a little help from me.


Memories

The next layer I have called 'memories'. It depicts the fact that if you have lived in this universe then you never actually leave.  I have used the cremation ashes of a friends dog encased within clear glass. I would have liked to have used the ashes of a loved one, but I don't have any, plus I thought that some people might cope better viewing the piece knowing it didn't contain an actual person.

These 'memory' beads are made in quite a uniformed manner. It has to be a controlled make to ensure that all of the ash is well encased within the glass, otherwise the beads can have sharp little pieces sticking out.  When a loved one died we are taught to look up to the sky and assign them a star, so I wanted this layer to be hovering above the earth in plain sight.  These beads, like the Nebula beads, are made on a hot torch using rods of glass.


Earth

I felt that if I was doing a core section of the universe then I needed to include a planet, and the planet that I thought that would be recognisable by colours would, of course, be Earth.

So I started this off the same way by doing a 40cm mish mash of glass rods in a steel ring in the kiln.  Once fused down after one firing of the kiln, the piece then had to go back in to be slumped into the shape I wanted.   I re-fired the piece on a slumping schedule to allow it to drape over an upside down ceramic bowl.  I would have preferred a shallower bowl if I could have, but having limited supplies at home I was quite pleased with the shape I actually got.


Lava

The final layer I chose to do was to depict lava droplets within the Earth.  So I made small orange beads for this and hung them under the Earth's 'crust'.


I am pleased with the final outcome, there are a few things I would have done differently, as I have mentioned, had I have had the materials or tools, but on the whole I am pretty pleased with it.

I expect that a small explanation of the final piece might help people understand what I am trying to say, although it could be perceived in whatever way that people imagine their own universe to be perhaps.

The piece measures about 40cm across by 60 cm long.  All the layers are held together with nylon fishing wire, and it is currently now hanging from my shed roof.   :)


Friday, 26 February 2021

My sustainability project.

  I have finished my uni piece for my 'Sustainability' assignment.

Due to the fact the working with glass isn't one of the most sustainable art forms, I decided to create a piece that might draw attention to the plight of the planet instead.  

I also decided that I would not purchase anything to create this piece, but concentrated on working with things I already had.

In my head I wanted to make a clock, to draw attention to the fact that we have limited time left to help the planet.

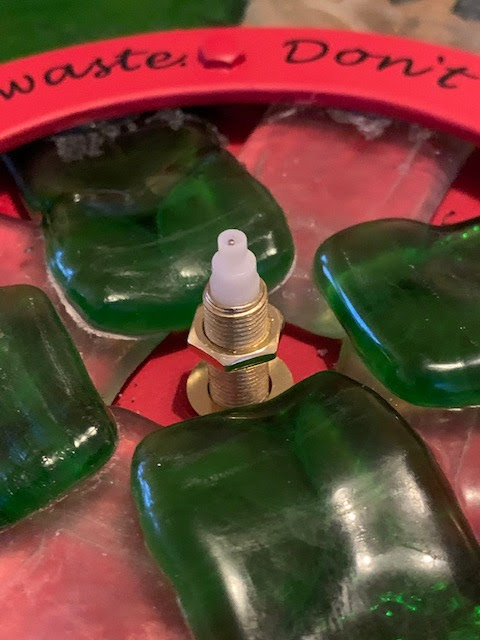
I had a box of mini wine bottles that I scrubbed and dried, then popped in the kiln to melt down flat.

My kiln is quite an energy efficient one, as it's not soo big, but I did need to do a couple of firings to complete my piece.

Once they were flat I messed about for a bit trying to decide on a formation. Ideally I would have liked to use all twelve bottles, but this was going to make the clock too heavy to hang.  In the end I decided on a formation of eight bottles, leaving some to use in another project at a later date.

I cut the numbers out of old copper sheet that I had rescued from a fire pit.


Once that was all nicely fused I was just going to fit a clock part, when I came across a clock kit in my stash that had an interesting wooden ring. Immediately I thought this would be excellent as a 'warning' ring if painted red.  Warning road signs are usually red rings.  

Because there was also another piece of round wood in the kit, I could sandwich the glass in-between the pieces with glass glue and bolts - therefore making it a much sturdier piece to hang on the wall.


As I now had a red warning ring I felt like I needed a warning statement to go on it.  My daughter helped me out with that - I wanted both the words 'Time' and 'Waste' within it.  She she wrote... "Don't call time on the Earth, reuse, don't waste". That worked really well so I wrote it on.

I was VERY unhappy with this as my handwriting is appallingly bad.  So it was back to the drawing board for that.

After a quick repaint, I dug out my vinyl cutting machine and I had some scraps of black vinyl left that had come from my old shop many years ago.  I cut out the words by machine this time and it looked so much better.  Using the vinyl was something I wanted to avoid if possible, due to it being plastic.  If it wasn't lockdown and I could have found someone with nice handwriting I would have definitely done it that way instead.


Now it was time to put it all together and add the clock mechanism.


And my piece was finished.  And it holds it's own weight well on the wall... and you can tell the time so it's functional too, as well as being a conversation starter,

I have enjoyed this project. I particularly like working with materials that might have otherwise gone in the bin.  Giving something a repurpose is something I try to do in other aspects of my life, like adapting clothing and sprucing up furniture.  So this assignment was right up my street.

Wednesday, 24 February 2021

A little stumble....

 Today I had a meltdown, like a six year old might, when my project didn't end up looking how I wanted it to look!

The day started well with me managing to scrounge some nuts and bolts off my Husbands friend - I am trying very hard not to purchase a single thing towards the making of this clock, so if I don't personally have what I need I will ask other people if they have it.  If they don't I will have to rethink my plan.


I then had to mark off where to drill on my ring, and the piece that would sit underneath, and find a drill bit large enough to accommodate the bolt.  My first attempt at drilling a hole wasn't massively successful as the wood all chipped badly on the back.


So I gripped it to the underneath piece and decided to drill them together.  This didn't work well either as the wood then just chipped under the second bit.

So I then drilled right through both and into a scrap piece of wood.  This worked!

If at first you don't succeed, try and try again.... as they say.


I didn't want the bolts to be black, so I drilled a load of holes in a scrap of wood to stand them up in while I spray painted them.  I also painted the two pieces of wood as the same time to hide all the chipped holes.


Once the paint was dry it was time to work on the wording.

My daughter had come up with a nice slogan that I thought would work well.  I wanted the word 'Time' in it, and also the word 'Waste'.

"Don't call time on the earth, reused, don't waste"

I liked this so I then proceeded to write it on the ring, in-between the screw holes.


And this is where my meltdown began..... why I even attempted it in the first place is beyond me, I know my handwriting is complete scrawl.

I type, I have no need to write.  Maybe that's a skill I should work on for the future.


The worst bit was, I didn't actually have my meltdown at this point, where it would have been much easier to rectify... no, I waited until I had glued all the wood into place on the glass bottles and screwed all the bolts tightly into place too.  THEN I decided to have my tantrum.

I decided to pour myself a rather large glass of wine and put it all away to deal with another day.


Tuesday, 23 February 2021

Thanking the Kiln Gods.

  The Kiln Gods were good to me overnight, when I opened the lid of 'big blue' my faithful kiln I was so relieved to see a piece that had worked how I wanted it to.  Always a risky business using recycled glass.


It had slumped down pretty evenly and the numbers had worked.  Big thumbs up all round.

So, off I went to my craft shed to find a clock mechanism that I know I have somewhere as I save all sorts of stuff for 'just-in-case'.

Instead of just finding a mechanism, I actually found a clock kit that someone had gifted me a few years back... now my idea had evolved somewhat, I could use this piece to add something else to the design.


The kit consisted of a wooden clock base, along with a wooden ring and the clock part.

I decided that the ring needed to be bright red... like a warning ring, to warm people about time ticking away to save our planet.

So I painted it all red.


I am going to give it another couple of coats, then work out how to assemble it all!


Monday, 22 February 2021

Deciding on a layout for my clock.

  Sometimes I have a determined plan in my head about where a design should end up, and other times  (most others) I just see how the pieces fit together and how much I like the look.

Not just with glass, but also with quilting and crochet, I will lay out a design, take a photo, move it around, take a photo...numerous times.  Then I go and make a cup of tea and flick through the photos, finally choosing a design/layout that way.

You seem to get a different view through a camera, you can certainly spot flaws and mistakes more in a photograph I think.


So I laid my bottles out in the kiln...


Then I decided that I really did need numbers, at least on some of them.

Using some old copper sheet that I had rescued from a fire pit, hence the beautiful colours on it, and cut it up.


I decided on Roman Numerals as it would be much easier to cut straight lines of copper sheets, rather than cut around shaped numbers.


I don't know where my head was when I did this, as I cut enough pieces to make up numbers 1, 3, 6 and 9, it wasn't until I was placing them that I realised I need a 12 instead of a 1.  thank goodness I caught that in time!

So, back to the kiln and laying out a design.


I finally settled on the middle design, it was a difficult decision which I pondered over for sometime.

The bottom design used all 12 bottles, which equated to the 12 numbers on a clock, but it just seemed a little bulky, plus I thought if I halved the use of the green bottles it would leave enough for another art piece in the future perhaps,

The kiln lid is now tightly shut and heating up nicely to fuse all the pieces together.   Fingers crossed!