Saturday, 30 January 2021

My day in photos.


A little challenge set by one of our university tutors this week was to use photographs to depict our day.

I decided to try and take one each hour to give a snapshot of what I get up to on a daily basis.

I have done this a few times in the past over on my Instagram, but it was fun doing it again.


At 9.30am I was up, dressed, hair brushed (unusual as it sounds to those who know me) and logged onto the computer for my online class lesson.

First drink of the day is peppermint tea. I also had a slice of marmite on toast and fiddled about with a miniature armchair as the class went on  :)


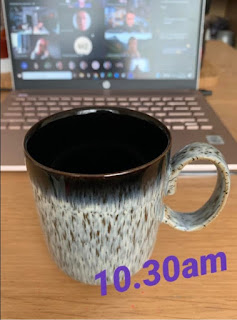
10.30am - still in class, although I have switched from tea to strong black coffee. I don't do sitting still for long very well so I need something to keep me alert.


By 11.30pm I was in the supermarket doing some essential shopping for both our house and my parents.
My Mum asked me to buy her salmon, and I found this!  I couldn't believe that you could buy a salmon head and tail - why would anyone want that?  So I asked on Facebook, and yes, people buy this.  Apparently in Asia they have 'fish head curry'.  No offence... but yuk!


At 12.30pm I wandered down to my friends little catering business, where he is doing 'ready meals' to finish cooking at home.  This week he did a Sweet Potato Vegan curry with some Indian hash potatoes. So I supported his little business and bought myself a lovely tea!


Back home at 1.30pm and time for a quick lunch.  Bagel with marmite and peanut butter - nothing nicer!


At 2.30pm I got to work making a vegan naan bread to go with the curry for tea.  No recipe, as usual, I just chuck it all in a bowl and hope for the best - always seems to work out ok.


At 3.30pm I was back working on my little armchair project, with the help of a very sharp blade and a big tub of glue.  This mini armchair is to go into my mini craft shed.


At 4.30pm, while waiting on the glue to dry on my mini armchair, I started work on fitting these little cross-stitches into frames.  I made these a couple of nights ago and they are also for my mini shed project.


I know, I know! 5,30pm is a bit early to crack open the wine..... but I was cooking, and I do like a drop or two of wine whilst I am cooking.  I am rolling some fresh garlic and coriander into my naan bread.


6.30pm - its tea time!  Or 'dinner' if you are  a Southerner  (this is a constant argument in our house, but seen as we are in the North it's known as TEA!)  
The curry was delicious and the naan was pretty good too, even if I do say do myself.


8.30pm and finally time to put up the feet and relax. Just about to start on a new crochet project with this gorgeous yarn from Scheepjes.  And wine, of course.


10.30pm. I am aware I have missed one, but you would have got the same photo as I didn't move.

When it gets to this time of night the dog starts pacing and the cat starts crying.  They like their routine and you certainly get to now about it!


So, that was my day.  Have a go at this yourself, it's fun.  If you do it then please send a link so I can have a nosy at what you get up to!


A mini Rainbow Swirl floor rug.


As well as trying to squeeze as many crafts into this little shed as possible, I also want to cover varying skill levels.  I want to show that crafting is accessible across all generations and ages and to people with limited dexterity.  Anyone can craft. Everyone should craft. Crafting can heal your soul.


So, I returned to something I had done as a child… apart from the regular slapping of paint on a piece of paper, this is the first craft I can ever remember doing and I thought it would make a most marvellous floor rug for my Mini Shed.


Back then we called it a Knitting Nancy.  The first one I had was a wooden bobbin with four nails banged into it.  Can you imagine my joy when one Christmas I was upgraded to a beautifully painted tall one which looked like a little wooden doll.  The problem was, way back then, that I used to make miles and miles of this knitted tubing and make loads of, always unused, tablemats.  There wasn’t the internet for inspirational ideas of what you could make with your tubing, so you just made it.  On and on and on.  Until it got to the point that people refused to give you any more yarn as it was a waste  😊

If you Google FRENCH KNITTING IDEAS, there are loads of inspirational things to get you excited.


Anyway, I grabbed a knitting doll – my old one is long gone…. or is it?  (I might have to check my parents attic and come back to you on that one) and some multicoloured yarn.  One thing I used to get excited about when I was young was seeing a new colour pop out of the bottom of the knitting doll.  This still happens.


I got to work making the tubing.  You need to make an awful lot of tubing to make a dinner mat sized rug.


On and on and on…….


Until I thought I probably had enough.

It took ages to sew it, probably as long as it took to make it. I wanted to sew it in a way that it formed a ridge all the way round in a spiral design.  It worked well. I am really pleased with the rainbow effect that the yarn gave me, it also had a glitter thread running through it, everyone loves a bit of sparkle 😊

It took about 6 hours to make the tubing and sew it up.


Friday, 29 January 2021

A little knitted throw.


Working out a scale:

My mini shed measures two foot square. I reckon an average room is about 12 foot square – and that makes it incredibly easy for me to work out a scale for all the mini things I need to go in my shed.

So if a room is 12 foot and my shed is two foot, that gives me a 1:6 scale.


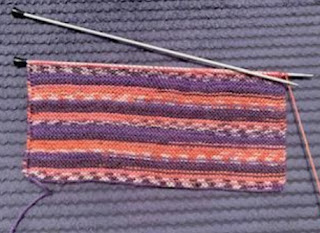
I shall test that theory and knit a small blanket for the mini shed. I grabbed this 4ply sock yarn as it knits up into some nice shades without changing the yarn, and some 2.5mm knitting needles.


So, a regular knee throw blanket is around 120cm square.

I had to knit a small square so I could measure how many stitches and rows I would need for my mini blanket.

This little piece was 3cm square. It has 10 stitches across and I had worked 18 rows in Garter Stitch.


I chose Garter Stitch because the finished piece had no front or back, it looks the same on both sides.

I calculated that using my 1:6 scale, to get the correct scale for a 120cm blanket I would need 20cm.


120 divided by 6 = 20.


20 divided by 3 (the size of my sample) = 6.66 = let’s round it up to 7.

7 x 10 stitches = 70 stitches for the width.

7 x 18 rows = 126 rows for the height.


I got to work…..


Knitting small is actually harden than knitting regular or chunky. The points of the needles hurt your fingers and you have to grip tighter.. plus it’s much harder to catch a fallen stitch if you need to.


It took about 6 hours to make would you believe!  SIX HOURS for a small mini blanket fit for a Barbie doll…if anyone wants to commission one do let me know.  😊


Would you like to learn how to knit?

I do some beginners Youtube videos if you fancy having a go, please find the links below.

How to Cast On with two needles.

How to Cast On Thumb method.

How to Knit and Purl.

How to Increase and Decrease.

How to Cast Off.

Have fun, and feel free to give me a shout with any questions.

Thursday, 28 January 2021

Completing the roof.

I have now had a good think about the shed roof, and I reckon that if I can stick some dowel in the ends of the legs, then cut a piece of wood which has matching holes in, I can then attach those bits of wood to the roof part and the roof can lift on and off.   Still with me?  Glad someone is!

So, I got to work.  The legs had little stoppers on top stop the table scratching the floor, so I prised them off which left a handy little hole for me to start with the drill.

This is my Dad’s drill, and the drill bits borrowed from the neighbour next door. I have never used a drill in my life!  First time for everything eh?


Well, that went better than expected.  I suspect the drill bits are not as sharp as they could be, either that or drilling is a very slow process, as it took quite a long time to drill a hole of about 1.5cm.

Next I cut a piece of wood the length of the table and drilled a hole in the end of that too. Measuring carefully so the holes would match.  I stuck a length of dowel in to check and luckily they did


So I cut 4cm of dowel for each leg and used my trusty glue to stick them into place.


The next morning, however, I wasn’t quite so happy. I had just stuck the dowel in the holes without checking that they would match up to the holes in the wood lengths, and of course they didn’t! They were only a tiny bit out, a few millimetres, but enough that the wooden length would not go over them both at the same time.

That was a bit of a disaster really.  The dowels were stuck fast and could not be pulled out. I was really annoyed with myself for failing to check such a simple thing.


So I tapped them with the hammer.  That didn’t work.

So I tapped the legs with the hammer. That didn’t work either.

Then I whacked the legs with the hammer and dislodged some of the side slats across the table.

It was time to put the hammer down and walk away.

I made a coffee.


How could I tackle this from a different angle? 

I know, I could make the holes bigger in the wood lengths.

So, I dug out my old Dremel, found a sandpaper bit for it and sanded the holes until they were big enough to slot over the dowel.  Result!


Now to stick the wood lengths to the actual roof part.  This is just a temporary measure until I can figure out how to screw or nail on an angle.

Yeah, so this was a bit trickier. How was I going to keep the wood in place while the glue set?

A quick text message to a friends husband to ask if he had “any of those strap things that holds things in place” got me a set of strap things. Good job people can work out what I am asking for!


I glued the two pieces of wood in like this, measuring carefully.  And, yep, you’ve guessed it, it didn’t fit!

So I banged one of the pieces back out again, put the roof in place and THEN glued the slat into place. Let’s see if this will work out better.


It’s starting to look like a shed now.  Happy days!

I’ve spent another couple of hours on this part, so hours spent so far on this project is now 15. 


Tuesday, 26 January 2021

Fitting a floor...

I need a floor.  So off to my shed I go for a look about to see what I can use to make a floor in my Shed.


I found a sheet of foam board which should work nicely, and a selection of sticky backed plastics – one that looked like flooring.

I measured and cut the foam board. It must be cut with a blade and some element of precision this stuff, so I sliced down it with a Stanley blade, bent it in half at the cut and then sliced the backing.  Cut quite nicely actually. 

I had to measure some corners to trim out due to the shape of the underside of the table, then I had to cut a little more off the corners so I could get the board in past the table legs.  


Next, I covered it with the sticky backed plastic.  The one I wanted to use wasn’t quite big enough, so I painstakingly patched the last couple of rows in, inch by inch.  I don’t think you can tell too much unless I point out where the patched part is.


And yep, I was happy with that. It actually looks like a floor and doesn’t really add any weight to the shed as foam board is so light.


It took about an hour to make and all the materials were from stash.


Friday, 22 January 2021

Time to put a lid on it.

 I need a roof…. I have always needed a roof, but I have been trying not to think about needing a roof because it looks like it is going to be a tricky thing to make.

Where do I start?

So…… I have a large pile of this tongue and groove stuff. When I held a bit up to the mini shed / table I realised it might work quite well, and best bit is…. It didn’t need cut!  Bonus.

I measured and worked out that seven pieces of tongue and groove all stuck together would be a perfect measurement with a small overlap, like a roof would have.  I decided to get those bits stuck together first then figure out how to do the next bit of joining them together.


So, with my new best friend, the bottle of wood glue, I stuck seven pieces together to make a long length.  


When it was dry it looked a bit bendy so I tried to straighten it up a bit and promptly snapped the thing in half!   You might be able to imagine my displeasure at that. I couldn’t even swear, I was THAT annoyed.

Then I realised that actually, I could just glue the snapped bit back onto the opposite end.  Which I did.  Disaster averted.

But that made me think… this roof was going to be quite unstable and prone to breaking, I was going to have to deal with that.   I took a length of wood and glued it to the whole length of one side of the roof part and clamped it in my workbench.  Hopefully, that would do the trick.

It worked beautifully; it gave the roof part a great solid structure. Happy days!

Once I had the two pieces of roof done, I had to work out how to put them together.  After my success with the hinges, I wondered if that might be the way to go.

Back to B&Q I went, and to my joy I found a really long hinge that measured the same as the whole length of my roof pieces.  I could hardly believe my luck. This was obviously meant to be.

I screwed the hinge into place on the first piece….then the second.  


Then I opened and closed it at least a dozen times like a giant book, proper pleased with myself that I had built something that looked like a roof!  And a stable roof at that.


My next step is to work out how to attach it to the Shed itself. I want it to be removable so people can look inside, pick up the crafts and feel inspired by them.  I feel this part may need some brainstorming though….. and maybe some more power tools.  So, I am off to raid my Dad’s garage again   😊