I have just done a small length of bunting to go into my mini shed project... I get asked all the time how to make bunting, so I thought I would write it all down in case anyone fancies having a go.
How, you can obviously spend a lot of time making bunting, cutting and sewing and turning and ironing, and sewing some more.... or you can cut a few corners and make it easier for yourself.
Some buntings are made by sewing two triangles of fabric together, then turning it the right way out, before pressing then sewing it to the bunting tape. If you need bunting that looks good both on the back and the front, then this is the method you should do, but if you want something a bit quicker that only needs to be seen on one side only, then follow this tutorial.
The photos I am sharing are step-by-step photos of my mini bunting (perfect for a Barbie Doll House), but I will give you a regular bunting size in brackets - of course you can make it any size you like.
Grab your favourite fabric. You will also need some stabilizer (found in an craft/haberdashery store), a length of bias binding, webbing or cosgrain ribbon. (length depends on how long you want your bunting to be) You will also need some Pinking Shears.
First off cut your fabric into strips that measure approx 5cm (20cm) and do the same with the stabiliser. Iron the stabiliser onto the back of the fabric - use a piece of greaseproof paper between the iron and the fabric to save any excess glue getting stuck onto your iron plate.
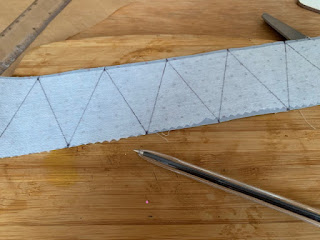
Mark across the top in increments of 5cm (20cm)
Then on the bottom put the first mark at 2.5cm (10cm) then every 5cm (20cm) after that. The marks should now be inbetween the top ones.
Mark diagonally from a bottom mark to a top mark, then again back across, this will give you perfect triangles.


No comments:
Post a Comment
I would love to hear from you, questions, comments and salutations all welcome.