

Having made an armchair for my mini
shed, I thought it needed a bench and table to go with it. So back to practising
my wood skills.
I found some scraps of wood, in my growing
scrap box and thought they would do the trick.

I had no real plan, no sketch, no
idea what to do really. I cut the long bits of wood the size that I thought the
bench should be, then I had another piece that I cut in half for the back legs
and found two chunky bits that might work for the front legs. I would adapt as I went.
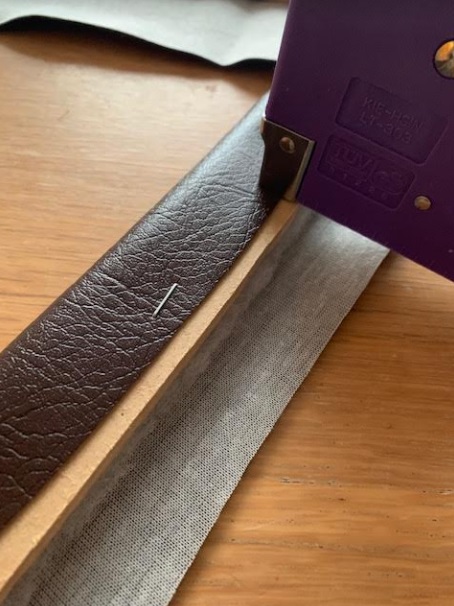
I started with the bench seat and
the back piece. I found some faux leather in one of my fabric stash boxes and I
had some wadding left over from the mini armchair. All I needed was a staple
gun – luckily I have one 😊

So I basically wrapped the faux leather around the wood with the wadding and stapled it in place.


Then it came to tidying up the ends. I tried to fold the fabric over like I was wrapping a gift, but it was too thick, so I trimmed a bit off to make it less bulky. Grabbed my trusted wood glue and glued it into place clamping it until it was set.


About an hour later I found out
that wood glue will not stick faux leather!
So, a staple it would need to
be. This is where I was wishing I had
cut a bit more fabric so I had more at the ends to play with. It was a tricky manoeuvre,
included a few swear words and a lot of removed and reinserted staples. But I got there in the end. The staples are ugly though, I think I have
a metallic marker somewhere that I could colour them in with to help disguise
them a bit.

The next part was to stick my wooden
legs and the back bits together to give the seat part something to rest
on. I did this and painted all the bare wood
a lovely metallic brown.

So now it looks like I have a set
of stilts and some seats. Time to put it
all together.
Having found out the hard way that wood glue does not work on this fabric, I dug out my hot glue gun and used that to glue the bench seat to the legs. It was only to hold it all in place until I could get some screws in.

The next thing I had to do - and this again was something I had learnt from
things going wrong earlier in the project – was to drill a small pilot hole to
guide the screws in, otherwise my wood would split (expert now talking here folks!!)
So, drill I did, then screws, and
it all worked out rather nicely.

And there we have a bench. On reflection I wish I had used a nicer wood
for the back struts as this is a bit rough…but then it’s a bench, I suppose its
ok being a bit rough.

Time spent on this was around two
hours.
No comments:
Post a Comment
I would love to hear from you, questions, comments and salutations all welcome.